Step 1: Preparing Your Miniature
Begin by closely examining your miniature for any imperfections. Clean and assemble it according to the manufacturer’s instructions if necessary. Once it’s ready, move on to priming.
Step 2: Applying the Primer
In a well-ventilated area, use Chaos Black spray primer to coat the miniature evenly. This essential step creates a solid foundation for your paint, ensuring it adheres properly to the surface.
Step 3: Crafting the Armor
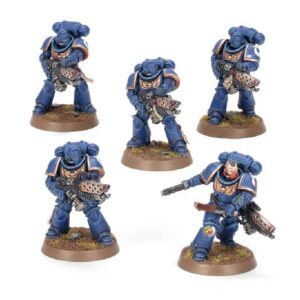
For the primary armor color, apply Sons of Horus Green with precision, ensuring complete coverage. This forms the base color of your miniature.
Step 4: Adding Depth and Dimension
To enhance the details and create depth, carefully apply Coelia Greenshade over the green armor. This wash settles into recesses and contours, giving the figure a more realistic and visually appealing look.
Step 5: Detailing in Black
Use Corvus Black to paint any black elements on your miniature, such as weapon casings or intricate parts. Maintain sharp lines and details.
Step 6: Shimmering Metallics
For metallic parts like weapons or armor trim, apply Iron Hands Steel. This metallic paint adds a realistic shine to these areas, bringing your miniature to life.
Step 7: Emblems and Decor
With Brass Scorpion, add intricate details like emblems and insignias to your figure. These small touches make your miniature stand out.
Step 8: The Fiery Red
Khorne Red is ideal for painting any red details on your figure. Whether it’s the eyes, a specific symbol, or other ornamental elements, this bold color draws attention.
Step 9: Painting the Face and Hair
Bring the character of your figure to life by painting the face with Kislev Flesh. Mournfang Brown adds texture and depth to the hair.
Step 10: Realism in the Base Rock
Paint the rock on the base that your miniature rests on with Rakarth Flesh. This off-white color provides a natural, textured appearance to the base.
Step 11: Facial Definition
To emphasize the facial features, apply Reikland Fleshshade to the face. This wash enhances the contours of the face, giving it a lifelike appearance.
Step 12: Overall Shading
For an overall shading effect, apply Nuln Oil to the entire miniature. This step adds depth, highlights details, and unifies the colors on your figure.
Step 13: Highlighting the Armor
Use Fenrisian Grey to create edge highlights on the green armor. This step accentuates the armor’s contours, giving it a distinctive, battle-worn appearance.
Step 14: Perfecting the Base
Complete the base by painting it with Astrogranite or another suitable texture paint. This step ensures the base complements your figure.
Step 15: Preserving Your Work
To protect your meticulously painted model, apply a coat of varnish. Munitorum Spray is an ideal choice for this final step. It not only preserves your work but also adds a subtle sheen that showcases your attention to detail