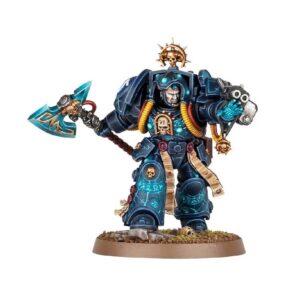
Step 1: Prime the model
Apply a smooth, even coat of primer to Magnus the Red. Use Chaos Black or any black primer of your choice to create a solid foundation for the paint.
Step 2: Basecoat the model
Using a large brush, apply a basecoat to Magnus the Red. For his armor, you can use colors like Retributor Armour or any gold/brass shade. For his skin, consider using a rich, vibrant red such as Mephiston Red or Khorne Red. Ensure the basecoat covers all the relevant areas evenly.
Step 3: Shade the model
Apply a shade wash to enhance the details and add depth to the model. Consider using shades like Carroburg Crimson for the red skin and Nuln Oil for the armor. Apply the wash carefully to the recessed areas, allowing it to flow naturally and settle into the crevices.
Step 4: Highlight the model
Using a lighter shade of the basecoat color, carefully highlight the raised areas of Magnus the Red. For the skin, consider using Evil Sunz Scarlet or any brighter red shade. For the armor, use a lighter gold tone such as Liberator Gold or Auric Armour Gold. Apply these highlights sparingly to create contrast and make the details pop.
Step 5: Paint the details
Switch to a smaller brush and focus on painting the smaller details of Magnus the Red. Use colors like Temple Guard Blue for the symbols on the wings, Stormhost Silver for metallic parts, and any other colors for additional details such as the eyes or accessories. Take your time and aim for precision, ensuring each detail stands out.
Step 6: Add additional effects
To make Magnus the Red even more captivating, consider adding additional effects like glowing eyes or magical energy. For glowing eyes, choose a bright color like Stormfiend or Flash Gitz Yellow. For magical energy, use a lighter shade of the basecoat color mixed with white to create an ethereal glow.
Step 7: Base the model
Apply texture paint or use other basing techniques to create a suitable base for Magnus the Red. You can use materials like Stirland Mud for a realistic earthy texture. Paint the base with appropriate colors to match your desired theme or environment.
Step 8: Varnish the model
Protect your hard work by applying a layer of varnish. Choose either a matte or gloss varnish based on your preference. This will preserve the paint job and provide a protective finish.


