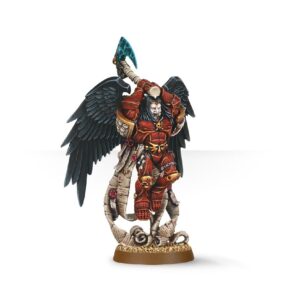
Step 1: Basecoat
Start by applying Mephiston Red to the armor plates and robes of Astorath using a medium layer brush. Make sure to cover the entire surface evenly, leaving no gaps. Don’t worry if it’s a bit messy, we’ll clean it up in the next step.
Step 2: Tidy up
Using the detail brush and Abaddon Black, carefully paint the trim and edges of Astorath’s armor, as well as the details on the face and axe. Take your time with this step, as it can be a bit tricky. Be patient and use a steady hand.
Step 3: Metallic details
Use Leadbelcher to paint the metallic details on Astorath’s armor and weapons. This includes the axe blade, chains, and any other metal parts. Apply the paint evenly with the medium layer brush.
Step 4: Gold details
Apply Retributor Armour to any gold details on the miniature. This includes the pommel of the axe and any other decorative elements. Use the detail brush for this step, as it requires precision.
Step 5: Shade
Using Nuln Oil, apply a wash to the entire miniature. This will help bring out the details and add depth to the colors. Use the medium layer brush for this step, and make sure to get the wash into all the nooks and crannies.
Step 6: Drybrush
Finally, using a large drybrush, lightly apply Mephiston Red to the raised areas of the miniature. This will help bring out the highlights and add dimension to the colors.