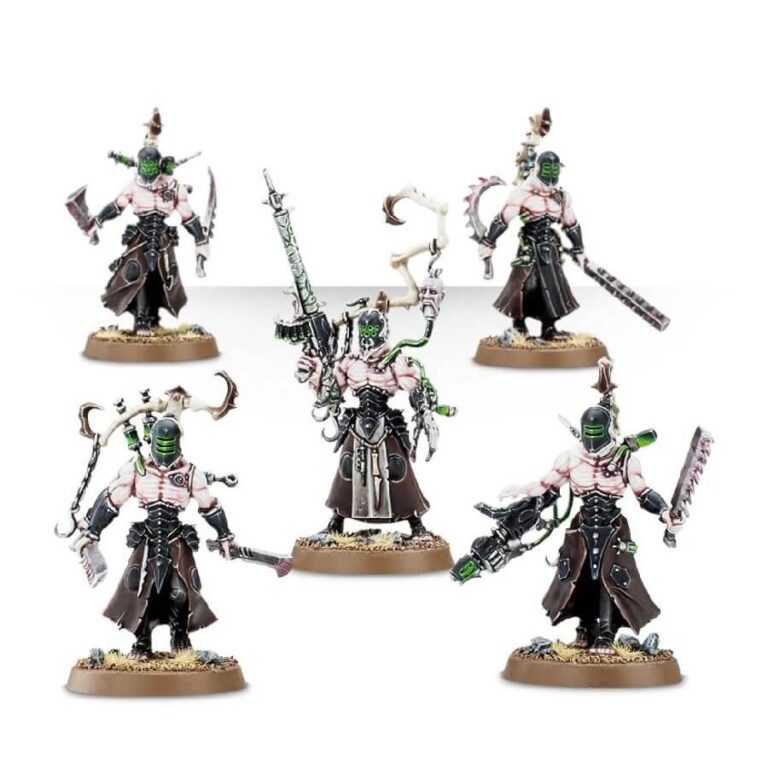
Enter the abhorrent world of the Drukhari Wracks, devoted attendants and servants to the Haemonculi. These twisted beings stand as living examples of their master’s surgical artistry, each one brutally reshaped into a walking instrument of torture. On the battlefield, they become fierce defenders of their creator, wielding a terrifying array of exotic and disturbing weapons with unwavering loyalty. Brace yourself for a dark and haunting presence that is both grotesque and captivating.
What’s in the Wracks box
- x86 plastic components that make five Wracks.
Each Wrack can be equipped with a host of weapons, including hooked blades, studded clubs, 1 liquifier gun and 1 ossefactor. There are also eleven heads, including three intended for the Acothyst. This kit also includes two additional sets of arms which allow you to convert one Wrack into a Raider pilot or gunner. - x5 Citadel 25mm Round Bases.
How to paint the Wracks set
- Step 1: Prime the Miniature
Get started by priming your Wracks miniature with a base coat of black or grey primer. This provides a solid foundation for the paint to adhere to. - Step 2: Base Coat – Skin and Outfit
Begin by painting the skin of the Wracks with a suitable flesh tone, such as Bugman’s Glow. Apply multiple thin coats for smooth coverage. Next, paint the outfit with a dark color, like Abaddon Black or Rhinox Hide, based on your desired look. - Step 3: Define Details
With a smaller brush, carefully paint the intricate details of the Wracks, such as their weapons, straps, and accessories. Use contrasting colors to make these elements stand out. For instance, you can use Leadbelcher for metallic parts and Mephiston Red for small accents. - Step 4: Apply Shading
To add depth and realism to your Wracks, apply a shade like Nuln Oil or Agrax Earthshade to the recessed areas. This will enhance the shadows and textures, giving your miniatures a more lifelike appearance. - Step 5: Add Highlights
Using a lighter shade of the base colors, gently highlight the raised areas of the Wracks’ skin and outfit. This will make them pop and create a more dynamic look. For example, use Cadian Fleshtone for highlighting the skin and Eshin Grey for highlighting the dark outfit. - Step 6: Accentuate the Eyes
Paint the eyes of your Wracks with a bright color, like Mephiston Red or Wazdakka Red, to add a touch of life and character to the miniatures. - Step 7: Optional Blood Effects
For an extra touch of gruesome detail, you can add blood effects to the weapons or wounds on your Wracks using a deep red color, like Blood for the Blood God. - Step 8: Varnish and Display
To protect your hard work and ensure your Wracks stay looking their best, apply a coat of varnish. You can use Citadel’s Ardcoat for a glossy finish or Stormshield for a matte look

