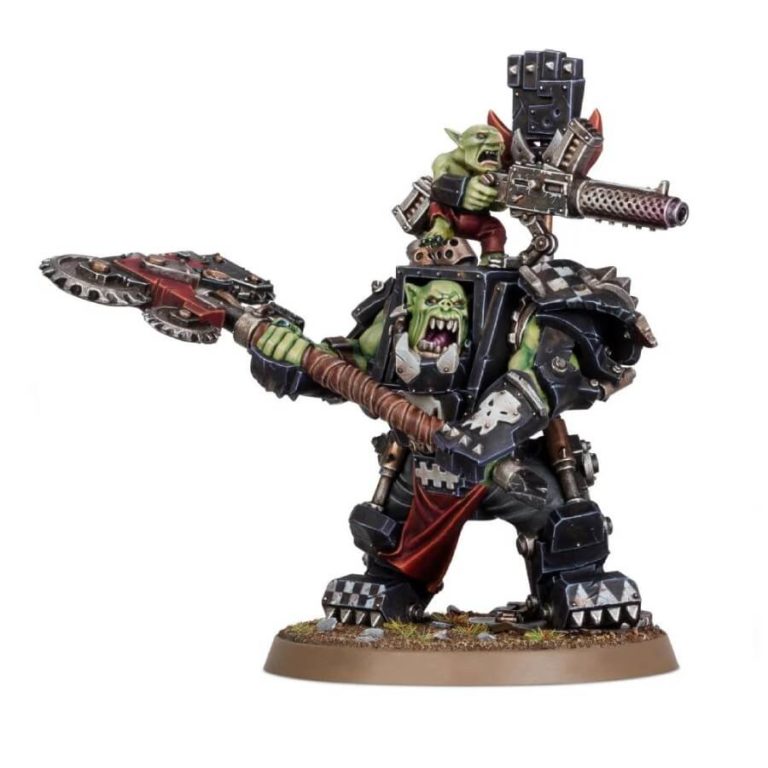
The Warboss is the ultimate embodiment of brute force in any Ork army. This unstoppable powerhouse is the stuff of nightmares for his enemies, thanks to his incredible strength and near-invulnerable mega armour.
The Warboss stands out even among his own kind, with his impressive boss pole marking his rank and his ‘uge choppa capable of cleaving even the toughest of vehicles and characters in two. As if that weren’t enough, he also wields a grot-operated big shoota, mowing down weaker foes with ease.
But what truly sets this Warboss apart is his piston-driven mega armour, which not only provides him with unparalleled protection but also makes him impervious to long-range tank-busting artillery that is the bane of most Orks. With this armour, the Warboss can confidently charge headlong into the heat of battle, wreaking havoc and destruction wherever he goes.
What’s in the Warboss in Mega Armour box?
- x17 plastic components that can be used to assemble one Warboss in Mega Armour.
- x1 Citadel 50mm Round Base.
How to paint the Warboss in Mega Armour set
- Step 1: Base Color
Start by applying a solid basecoat of your chosen color for the Warboss’s armor. For a classic look, use a dark and rich green like WAAAGH! Flesh to represent the might of the Ork. Cover the entire armor with this vibrant hue. - Step 2: Bold Metallics
Now, let’s add some metallic accents to the model. Select a metallic paint, such as Leadbelcher, and apply it to the Warboss’s power klaw, kustom shoota, and any other metal parts. This will give them a striking and robust appearance. - Step 3: Red Alert!
The Warboss needs a fierce face, so paint his eyesockets and faceplate with a bold red color, like Evil Sunz Scarlet. This will make him look even more intimidating and ready for battle. - Step 4: The Final Touch
Highlight the metallic parts and face with a lighter shade of the respective colors. For example, use Runelord Brass to give the metallics a gleaming effect, and use Wild Rider Red to accentuate the red areas. - Step 5: Dirty Details
Add some weathering and battle-damage effects to the Warboss’s armor using a mix of browns, greys, and blacks. This will make him look battle-hardened and battle-ready. - Step 6: Show Off the Symbols
The Warboss is a symbol of power and authority, so paint his banners, glyphs, and other symbols with bright colors like yellow or blue to make them stand out. - Step 7: Bring Out the Boss!
To make the Warboss truly stand out on the tabletop, consider using a larger brush to dry brush some highlights on his armor and any other areas that need an extra pop of color. - Step 8: Varnish for Protection
Finish your work by applying a matte varnish to the entire model. This will protect the paint job and give the Warboss a professional finish. - Step 9: Base it Up!
To complete the look, add some texture to the Warboss’s base, such as sand or rocks, and paint it with earthy tones. This will ground the model and make it look like he’s ready to conquer any terrain.

