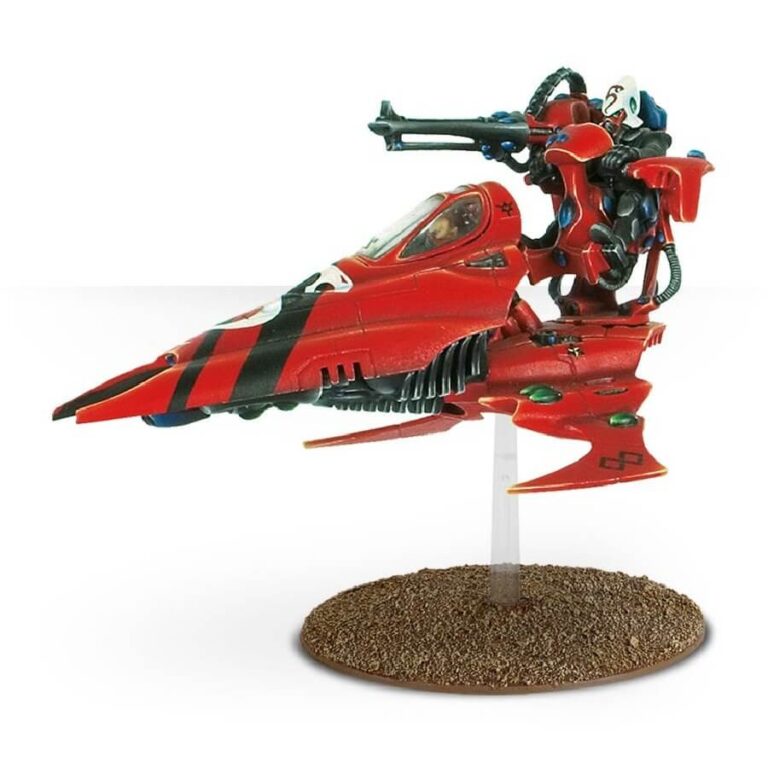
The Vypers, true to their name, are extraordinary Aledari’ mobile weapons platforms that excel at delivering a withering barrage of firepower, even while traversing at high speeds. Their unparalleled mobility more than compensates for their relatively light armor, making them a formidable force on the battlefield. These nimble Vyper Jetbikes are fielded in squads of 1 to 3 models, presenting a versatile and dynamic addition to any fighting force. Get ready to embrace speed and firepower like never before!
What’s in the Vyper box
- x19 plastic components that make 1 Aeldari Vyper Jetbike. The kit also includes options for a bright lance, star cannon, missile launcher, shuriken cannon and a scatter laser.
- x1 Citadel 60mm flying base.
How to paint the Vyper set
- Step 1: Prime Your Miniature
Begin by priming your Vyper model with Chaos Black or any other primer of your choice. This creates a smooth surface for the paint to adhere to. - Step 2: Basecoat the Model
Start by applying a basecoat of paint to the Vyper’s body. You can use a color like Mephiston Red for a vibrant look or Abaddon Black for a darker appearance. Ensure an even application to cover the entire body. - Step 3: Paint the Cockpit
With a lighter shade like Evil Sunz Scarlet, paint the Vyper’s cockpit to give it a striking contrast to the body color. This will add depth and visual interest to the model. - Step 4: Highlight the Body
Using a brighter color like Wild Rider Red, carefully apply highlights to the edges and prominent areas of the Vyper’s body. This step adds dimension and makes the model pop. - Step 5: Paint the Weapons
Now, move on to the Vyper’s weapons. Use a metallic color like Leadbelcher for a realistic look. Apply the paint to the guns, making them stand out against the body. - Step 6: Add Details
With a fine brush, add any additional details to the model, such as symbols, runes, or panels. Use a contrasting color like Ushabti Bone or any color that complements the base colors. - Step 7: Highlight the Weapons
Using a lighter metallic color like Runefang Steel, apply highlights to the edges and raised parts of the weapons. This will give them a shiny and well-maintained appearance. - Step 8: Paint the Canopies
For the canopies of the Vyper, use a bright color like Baharroth Blue or a similar shade. Apply this paint to the canopies to give them a vibrant and eye-catching look. - Step 9: Add Final Details
With a fine brush, add any final touches, such as cockpit controls or small designs. You can use contrasting colors to make these details stand out. - Step 10: Varnish and Protect
To preserve your hard work, apply a protective layer of varnish over the entire model. This will safeguard the paint job and prevent any damage over time.

