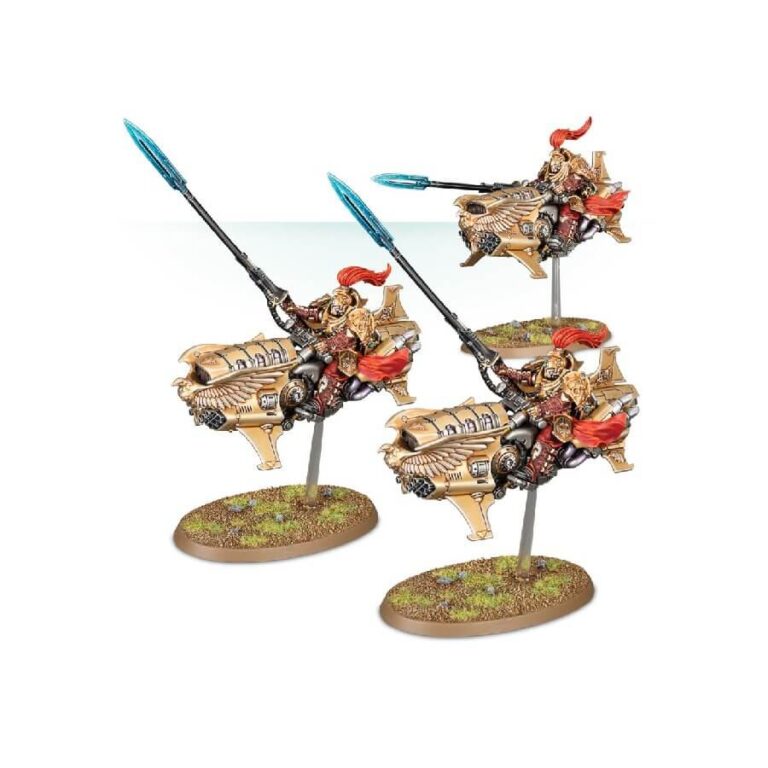
As golden lightning streaking across the battlefield, the Vertus Praetors effortlessly outflank and encircle the heaviest enemy vehicles. No adversary is beyond their reach, not even airborne threats, as the Vertus Praetors combine their firepower to weave intricate webs of flakk that ensnare and annihilate hurtling enemy aircraft with devastating consequences. Witness their unparalleled coordination as they unleash a barrage of destruction upon their foes, transforming the skies into a maelstrom of chaos for any adversary foolish enough to challenge their aerial supremacy.
In this ever-evolving theatre of war, the Vertus Praetors stand as shining beacons of the Adeptus Custodes unwavering dedication. Their mastery of the Dawneagle jetbikes allows them to traverse the battlefield with unparalleled speed and precision, enabling lightning-fast strikes and tactical maneuvers that turn the tide of battle in favor of the Emperor’s forces. With every soaring leap and each perfectly executed maneuver, the Vertus Praetors epitomize the epitome of martial prowess, serving as an inspiration to all who witness their awe-inspiring feats.
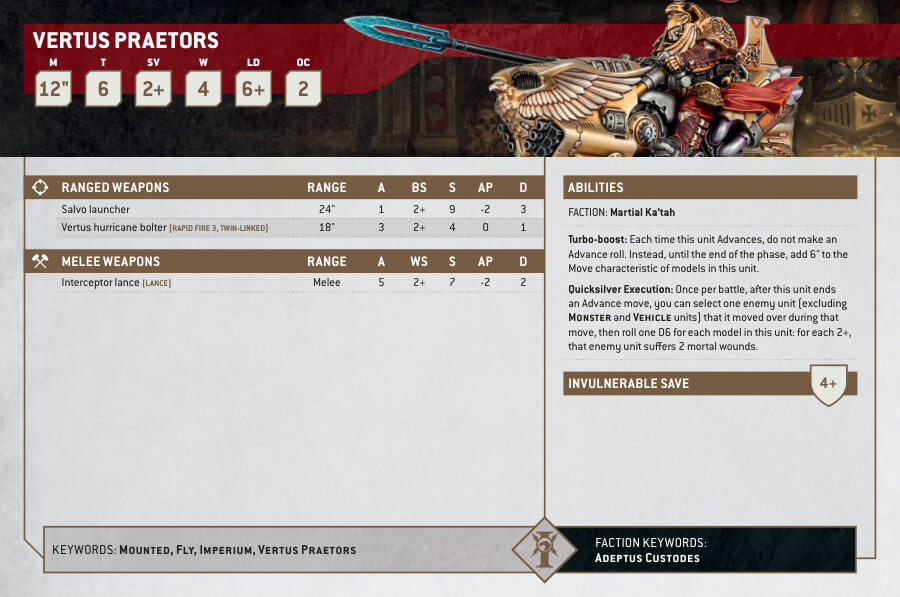
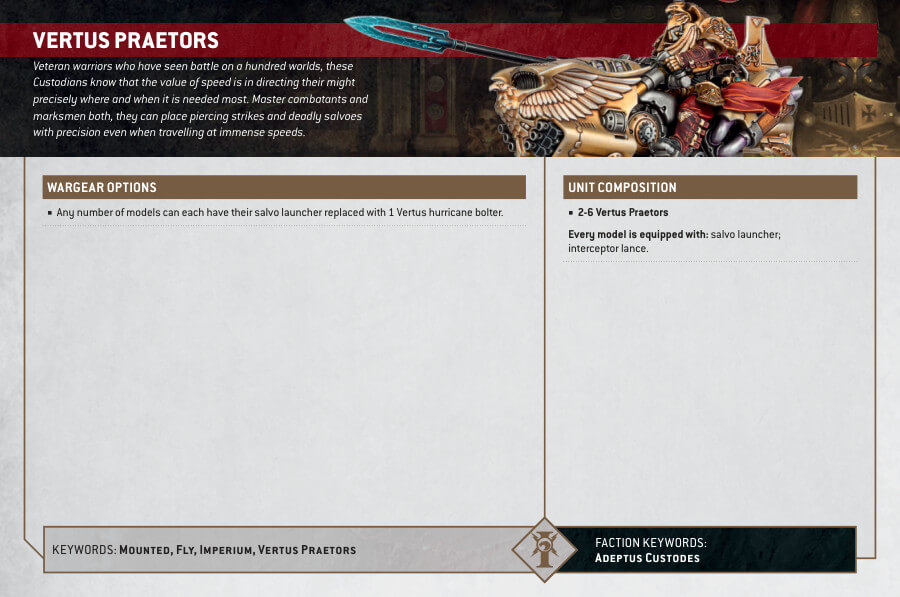
Vertus Praetors Datasheets
What’s in the Vertus Praetors box
- x111 components that make 3 Vertus Praetors.The kit can also make a Shield-Captain, who is distinguished by his bare head.
- x3 Citadel 75mm Oval stands, with flying stems.
How to paint the Vertus Praetors Set
- Step 1: Base Coating
Start by priming the model with a black spray paint or base paint. Make sure to apply an even coat and allow it to dry completely. - Step 2: Armor
Use a brush to apply a base coat of Retributor Armour to all the armor plates and other metallic areas. - Step 3: Shading
Use Nuln Oil wash to shade the metallic areas, applying it carefully into the recesses and corners. This will add shadows and enhance the details. - Step 4: Highlighting
Apply a dry brush of Dawnstone over the raised edges and prominent areas of the armor to create highlights and add depth. - Step 5: Trim and Details
Paint the trim areas, such as the edges of the armor, with Leadbelcher. Be careful and precise during this step to achieve clean lines. - Step 6: Shading the Trim
Apply a wash of Nuln Oil over the Leadbelcher to add shading and enhance the details of the trim. - Step 7: Gemstones
Paint the gemstones on the model with Stegadon Scale. Apply multiple thin layers to achieve a smooth and even finish. - Step 8: Shading the Gemstones
Apply a wash of Coelia Greenshade over the gemstones to add depth and create a vibrant appearance. - Step 9: Shoulder Pads
Paint the shoulder pads and other cloth areas with Mephiston Red. Take your time to cover these areas neatly and evenly. - Step 10: Shading the Cloth
Apply a wash of Carroburg Crimson over the red areas to add shading and create a richer tone. - Step 11: Purity Seals
Paint any purity seals or scrolls with Doombull Brown. Be careful to paint within the lines and avoid getting paint on adjacent areas. - Step 12: Shading the Purity Seals
Apply a wash of Nuln Oil over the Doombull Brown to add depth and enhance the texture of the purity seals. - Step 13: Varnishing
Once all the paint has dried, apply a layer of varnish to protect the paintwork. Use a brush or a spray-on varnish, following the instructions provided by the manufacturer. Allow the varnish to dry completely before handling the model.

