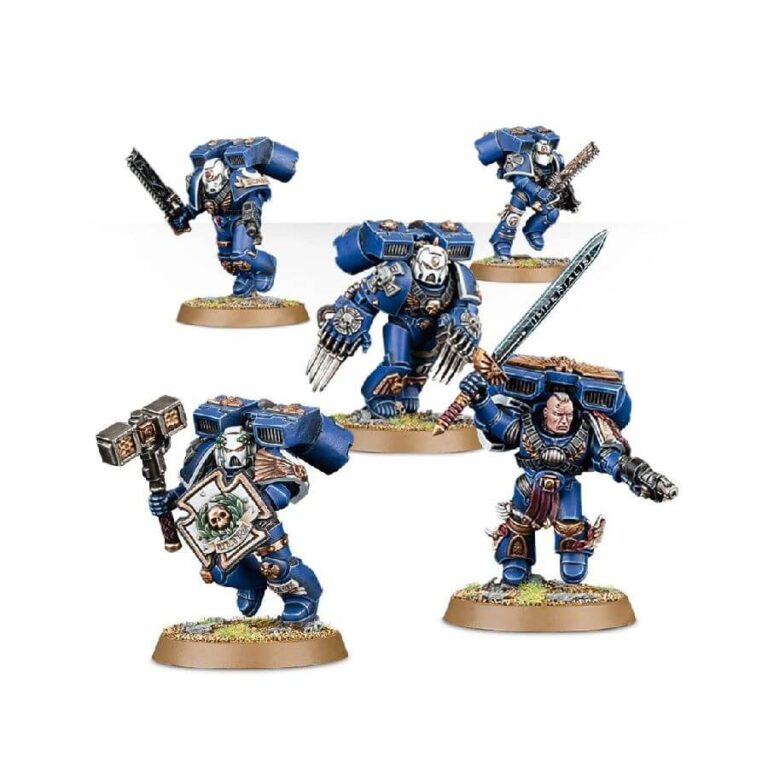
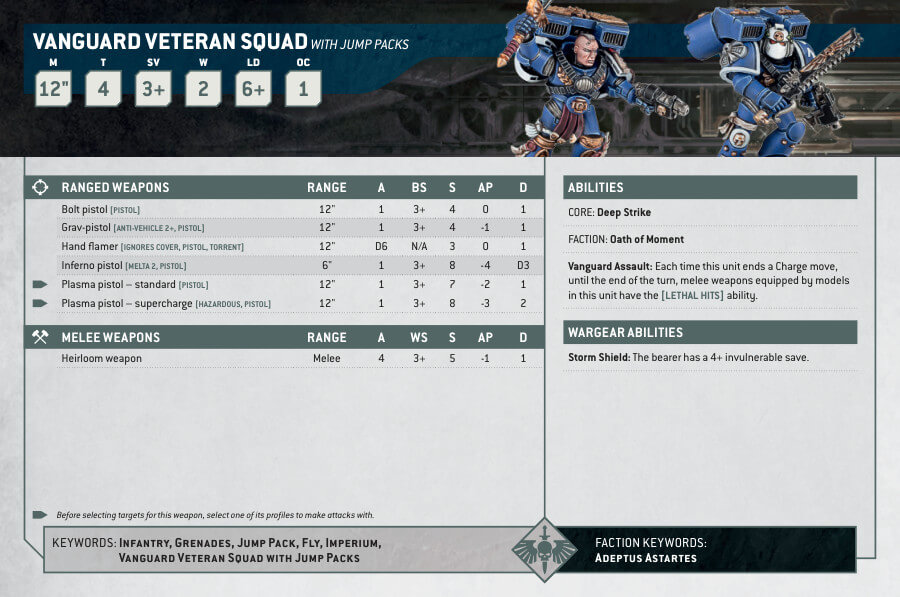
The Space Marine Vanguard Veterans are a highly versatile and mobile close-combat unit composed of veterans from the 1st Company who are equipped with jump packs and some of the Chapter’s most revered melee weapons. The Vanguard Veteran Squad kit comes with 5 members, each with a unique set of running legs, torso fronts, and shoulder pads, as well as a variety of weapon options including chainswords, bolt pistols, lightning claws, thunder hammers, storm shields, relic blades, power swords, power fists, power axes, grav pistols, plasma pistols, melta bombs, and grenades. The kit is also fully compatible with other Space Marine kits, allowing for endless customization and the creation of unique collections of miniatures.
Vanguard Veteran Squad Datasheets
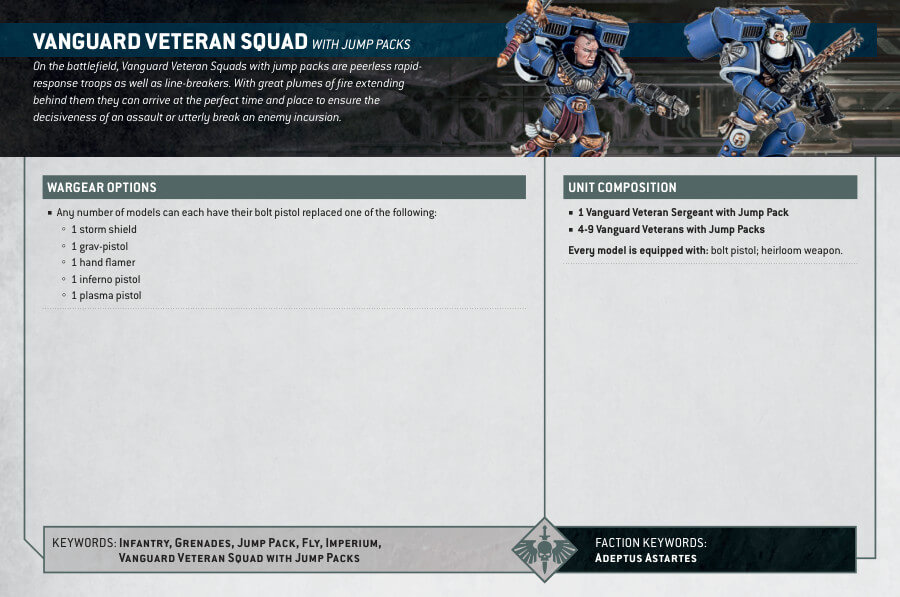
What’s in the Vanguard Veteran Squad box
- x98 plastic components, allowing players to assemble a 5-man squad of Space Marine Vanguard Veterans. The kit includes a wide range of customization options:
- x5 sets of running legs
- x5 unique torso fronts
- x16 different shoulder pads
- x9 head options (8 helmeted, 1 bare)
- x5 Citadel 32mm Round Bases.
How to paint the Vanguard Veteran Squad Set
- Step 1: Priming
Begin by priming your Vanguard Veteran Squad with a suitable primer. Chaos Black is a great choice for a solid foundation. - Step 2: Base Coat – Armor and Helmets
Apply a base coat of a rich blue color to their armor, using paints like Calgar Blue or Kantor Blue. For the helmets, use a clean, bright white, such as White Scar. - Step 3: Base Coat – Lenses and Exposed Heads
Paint the lenses of their helmets with a vibrant red like Evil Sunz Scarlet. Instead, if any of your miniatures have exposed heads, give them a flesh tone base coat like Cadian Fleshtone. - Step 4: Painting Bronze Details
For the bronze details on their armor, use a metallic paint like Balthasar Gold. Ensure you paint these details carefully to make them stand out. - Step 5: Painting Weapons
The weapons, including bolt pistols, should be painted with Abaddon Black for a sleek, dark appearance. Their lighting claws however, would look nicer with a metallic shade, like Leadbelcher. You can even add blood effects on them using Blood For The Blood God. - Step 6: Shading – Adding Depth
Enhance the depth and realism of your Vanguard Veterans by applying appropriate shades. For the blue armor, consider using Drakenhof Nightshade or Nuln Oil, while Reikland Fleshshade works well for exposed heads. Shade the bronze details with Agrax Earthshade. - Step 7: Layering – Highlights
Highlight the blue armor with a slightly lighter shade, such as Altdorf Guard Blue or Teclis Blue. Focus on raised areas and edges to add dimension. - Step 8: Final Touches – Lenses and Weapons
Make the lenses and weapons pop by adding extra highlights. For lenses, use Wild Rider Red, and for weapons, a fine edge of Eshin Grey on black areas can provide a crisp appearance. - Step 9: Painting the Bases
Create a realistic terrain effect on the bases by using texture paints like Astrogranite Debris or Armageddon Dunes. Apply these evenly across the bases to achieve the desired effect. You can also add Citadel grass tufts or other scenic elements to enhance the bases further. - Step 10: Varnishing
To protect your beautifully painted Vanguard Veteran Squad, consider applying a varnish. Citadel’s Munitorum Varnish is a good choice for a matte finish that safeguards your miniatures without altering their appearance. Make sure your miniatures are entirely dry before varnishing.

