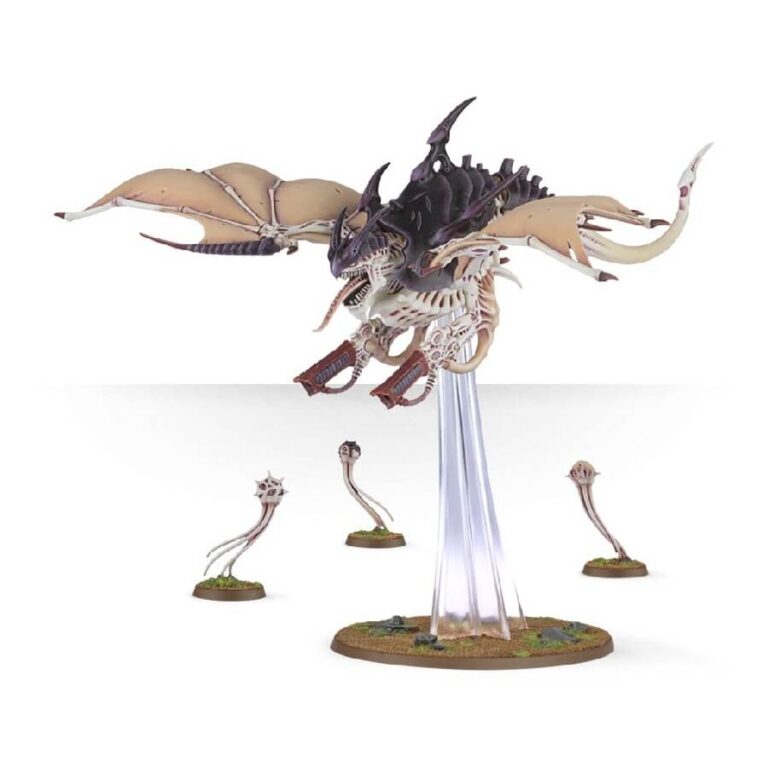
The Harpy, a formidable and agile Tyranid bioform, dominates the skies with unmatched grace, unleashing devastation upon its prey. Equipped with a choice of either a twin-linked stranglethorn cannon or twin-linked venom cannon, its distinctive features include a long tongue and head crest, a carapace adorned with vertical fins, an upward-pointing tail, and the option to add spore mine cysts for added menace. Additionally, the kit includes three unique spore mines, each with its own captivating design.
What’s in the Tyranid Harpy box
- x69 plastic components you can use to make either a Harpy or Hive Crone.
- x1 Citadel 120 x 92mm flying base
How to paint the Tyranid Harpy set
- Step 1: Prime the Miniature
Start by applying a thin layer of Abaddon Black to the entire Tyranid Harpy model. This acts as a primer, providing a good base for the other colors to adhere to. Make sure to cover all the details but keep the coat thin to avoid obscuring them. - Step 2: Base Coat the Model
Using a large brush, apply a base coat of White Scar to the main body of the Harpy. This should cover most of the model and create a solid foundation for the subsequent layers of paint. Be sure to leave any areas you want to paint a different color untouched. - Step 3: Purple Armoured Shell
Now, using a smaller brush, apply a layer Screamer Pink to the areas on the Harpy’s back and other desired parts. This will create a distinct color contrast and add visual interest to the model. - Step 4: Add Highlights
Using a lighter shade of purple Emperor’s Children, carefully paint small dots or lines on the edges and raised areas of the purple sections. This technique will add depth and highlight the details of the model. - Step 5: Paint the Details
Using a small brush, paint the claws and other details with a bone color like Ushabti Bone. You can also add some drops of Blood For The Blood God, to make it look like it just finished slashing a Space Marine. - Step 6: Apply Washes
Using a medium brush, apply a wash of Carroburg Crimson to the purple areas, and a wash of Agrax Earthshade to the bone areas. This will help define the details and add depth to the model. - Step 7: Highlight the Bone
Using a fine brush, apply a highlight of Pallid Wych Flesh to the raised areas of the bone sections. This will create a contrast and make the details stand out. - Step 8: Final Touches
Lastly, use a fine brush to add finishing touches, such as painting the Harpy’s eyes with a bright color of your choice and applying a final highlight of Pallid Wych Flesh to the highest points of the model. Once you’re done, you can apply a varnish, like Stormshield to protect your model against chipping and time.

