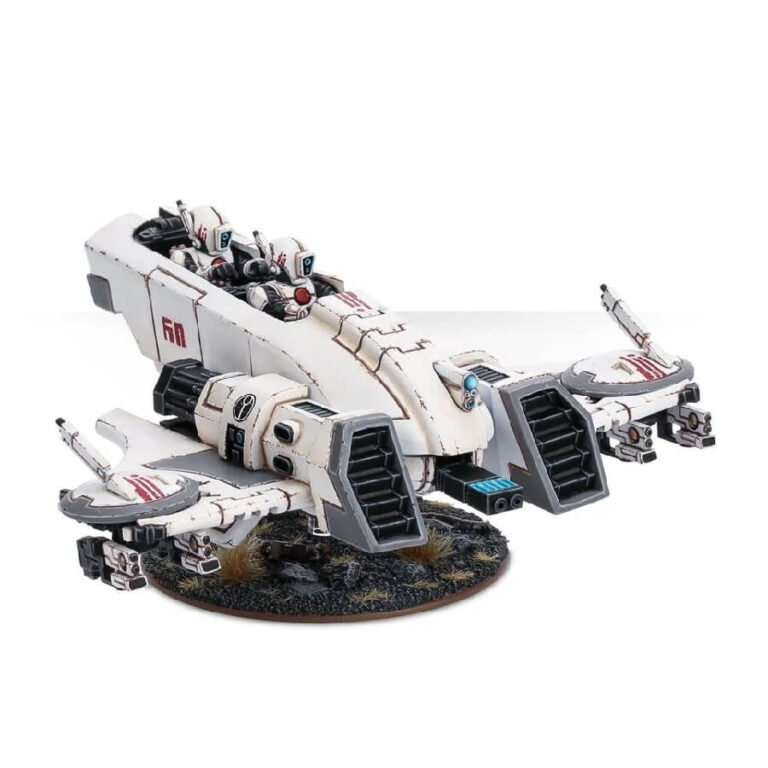
Through strategic enhancements, the Piranha’s capabilities expand dramatically. Outfitting it with a fusion blaster or equipping it with a duo of seeker missiles transforms this T’au vehicle into a formidable tank hunter. The true prowess emerges when Pathfinder teams guide the Piranha to its target, unleashing its potential in precision strikes against even the most fortified adversaries.
What’s in the TX4 Piranha box
- x50 plastic components that make one TX4 Piranha equipped with burst cannon or fusion blaster, with a variety of optional parts, 2 gun drones and model stickers.
- x1 Citadel 60mm flying base.
- x2 Citadel 32mm flying bases.
How to paint the TX4 Piranha set
- Step 1: Base Coating the Model
Begin by applying a smooth base coat of White Scar to the body of the TX4 Piranha. This bright white color provides a clean foundation for your paint job. - Step 2: Metallic Details
Using a small brush, paint the metallic components, such as weapon parts, with a metallic paint like Leadbelcher. This metallic touch adds depth and contrast to the model. - Step 3: Detailing the Cockpit
Enhance the cockpit’s details by carefully painting buttons, screens, and other elements with contrasting colors like Abaddon Black. This adds a sense of realism and brings the cockpit to life. - Step 4: Accentuating the Weapons
Complement the white body with shades that match your scheme. For energy weapons, consider using colors like Mephiston Red. If you have missile tips, Averland Sunset could be an excellent choice. - Step 5: Shading for Depth
Add depth to your white body by applying a thin layer of shade, like Nuln Oil, to the model’s recessed areas. This shading technique enhances the details and creates a more realistic appearance. - Step 6: Weathering for Realism
To simulate wear and tear, gently dab on a darker color, such as Rhinox Hide, onto the model’s surface using a sponge or stippling brush. This adds a weathered and battle-worn texture. - Step 7: Layering and Highlights
Create highlights using a slightly lighter shade than White Scar. Layer over raised areas to add dimension. For example, if you started with White Scar, consider layering with Pallid Wych Flesh. - Step 8: Fine Highlights
Apply delicate highlights with a color like Wraithbone, to the edges and key focal points of the model. This final touch adds realism and visual appeal. - Step 9: Final Touches
Add vibrant color to energy sources, such as engine exhausts or weapon barrels. Colors like Moot Green or Wild Rider Red can create eye-catching accents. - Step 10: Basing
Paint the base in colors that complement your Piranha’s theme. For additional realism, use texture paints to simulate terrain and create subtle weathering effects, like Mordant Earth or Valhallan Blizzard, to create a snowy terrain.

