The Sanguinor is a legendary figure among the Blood Angels, believed to be an angel of vengeance sent from the heavens in times of great need. While some dismiss him as mere myth, those who have witnessed him in battle know that he is a powerful force to be reckoned with.
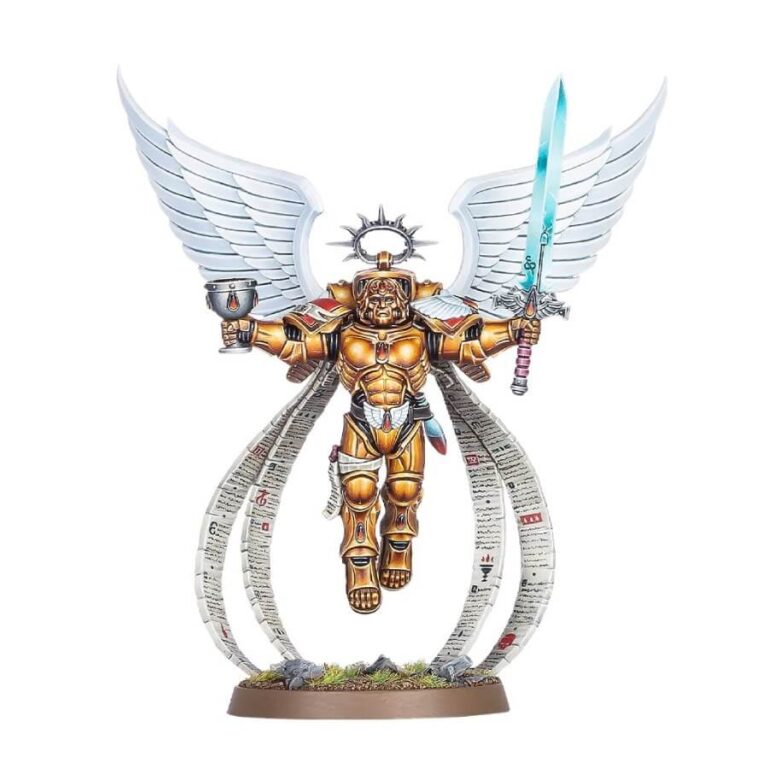
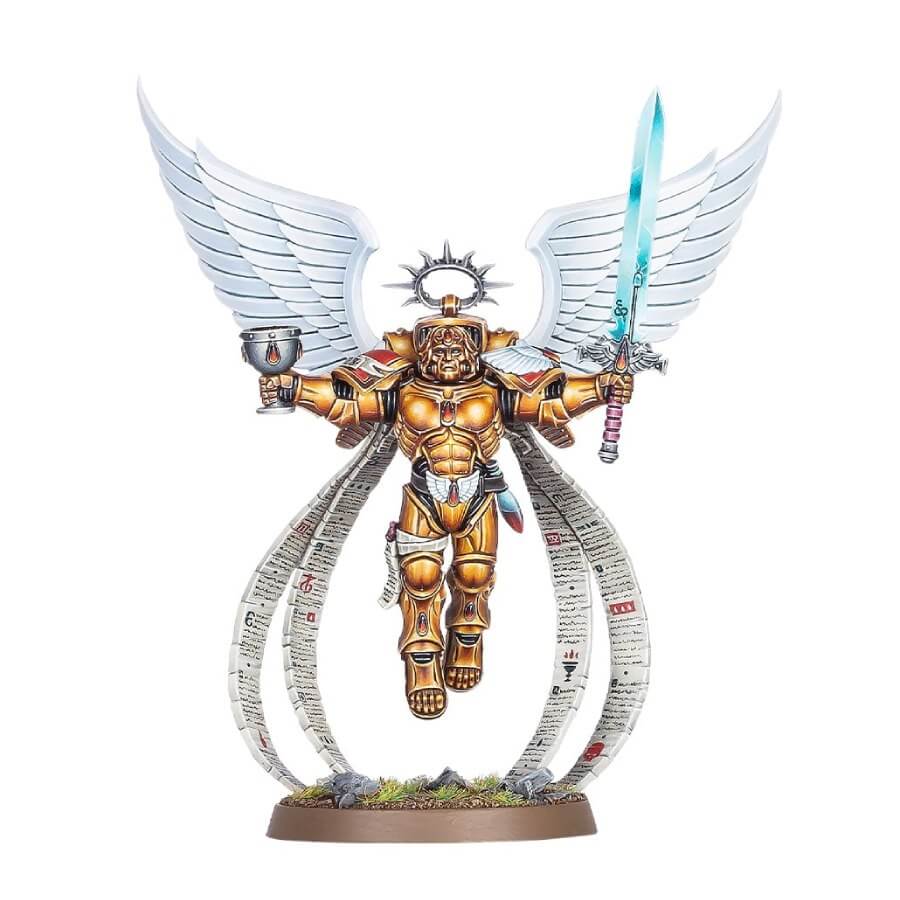
The miniature itself is incredibly detailed, with intricate designs featuring heavily throughout. Its two angel wings are outstretched, reflecting the pose of its arms. In one hand, the Sanguinor carries a grail, while in the other, it wields a sword with a hilt in the style of the Blood Angels icon. Details such as winged motifs on the torso, laurel wreaths on the knee armor, and gemstones and metal studs can be found throughout the figure. An iron halo is also set between the wings, and raised, sculpted details of the Blood Angels iconography are present on the shoulder pads.
The Sanguinor Old vs New Model
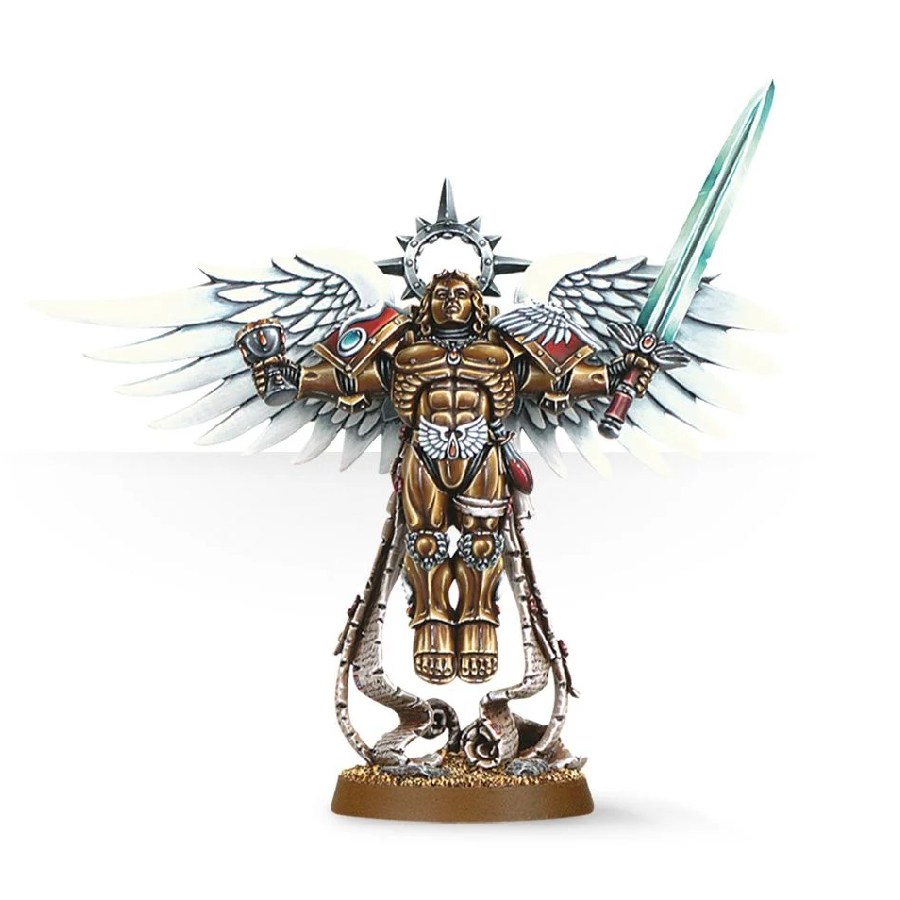
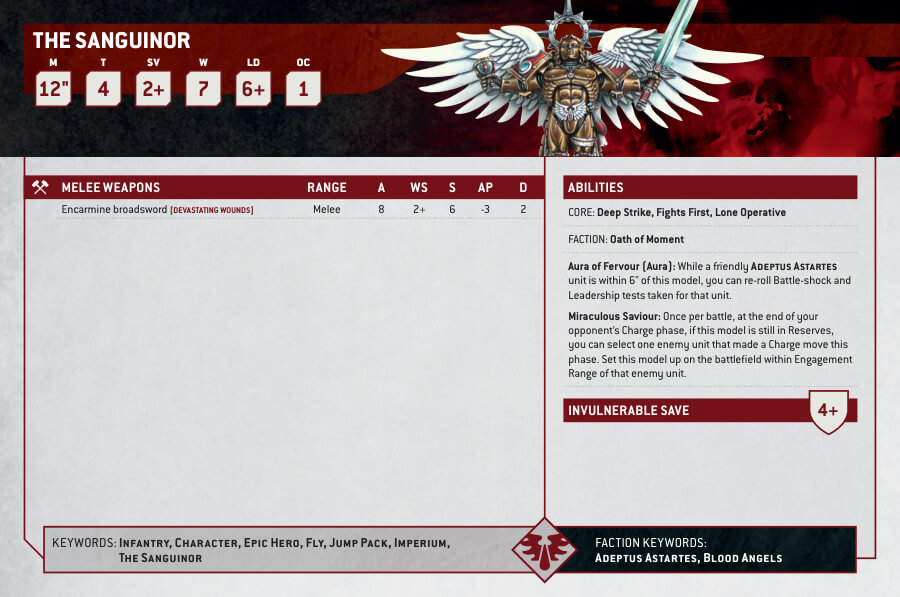
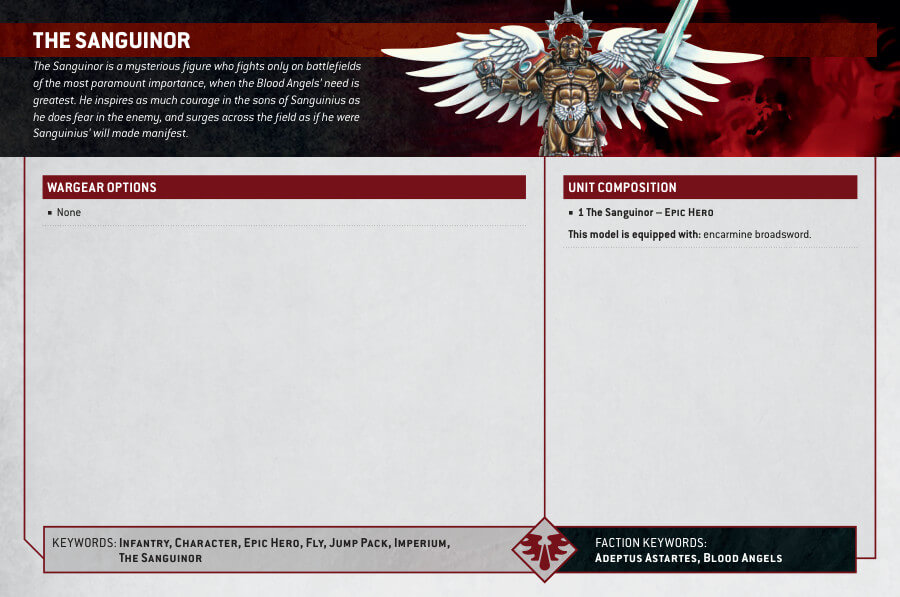
The Sanguinor, Exemplar of the Host Datasheets
What’s in The Sanguinor, Exemplar of the Host box
- x13 plastic components that make one Sanguinor, Exemplar of the Host model.
- x1 Citadel 40mm Round Base.
How to paint The Sanguinor, Exemplar of the Host
- Step 1: Priming
Begin by priming The Sanguinor, Exemplar of the Host, with Chaos Black primer. Priming is essential as it provides a smooth surface for the paints to adhere to, ensuring better color coverage and durability for your miniature. - Step 2: Base Coat – Armor and Shoulder Pads
Apply a base coat of Retributor Armour or Runelord Brass to his armor. Make sure to use smooth, even strokes to achieve a uniform and solid base color. For the red shoulder pads, apply Khorne Red, taking care to stay within the lines and avoid any spillage onto other areas. - Step 3: Base Coat – Wings
Paint his wings with a clean, bright white using Corax White. The wings should stand out with their purity, so take your time to ensure full coverage. - Step 4: Shading – Adding Depth
Now, let’s enhance the depth and realism of the miniature. For the armor, use Agrax Earthshade or Seraphim Sepia. Apply the shade carefully into the recesses and crevices of the armor, allowing it to settle and create shadows. For the red shoulder pads and any metallic details, apply Nuln Oil, focusing on areas that need shading. - Step 5: Layering – Highlights
Highlight the gold or brass armor with a slightly lighter gold or brass shade. You can use Liberator Gold or Skullcrusher Brass for this step. Concentrate your highlights on the raised areas and edges of the armor. This technique adds dimension and makes the armor look more realistic. - Step 6: Painting Details
Now, let’s paint all the details on the miniature For the parchments, use Zandri Dust or Screaming Skull. Apply Mephiston Red to the Blood Angels symbols. Choose a vivid color like Spiritstone Red or Soulstone Blue for the gemstones. Paint the sword with a vibrant cyan or turquoise shade using Baharroth Blue or Temple Guard Blue. - Step 7: Final Touches – Wings
To make the wings truly captivating, add extra white highlights to the feathers using White Scar. Carefully apply these highlights to the edges of the feathers and areas where light would naturally hit. This extra step enhances the intricate details of the wings, making them a focal point of the miniature. - Step 8: Base
For the base, use Astrogranite Debris or your preferred texture paint to create a realistic terrain effect. Apply the texture paint evenly across the base, ensuring it covers the entire surface. Once it’s dry, you can enhance the base further by adding grass tufts or other scenic elements to suit your preferred battlefield theme. - Step 9: Varnishing
To preserve your masterpiece and protect it from wear and tear, consider applying a varnish. Stormshield is an excellent choice for achieving a matte finish that safeguards your work without altering its appearance. Ensure the miniature is completely dry before proceeding with varnishing to avoid any smudging or streaking.

