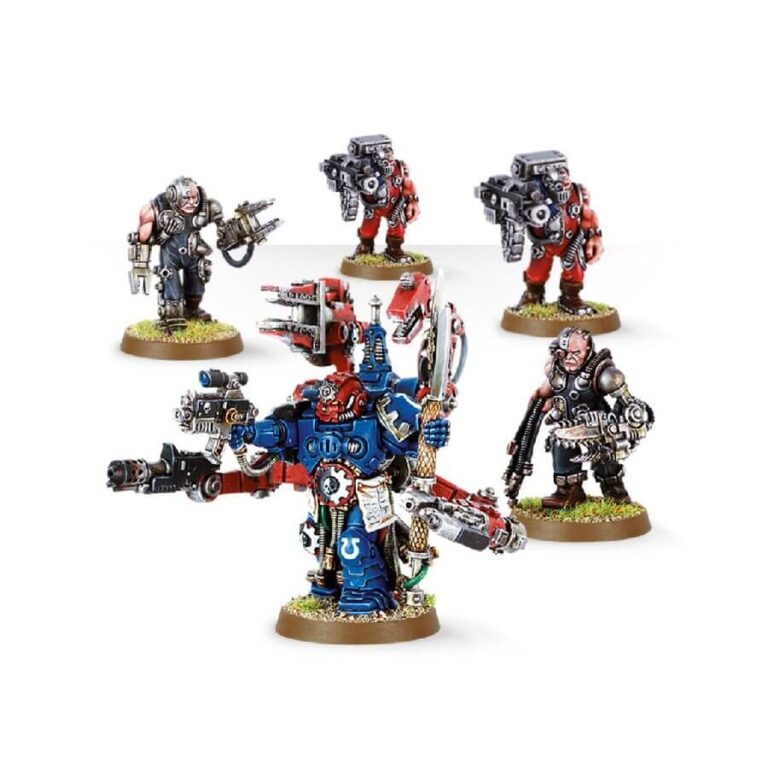
Techmarines are highly skilled Space Marines with a strong affinity for technology. They are trained on Mars by the Adeptus Mechanicus to become priests of the Machine God. These ancient pacts between the Adeptus Mechanicus and the Adeptus Astartes allow the Techmarines to return to their Chapters and maintain their weapons and equipment, ensuring they are always battle-ready.
Techmarines play an essential role on the battlefield, where they can often be found repairing damaged vehicles and fortifications or providing support to nearby buildings. In the midst of battle, their Servitor bodyguards will either assist them in their duties or engage enemy forces with a withering hail of fire.
With their extensive knowledge of machinery and technology, Techmarines are an invaluable asset to any Space Marine Chapter. They are known for their ability to adapt and improvise, making them effective problem-solvers in the heat of battle.
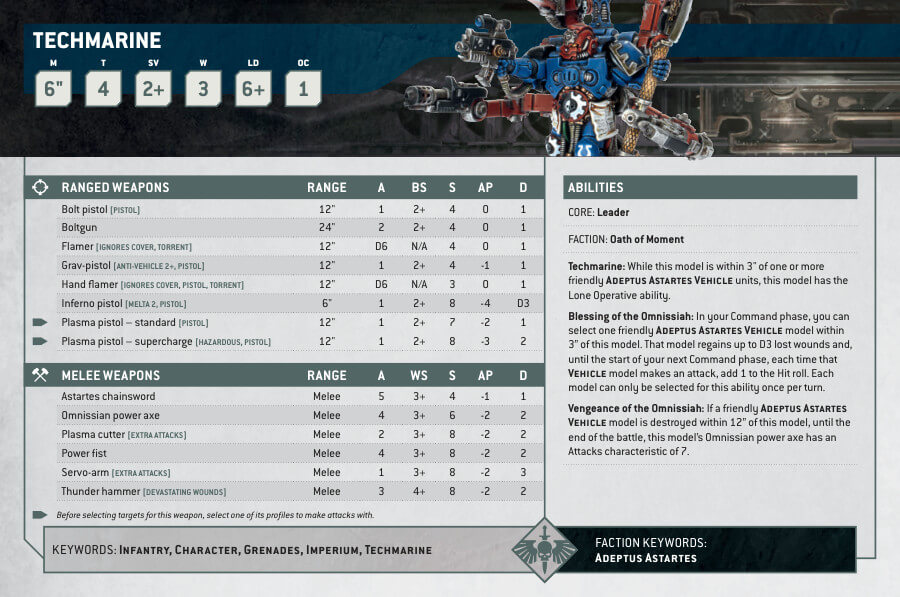
Techmarine with Servitors Datasheets
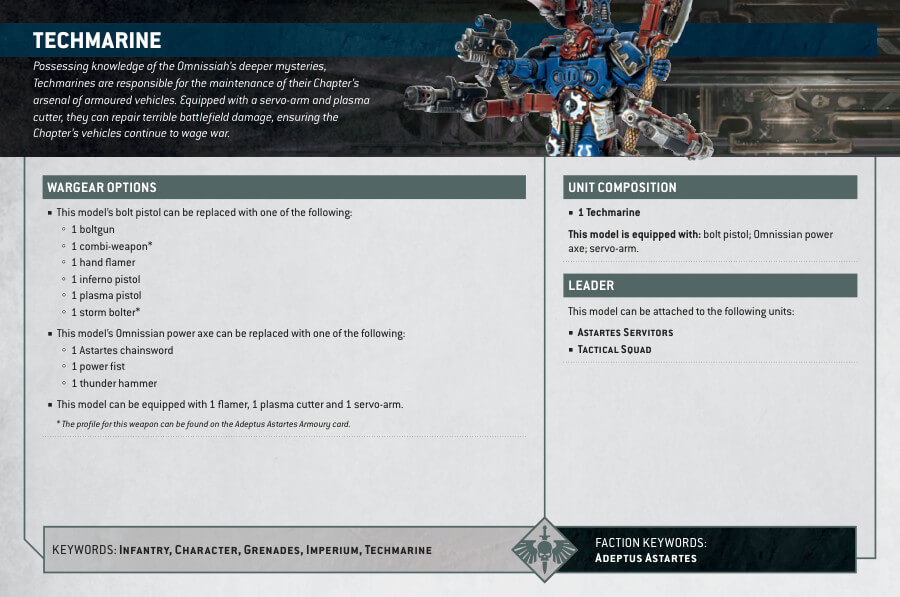
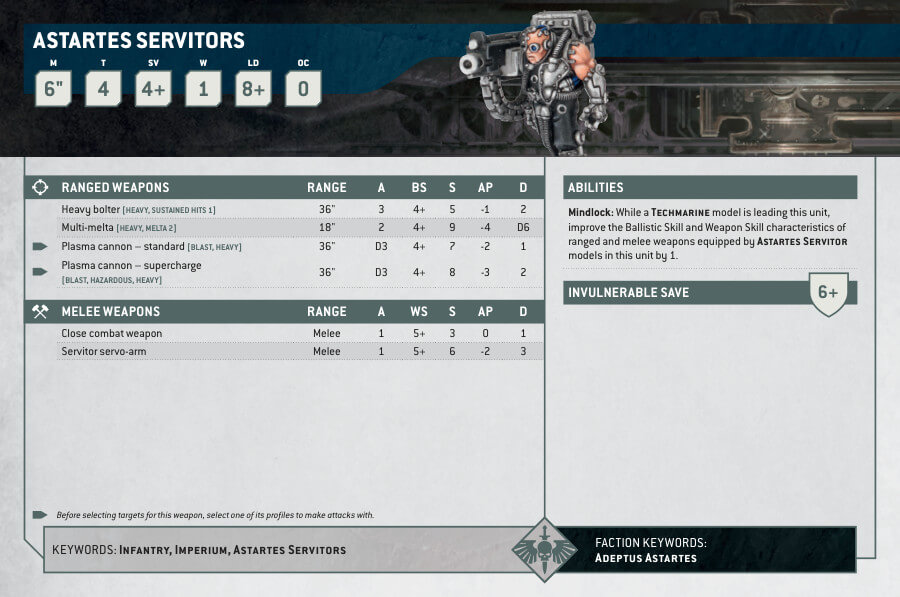
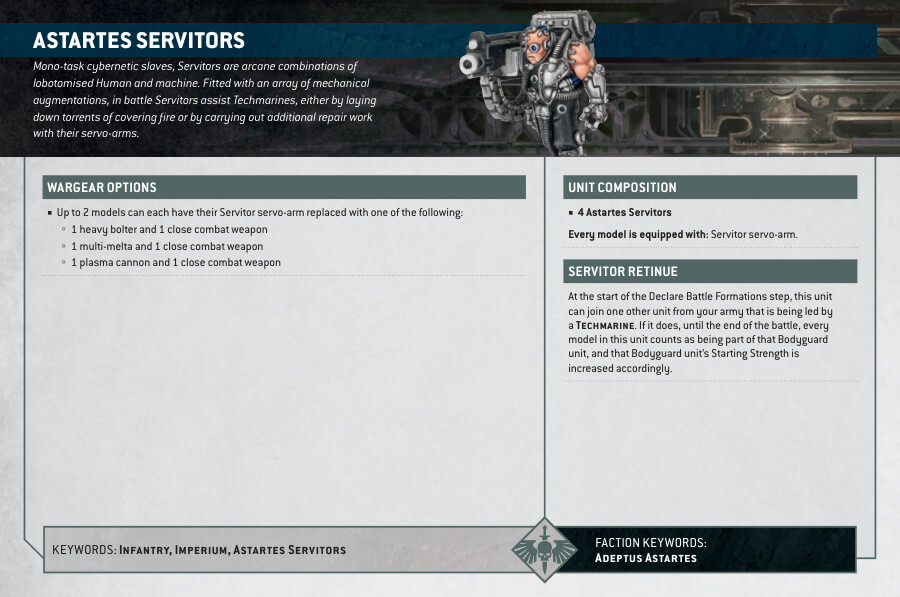
What’s in the Techmarine with Servitors box
- x1 Space Marine Techmarine and x4 Servitors.
The Techmarine is a single miniature that comes in x21 separate resin components that need to be assembled.
The four Servitors are also finely detailed resin cast miniatures that come in separate pieces and require assembly. - x5 25mm Round Bases, one for each miniature.
How to paint the Techmarine with Servitors Set
- Step 1: Primer Coat
Start by applying a thin, even coat of Chaos Black primer to all the miniatures, including the Techmarine and Servitors. This step is crucial as it provides a smooth and consistent surface for your paints to adhere to, ensuring better paint coverage and adhesion. - Step 2: Base Coat – Techmarine Armor
With the primer in place, begin by applying a base coat of Macragge Blue to the Techmarine’s armor. Ensure an even and smooth application across all the armor pieces. - Step 3: Base Coat – Techmarine Helmet
Paint the Techmarine’s helmet with Mephiston Red. Take your time to cover the entire helmet evenly. - Step 4: Base Coat – Techmarine Metallic Components
Use Leadbelcher to paint the metallic components such as the power axe and servo arms on the Techmarine. Apply this paint evenly to achieve a convincing metallic appearance. - Step 5: Adding Details – Parchments
For the parchments and scrolls, use Screaming Skull. Be precise when painting these small details to make them stand out. - Step 6: Adding Details – Eye Lenses
Paint the eye lenses with Moot Green to create a striking, futuristic glow effect. - Step 7: Adding Details – Gold Trims
For gold trims and ornate details, apply Retributor Armour. This adds a touch of elegance to the Techmarine’s design. - Step 8: Adding Details – Weapons
Paint the weapons with Abaddon Black. Ensure a clean and smooth application, especially on the weapon barrels and edges. - Step 9: Base Coat – Servitors Clothing
Moving on to the Servitors, paint their clothing with Abaddon Black. This provides a dark contrast to their mechanical parts. - Step 10: Base Coat – Servitors Mechanical Components
Use Leadbelcher to paint the mechanical components of the Servitors. Apply this metallic paint evenly across these areas. - Step 11: Base Coat – Servitors Skin
For the Servitors’ skin, use Rakarth Flesh as the base coat. Apply it smoothly, covering the exposed skin areas. - Step 12: Layering – Servitors Skin
Layer the Servitors’ skin with Flayed One Flesh to add depth and highlights. Concentrate on the raised areas for a more realistic effect. - Step 13: Shading – Techmarine Armor
Enhance the depth of the Techmarine’s armor by shading it with Nuln Oil. Apply the shade to the recesses and corners, and let it dry. - Step 14: Layering – Techmarine Armor
Layer the Techmarine’s armor with Calgar Blue to create highlights. Focus on the raised areas for a more detailed appearance. - Step 15: Shading – Techmarine Helmet
Add depth to the helmet by shading it with Carroburg Crimson. Apply the shade to the helmet’s creases and edges, letting it settle. - Step 16: Base Coat – Bases
Paint the bases of both the Techmarine and Servitors. You can use Astrogranite Debris for a rocky texture or Armageddon Dunes for a desert-like look. Apply the chosen texture paint evenly across the bases. - Step 17: Varnishing
To protect your beautifully painted models, consider applying a varnish. A matte varnish like Munitorum provides a protective layer without altering the finish. Ensure the models are entirely dry before varnishing.

