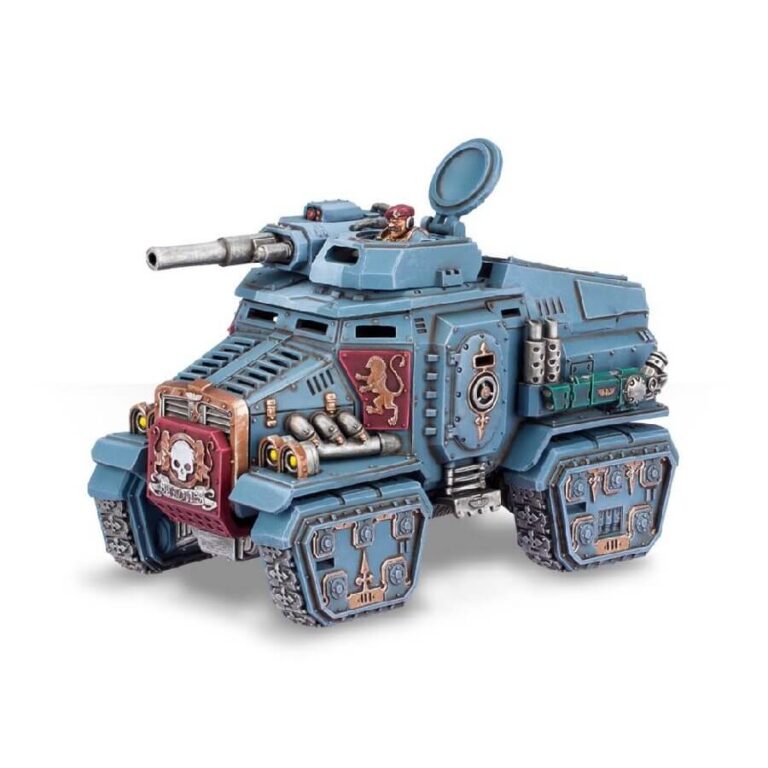
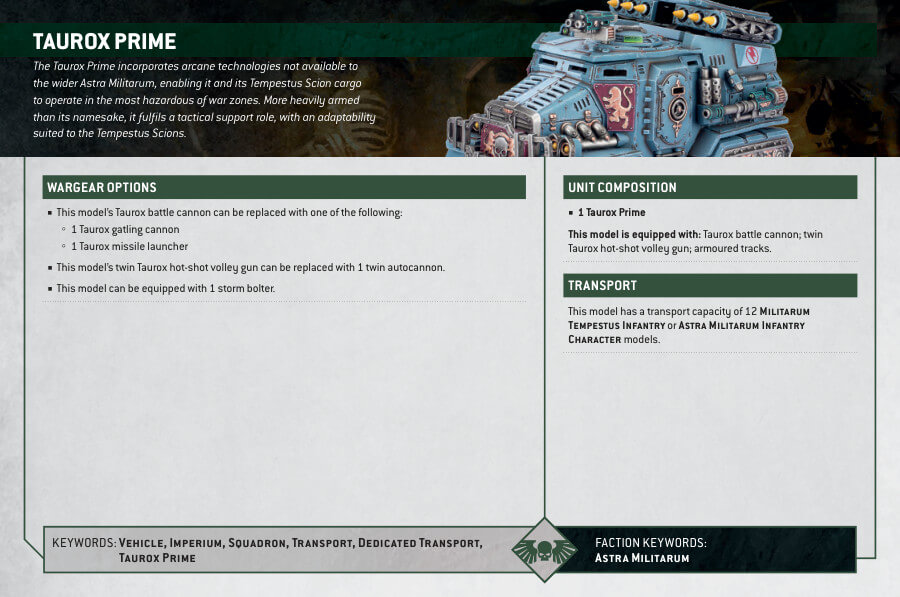
The Taurox Prime is a remarkable vehicle that incorporates advanced technologies exclusive to the Astra Militarum’s Tempestus Scions, providing unparalleled capabilities in the most hazardous war zones. With enhanced firepower compared to the standard Taurox, it serves a vital tactical support role, perfectly suited for the specialized missions undertaken by its operators.
This multipart plastic kit allows you to assemble one Taurox Prime, a high-speed transport armed with a diverse range of potent weaponry. The Taurox Prime offers various options for turret-mounted heavy weapons, including a battle cannon, gatling cannon, or missile launcher, along with autocannons or hot-shot volley guns mounted on the hull’s sides. Additionally, a pintle-mounted storm bolter can further augment its armament.
Taurox Prime Datasheets
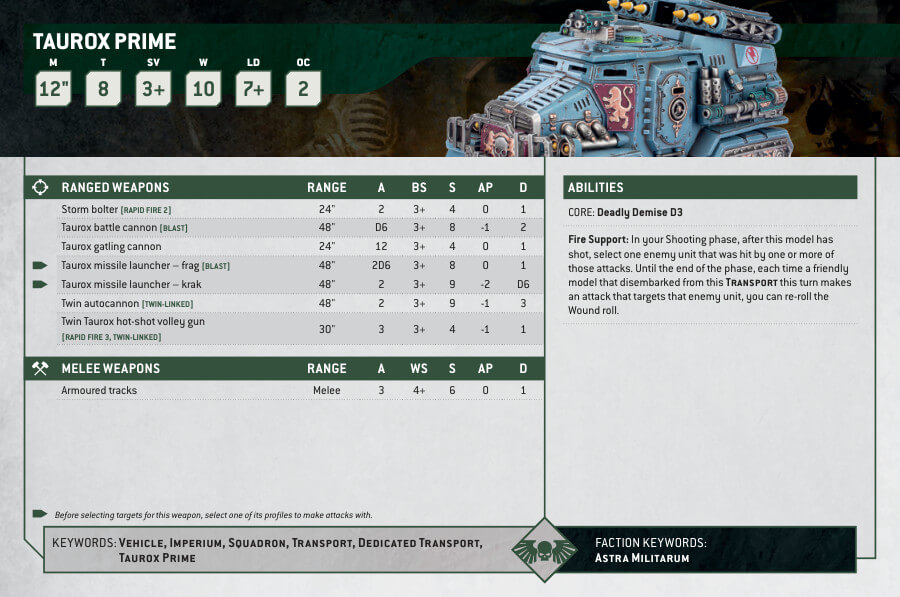
What’s in the Taurox Prime box
- x1 multi part plastic Taurox Prime kit: A fast-moving transport with a versatile range of powerful armaments.The tank features a fully-detailed interior complete with a driver, a hatch that can be built closed or open, a turret gunner with a helmeted or bare head who can be positioned at a height of your choice, and other accessories to customise your Taurox Prime – including decorative armour panels, an ornate grille-plate, and a stowed sledgehammer. This kit can alternatively be used to build a standard Taurox.
How to paint the Taurox Prime set
- Step 1: Prime the model
Apply a thin, even coat of Chaos Black primer to the Taurox Prime using a spray can or airbrush. - Step 2: Basecoat the main colors
Start by applying the base colors to the different areas of the Taurox Prime. For example, use Temple Guard Blue for the hull, Leadbelcher for the weapons, and Zandri Dust for the tracks. Apply multiple thin layers for smooth and even coverage. - Step 3: Detail the model
Use a smaller brush to add details to the model. Paint smaller elements like the cockpit, headlights, and exhaust pipes with precision. For example, use Mephiston Red for the tail lights and Administratum Grey for the headlights. - Step 4: Wash the model
Apply a wash, such as Agrax Earthshade, to the recessed areas of the model. This will add depth and shading to the details, making them stand out. Make sure to remove any excess wash from the raised surfaces. - Step 5: Highlight the model
Use a lighter shade of the base colors to highlight the edges and raised areas of the Taurox Prime. This technique will add dimension and make the model visually striking. For instance, use Ahriman Blue to highlight the edges of the hull and Ironbreaker for the weapon edges. - Step 6: Add weathering effects
Apply weathering effects to give the Taurox Prime a battle-worn appearance. Use a sponge or a brush to lightly dab on darker shades of the base colors, such as Abaddon Black or Rhinox Hide, to simulate chipping or wear. Additionally, add streaks of Typhus Corrosion for rust or Stirland Mud for dirt using thin brush strokes. - Step 7: Seal the model
Once the paint is dry, apply a protective layer of Ardcoat or Lahmian Medium to the Taurox Prime to protect the paint job and give it a finished look.

