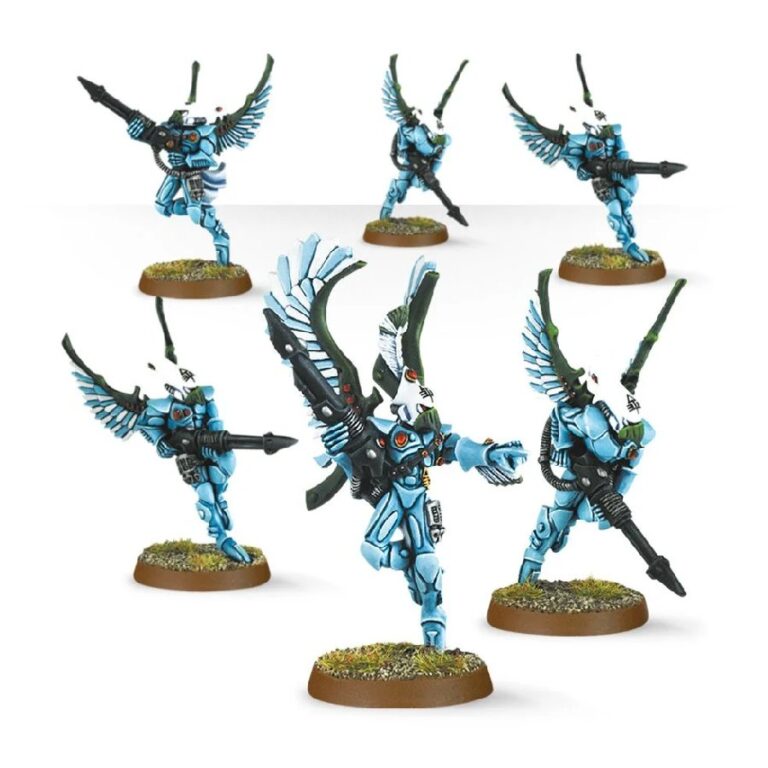
The Swooping Hawks, renowned members of the Aeldari warhost, bring swift and agile airborne support to the battlefield. With their remarkable wings crafted from vibrating feather plates and enhanced by ingenious gravitic lifters, they effortlessly soar above the fray, ready to unleash devastating strikes on unsuspecting enemy units. Armed with precision lasblasters and equipped with grenade packs, they rain a hail of firepower upon their foes before skillfully disengaging and gracefully ascending back into the sky. Although their armament and armor may be light, their strategic prowess makes them the ideal force for neutralizing enemy artillery, pursuing elusive fast-moving vehicles, and tactically pinning down flanking units.
What’s in the Swooping Hawks box
- x20 resin components that make 6 Aeldari Swooping Hawks
- x6 Citadel 25mm Round Bases
How to paint the Swooping Hawks set
- Step 1: Prime the Miniature
Apply a thin layer of black paint to the entire Swooping Hawks model using a primer. This creates a base for the paint to adhere to and ensures better color coverage. - Step 2: Base Coat the Model
Using a medium-sized brush, apply a base coat of your chosen main color to the Swooping Hawks. For example, you can use Macragge Blue to create a striking blue color scheme. Apply the paint evenly, covering the entire model. - Step 3: Layer the Feathers
Using a smaller brush, add layers of a lighter shade of your chosen main color to the feathered areas of the model. For example, you can use Altdorf Guard Blue to highlight the edges and raised parts of the wings. This adds depth and dimension to the feathers. - Step 4: Highlight the Feathers
With a fine brush, carefully apply an even lighter shade of your chosen main color to the very edges of the feathers. This technique, using Fenrisian Grey, will create subtle highlights and further enhance the feathered appearance. - Step 5: Paint the Details
Using a small brush, paint the smaller details of the Swooping Hawks, such as their weapons and accessories. For instance, you can use Leadbelcher for metallic parts like guns and belts. Take your time to ensure neat and precise painting. - Step 6: Apply Washes
Using a medium-sized brush, apply a wash of a darker color to the recessed areas of the model. For example, you can use Nuln Oil to add shading and depth to the feathers and other textured surfaces. Make sure the wash doesn’t pool or accumulate. - Step 7: Highlight the Metallics
Using a fine brush, carefully apply a lighter metallic color to the raised areas of the metallic details. For example, you can use Ironbreaker to highlight edges and give the weapons and accessories a shiny appearance. - Step 8: Finish the Details
With a fine brush, add final touches to the model. Paint small details like the helmets with a contrasting color, such as Yriel Yellow for a vibrant effect. Take your time to ensure accuracy and precision. - Step 9: Varnish the Model
Once the paint is dry, apply a coat of varnish to protect the paintwork and add a matte or glossy finish, depending on your preference. This will also help preserve the model’s appearance over time.

