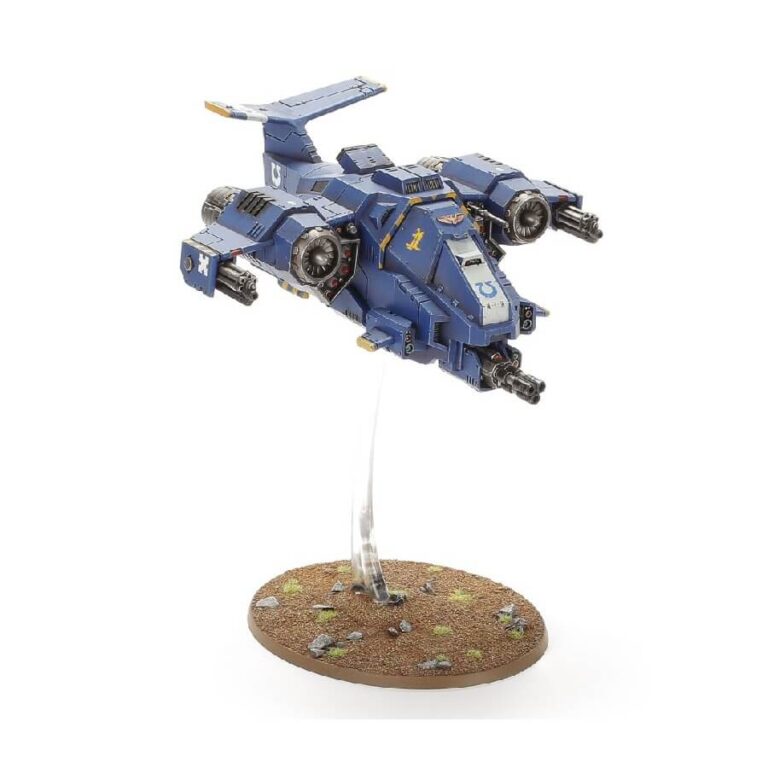
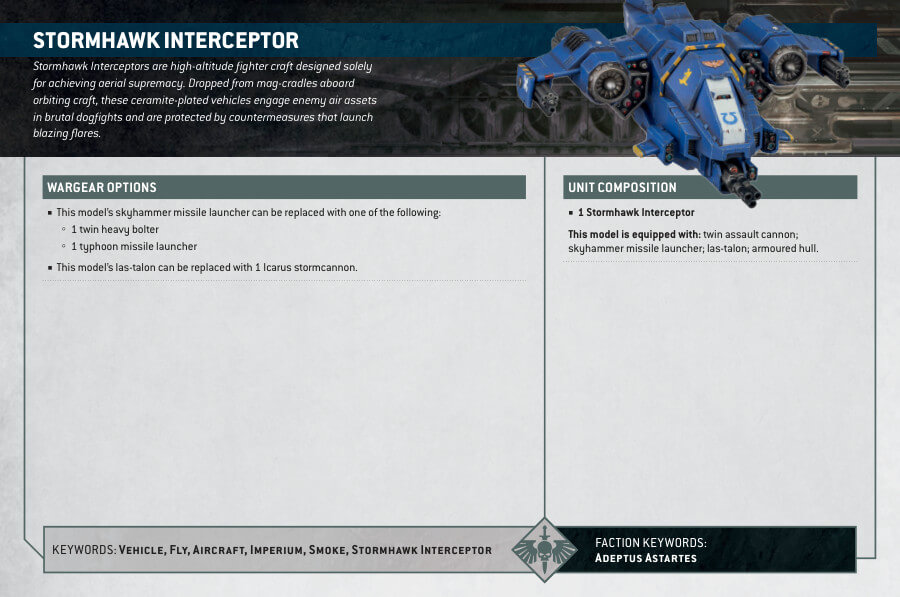
Stormhawk Interceptors are a breathtaking aerial force used by Space Marines to decimate enemy craft. With formidable frontal armor and incredible firepower, they excel in dogfighting and can take out targets with ease. These Interceptors are often seen in Vehemence Attack Patterns, where squadrons release golden flares to deter incoming fire. With their impressive aerial superiority, Stormhawk Interceptors are a symbol of the Emperor’s dominance over any planet’s skies.
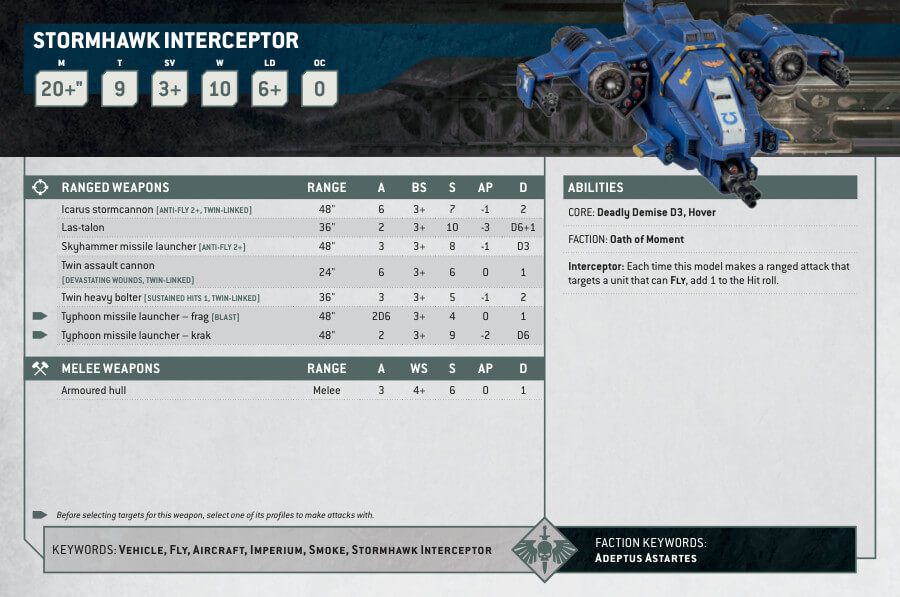
Stormhawk Interceptor Datasheets
What’s in the Stormhawk Interceptor box
- x123 plastic components are all you need to build the powerful Stormhawk Interceptor, an aircraft armed with a twin-linked assault cannon and a las-talon that can be exchanged for an icarus stormcannon, offering flexibility in engaging both air and ground targets. It also comes with twin-linked heavy bolters that can be replaced with either a skyhammer missile launcher or a typhoon missile launcher, and an infernum halo-launcher, which can discharge flares to disrupt enemy targeting systems.
- x1 transfer sheet is supplied to help you personalize your model
- x1 Citadel 120x92mm Oval base
- x1 flying stem for mounting your finished model
How to paint the Stormhawk Interceptor Set
- Step 1: Prime the miniature
Start by priming the Stormhawk Interceptor miniature with a black or white primer. This provides a base for the paint to adhere to. - Step 2: Base coat the main colors
Apply the base coat colors to the different areas of the model. For example, use Macragge Blue for the hull, Leadbelcher for the gun casings, and Abaddon Black for the cockpit. Remember to thin your paints with water for smoother application. - Step 3: Apply washes for shading
Use washes to add depth and shading to the model. Apply Nuln Oil to the recesses and crevices to create shadows. Use Agrax Earthshade for areas that require a warmer tone. - Step 4: Highlight the details
Using a lighter color, such as Ulthuan Grey, carefully highlight the edges and raised areas of the model to make them stand out. This brings out the finer details and adds visual interest. - Step 5: Paint the smaller details
Now it’s time to paint the smaller details, like the symbols, insignias, and other intricate parts. Use colors like Retributor Armour for gold accents, Runefang Steel for silver parts, and Averland Sunset for any red details. - Step 6: Add weathering effects
To give the Stormhawk Interceptor a battle-worn appearance, you can add weathering effects. Use a dry brush technique with a lighter color to lightly brush over the edges and exposed areas. This simulates chipped paint and wear. You can also apply Typhus Corrosion or Ryza Rust to add rust effects. - Step 7: Base the model
Complete the model by basing it. Use materials like sand, grass, or rocks to create a realistic base. Paint the base with appropriate colors to match the environment or theme you desire. For example, you can use Armageddon Dunes to create a wasteland themed base. - Step 8: Apply a protective coat
To protect your hard work, apply a clear coat of varnish to seal and protect the paint job. Citadel’s Munitorum Varnish is a suitable option.

