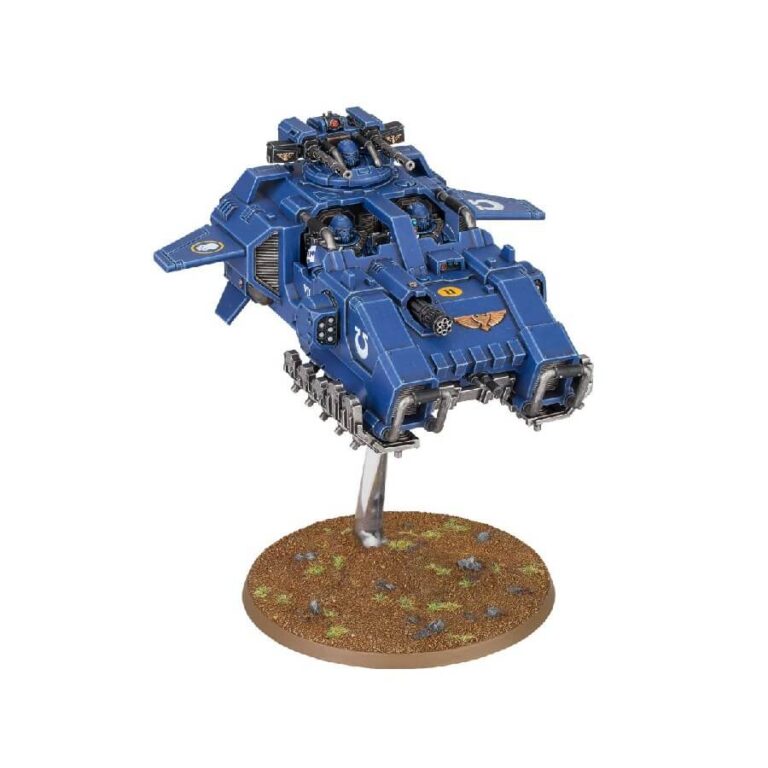
Add some fast-moving anti-infantry power to your Space Marines army with the Storm Speeder Hailstrike. With its heavily-armed loadout, this war machine can easily annihilate large groups of lightly-armoured infantry units, as well as demolish barricades and defences. This version of the Storm Speeder is perfect for those who are facing armies like the Orks, Genestealer Cults, or any other force that features numerous lightly-armoured units.
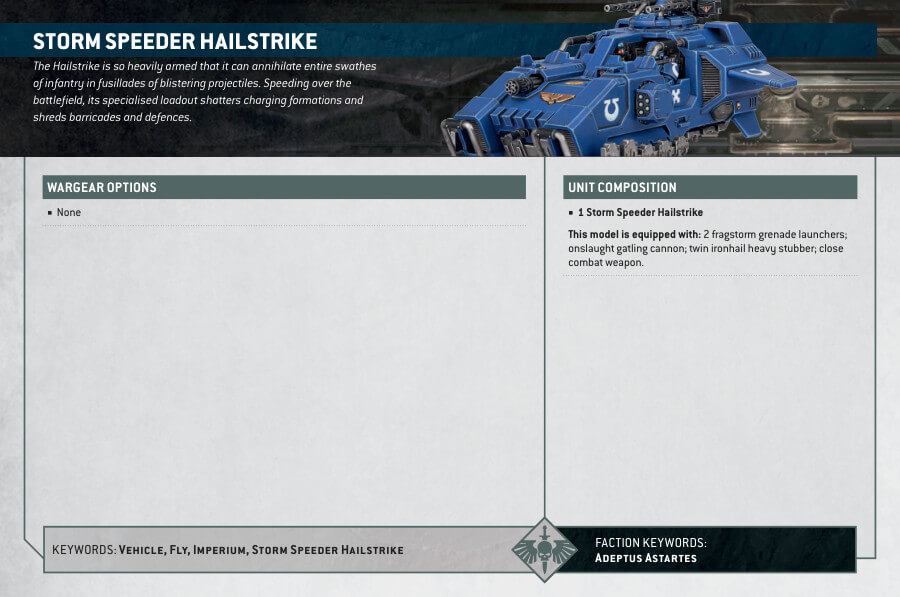
The kit includes 94 components that can be used to construct a Storm Speeder Hailstrike, complete with two fragstorm grenade launchers, an onslaught gatling cannon, and a twin ironhail heavy stubber. Additionally, the gun platform can be built to move, giving you the option to intimidate your opponents by having your heaviest weaponry aimed directly at their units.
Storm Speeder Hailstrike Datasheets
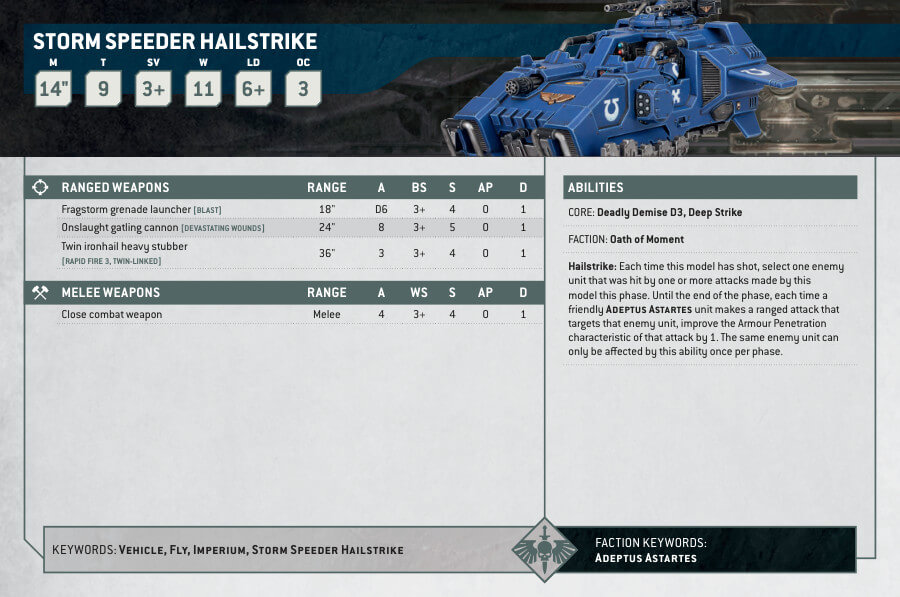
What’s in the Storm Speeder Hailstrike box
- x94 plastic components that can be used to build a Storm Speeder Hailstrike.
The Storm Speeder Hammerstrike and Storm Speeder Thunderstrike can also be constructed with the kit. - x1 Citadel 90mm Round Base.
- x1 Flying Stem.
How to paint Storm Speeder Hailstrike Set
- Step 1: Prime the miniature
Start by priming the Storm Speeder Hailstrike with a spray primer. Use a color that will serve as a good base for the subsequent layers of paint. A popular choice is Chaos Black or White Scar primer. - Step 2: Basecoat the main colors
Apply the base colors to the different areas of the Storm Speeder Hailstrike. Use Citadel paints for a consistent and high-quality finish. For example, paint the hull with Macragge Blue, the canopy with Abaddon Black, and the details with Retributor Armour. - Step 3: Apply washes for shading
Use washes to add depth and shading to the different parts of the miniature. Apply a thin layer of Nuln Oil wash over the metallic areas, such as the weapons and engine parts. Use Drakenhof Nightshade wash to shade the blue areas. - Step 4: Highlight the model
Use a lighter shade of paint to highlight the edges and raised areas of the Storm Speeder Hailstrike. For example, use Fenrisian Grey to highlight the blue sections, and use Stormhost Silver for the metallic details. Apply these highlights with a smaller brush, focusing on the edges to create contrast and add definition. - Step 5: Detail the miniature
Use smaller brushes and various colors to add additional details to the Storm Speeder Hailstrike. This can include painting insignias, lenses, and any other intricate parts. Use Mephiston Red for the vehicle’s markings and Leadbelcher for the vents. - Step 6: Weathering and effects (optional)
If desired, you can add weathering effects to enhance the realism of the miniature. Techniques like dry brushing with a lighter shade of paint, applying chipped paint effects with sponge or brush, or adding rust effects can be used selectively to achieve weathered and battle-worn appearance. - Step 7: Seal and protect the miniature
Once the paint has fully dried, apply a clear coat of varnish or protective spray to seal the paintwork and protect it from chipping and wear. This will ensure that your Storm Speeder Hailstrike remains vibrant and well-preserved.

