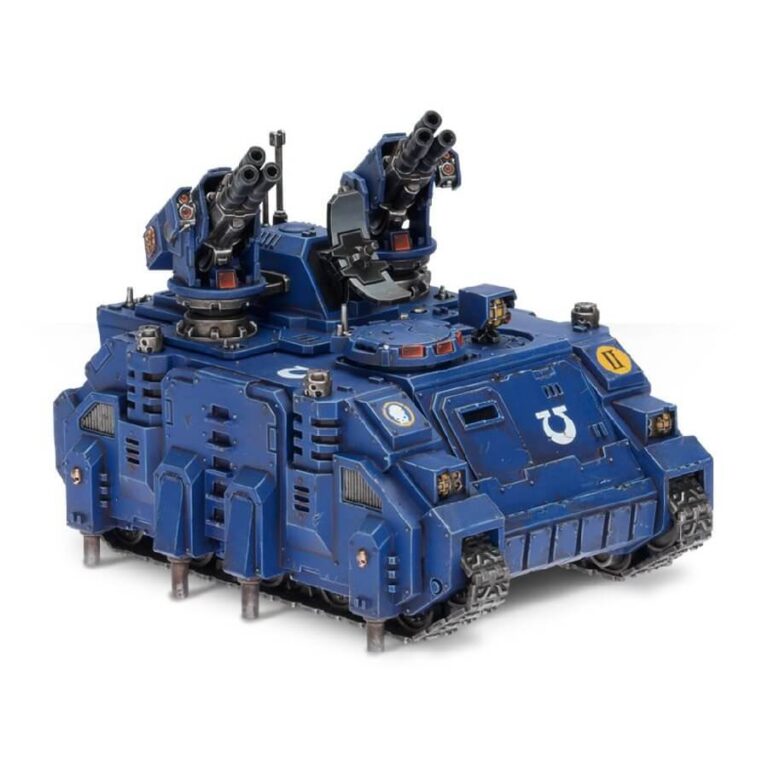
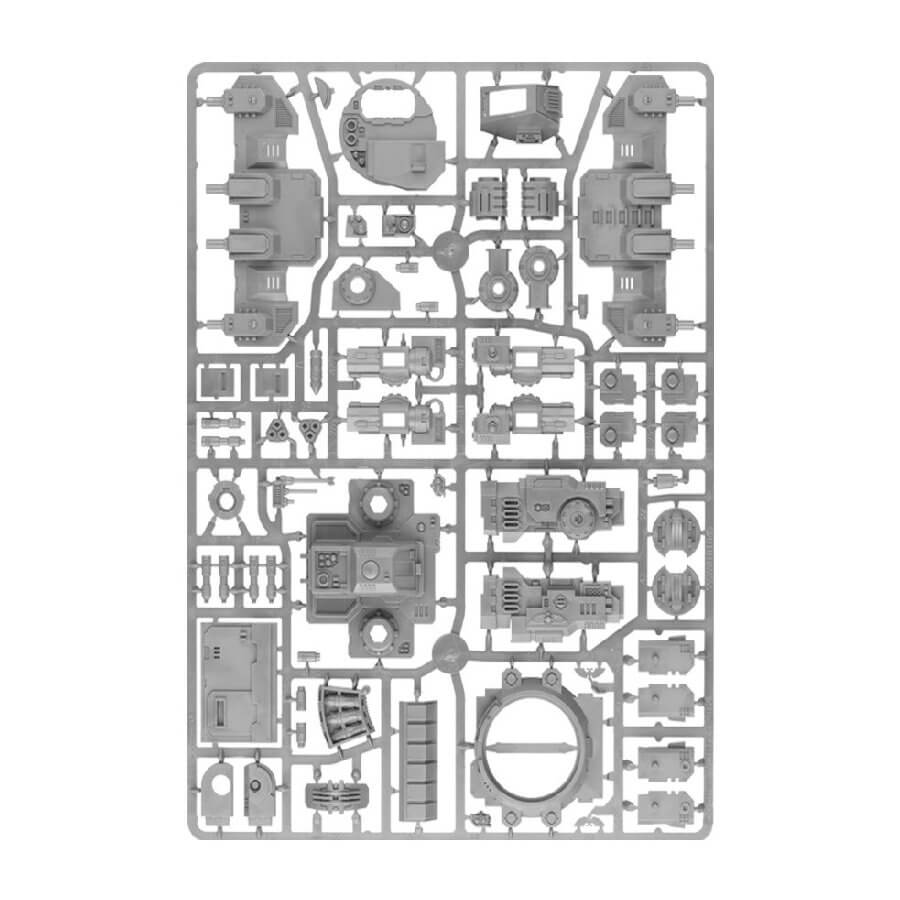
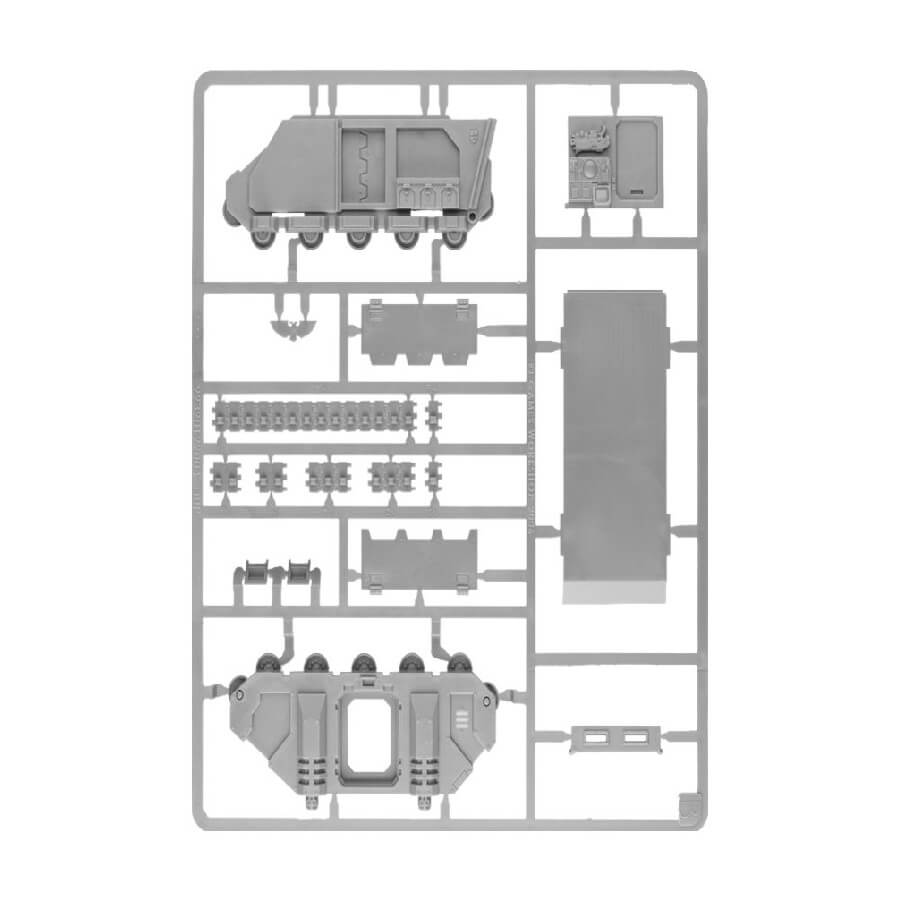
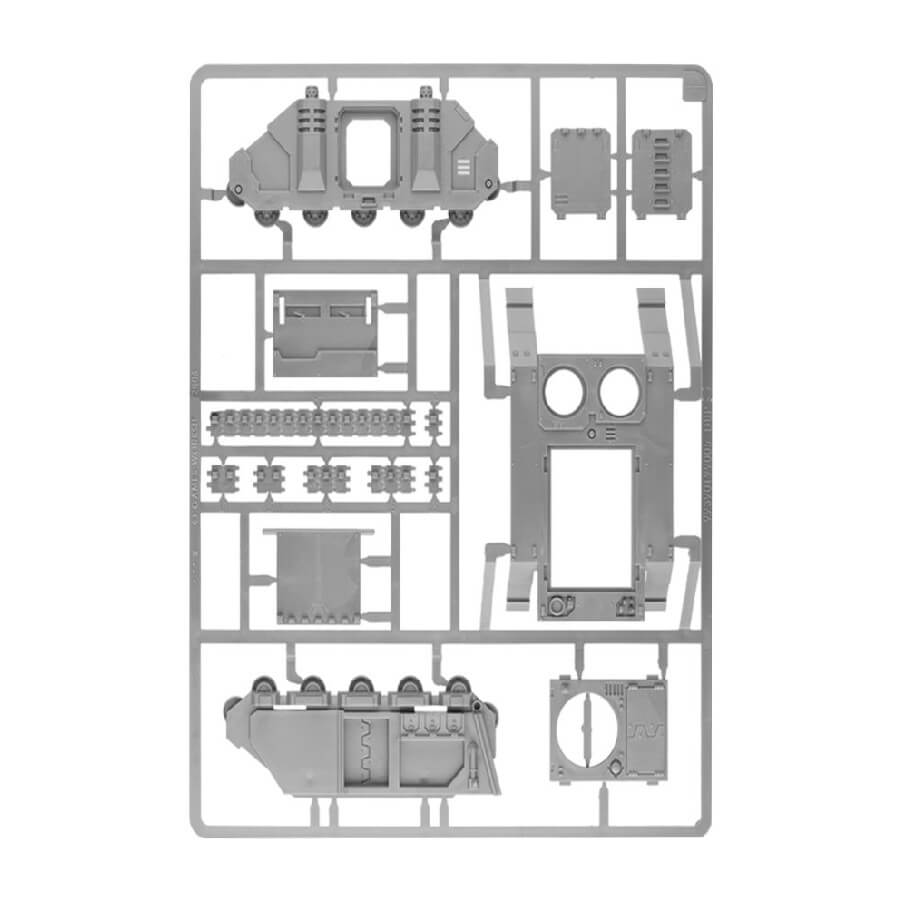
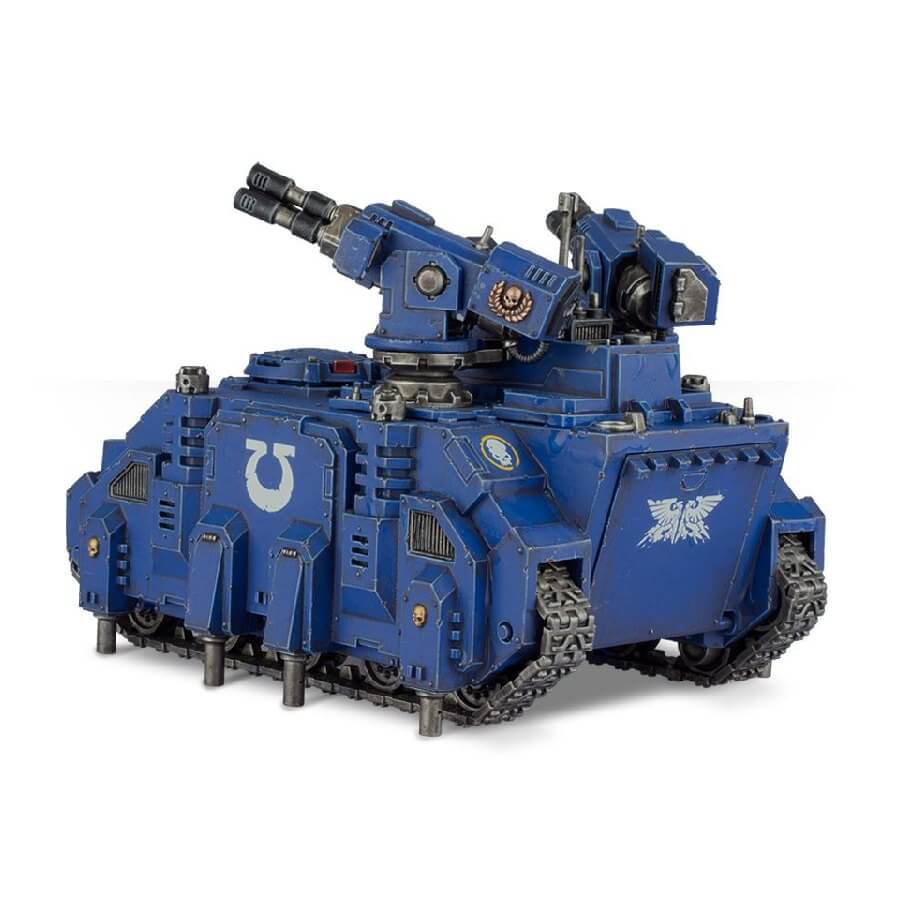
Built upon the reliable Rhino hull, the Stalker offers various options to enhance its capabilities. Reinforced armor plates can be added to the sides of the tank for increased resilience, while pneumatic pins along the base provide additional stability.
This kit not only includes the Stalker itself but also the Rhino hull, which features a versatile back ramp that can be left unglued, allowing it to open and close. The interior of the tank boasts intricate details, including a control panel with a spare boltgun, as well as two side hatches that can be glued in open or closed positions.
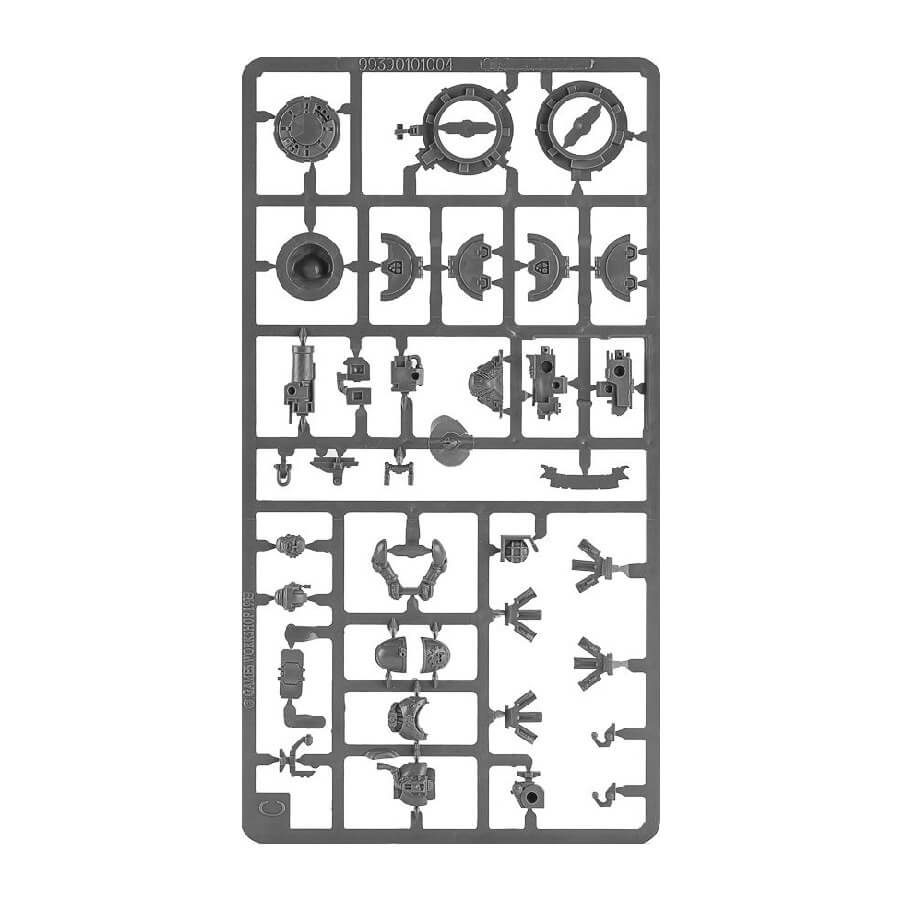
Adding to the customization possibilities, the kit provides a sprue of vehicle upgrades. You’ll have the choice of two top hatches, one of which can be equipped with a storm bolter. Additionally, the options include a Space Marine gunner within a turret or an automated weapons system, a hunter killer missile, a pintle-mounted storm bolter, a sensor array, a searchlight, two smoke launchers, two towing hooks, and a name plate for the tank.
One of the remarkable features of the Space Marine range is the interchangeability of plastic parts between different kits, and the Stalker is no exception. Since it utilizes the Rhino hull, you have the opportunity to incorporate various parts from other Space Marine vehicles, allowing for the creation of truly unique collections of miniatures.
What’s in the Stalker box
- x125 plastic components you can use to make 1 Stalker or 1 Hunter.
- x1 Space Marine vehicle transfer sheet with which to add Chapter iconography and vehicle markings.
How to paint the Stalker set
- Step 1: Basecoating
Using a medium-sized brush, apply a basecoat of blue to the tank’s hull, such as Macragge Blue or Kantor Blue. Apply thin layers to achieve smooth and even coverage. - Step 2: Metallic Details
Using a smaller brush, paint the metallic details on the tank, such as the gun barrels and tracks, with a metallic paint like Leadbelcher or Iron Warriors. Take your time to carefully paint these areas, ensuring clean lines. - Step 3: Contrast Colors
Apply contrast paints to add depth and shading to the tank’s panels. For example, you can use a black contrast paint like Black Templar or a brown contrast paint like Gryph-Hound Orange on specific areas to create shadows and weathering effects. - Step 4: Iconography and Markings
Using a fine detail brush, paint the chapter symbols and markings on the tank with white or a light color like Ulthuan Grey. Add any desired insignias or decals to represent the Space Marine chapter. - Step 5: Highlighting
Using a lighter shade of blue, such as Calgar Blue or Caledor Sky, gently highlight the edges and raised areas of the tank to create definition. Apply these highlights sparingly for a subtle effect. - Step 6: Weathering
Using a sponge or a stippling brush, apply a small amount of a lighter or darker color, such as Skrag Brown or Administratum Grey, to create weathering effects on the tank’s surface. Focus on areas that would naturally accumulate dirt or wear. - Step 7: Details and Accessories
Paint any additional details on the tank, such as lights, sensors, or ammunition boxes, using appropriate colors. For example, you can use a yellow color like Averland Sunset for lights or a red color like Mephiston Red for sensor lenses. - Step 8: Wash
Apply a wash of a suitable color, such as Nuln Oil or Agrax Earthshade, to the entire tank. This will darken recesses, add depth, and enhance the overall appearance. - Step 9: Basing
Paint the base of the tank to match your desired theme, whether it’s a rocky terrain or a urban setting. Use appropriate colors like texture paints or drybrushing techniques to create the desired effect. - Step 10: Varnish
Once the paint has dried, apply a protective varnish to the tank to safeguard the paint job and give it a finished look.