The ultimate survivor and lone wolf, a true Astra Militarum legend among the Imperial Guardsmen. Shrouded in mystery and known for his silent and deadly nature, Marbo is a force to be reckoned with. With a mere nod to acknowledge orders, he disappears into the shadows, only to reappear with deadly precision, leaving behind a trail of unimaginable destruction. His enemies are left in awe, believing they are facing an entire army rather than a single man.
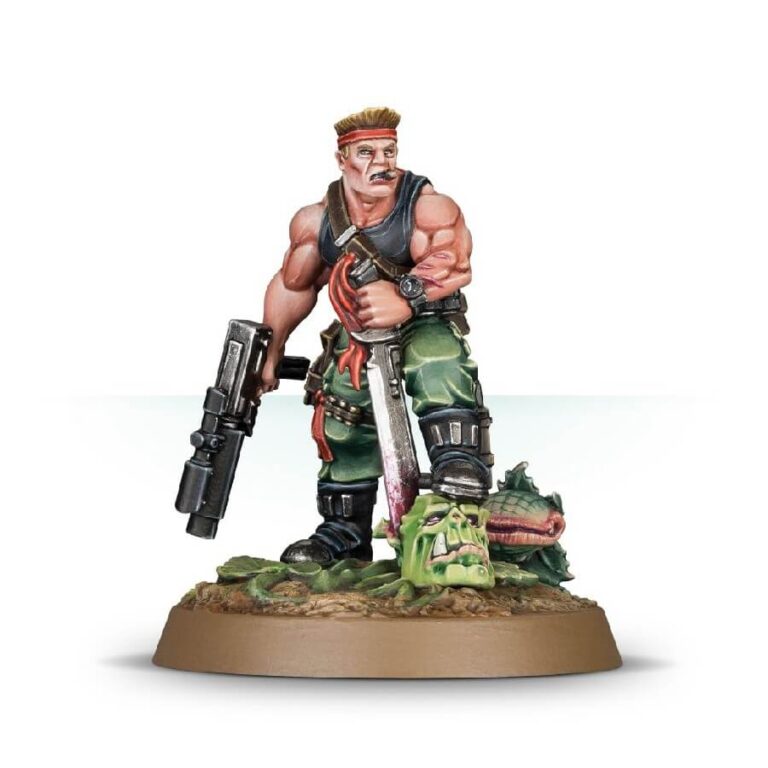
This resin kit offers the components needed to assemble the iconic model of Sly Marbo, a highly decorated warrior of Catachan. From his muscular physique and rugged tank top to the cigar firmly clenched between his strong jaws, Marbo exudes an aura of rugged masculinity. His minimalistic attire, comprising combat boots, tight trousers, and a plethora of straps and pouches, allows for swift and unrestricted movement on the battlefield. Armed with his distinctive ripper pistol, capable of firing armor-piercing rounds, and wielding a lethal Catachan fang drenched in deadly toxins, Marbo is a formidable opponent.
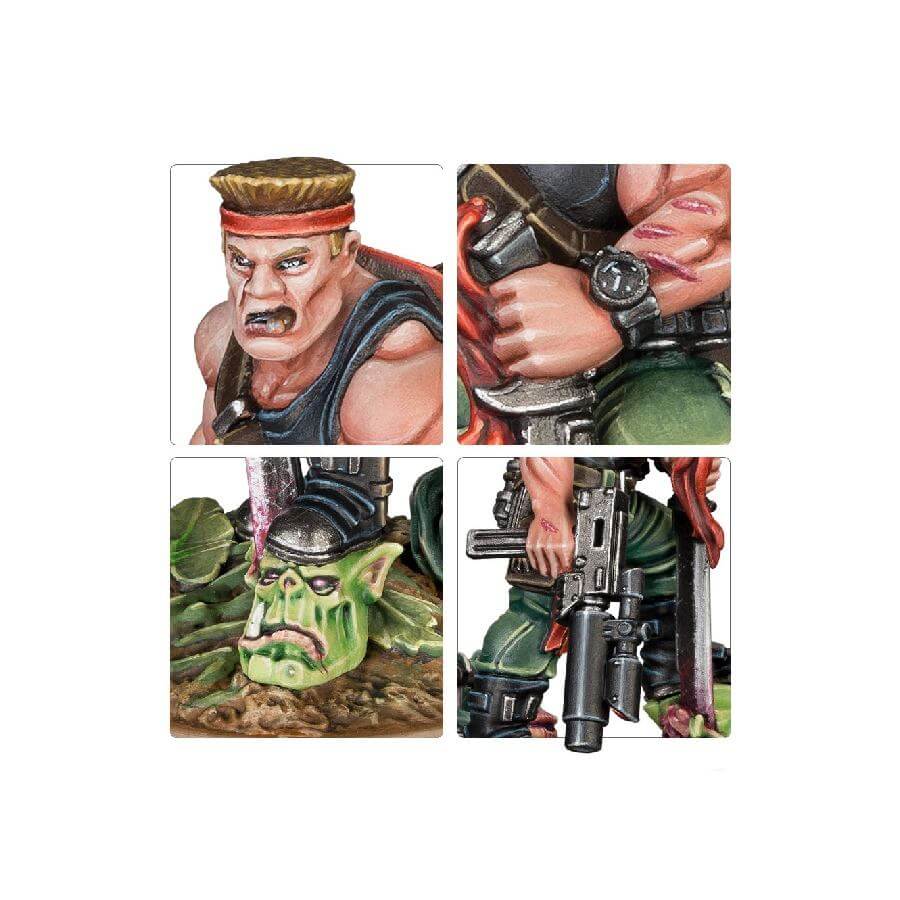
The detailed base of Sly Marbo showcases his ferocity and cunning. With his Catachan fang plunged into the head of a defeated Ork and a carnivorous plant poised to activate explosives behind him, Marbo demonstrates his relentless determination and resourcefulness in combat. Nothing can deter this fearless warrior.
Sly Marbo Datasheets
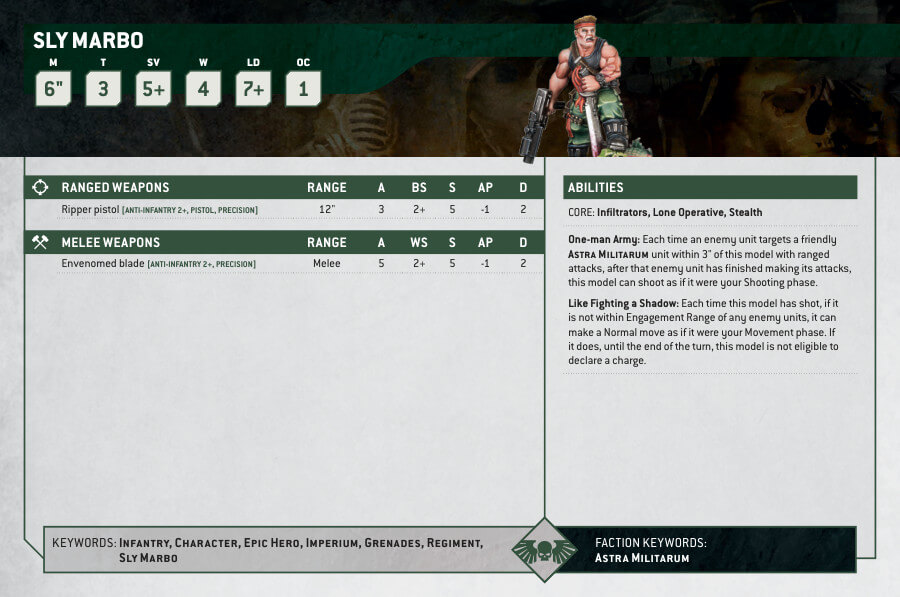
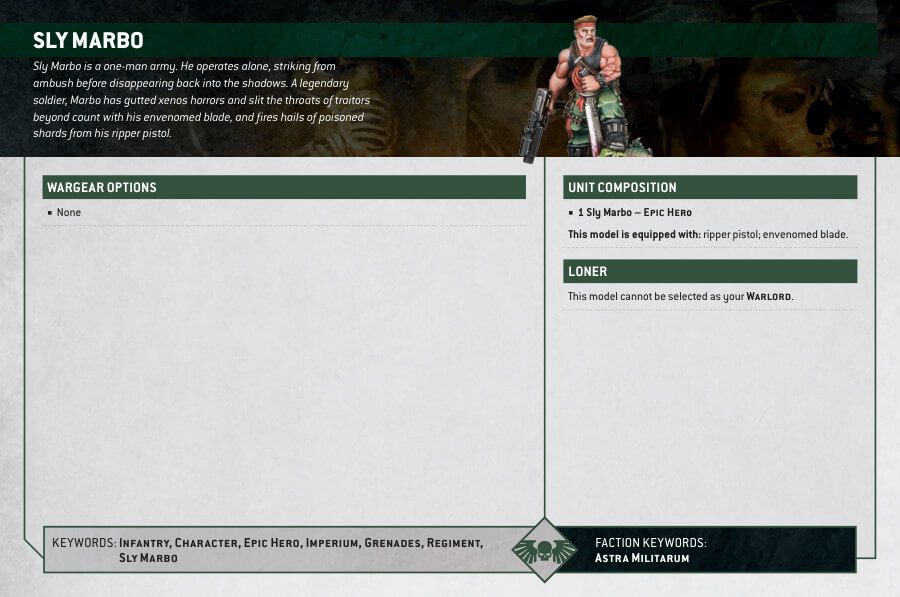
What’s in the Sly Marbo box
- x8 resin components that make one Sly Marbo model.
- x1 Citadel 32mm Round base
Sly Marbo Price per Country
| Country | Price |
|---|---|
| United States | $32 |
| Canada | $36 |
| Europe | €23 |
| United Kingdom | £18 |
How to paint the Sly Marbo model
- Step 1: Basecoat
Start by applying a basecoat of dark green to the armor, using a suitable green paint such as Caliban Green. Ensure an even coverage over the entire miniature. - Step 2: Clothing and Gear
Next, paint the clothing and gear with appropriate colors. For example, paint the pants and pouches with a brown shade like Rhinox Hide, and the belt and straps with a dark leather color like Doombull Brown. Be careful and precise to avoid painting over adjacent areas. - Step 3: Skin and Face
Paint the exposed skin areas with a flesh tone paint such as Kislev Flesh. Take your time and apply thin, smooth layers to achieve a natural-looking skin tone. Use a smaller brush for the facial details, like the eyes and mouth, and carefully highlight the raised areas with a lighter flesh tone like Flayed One Flesh. - Step 4: Weaponry
Focus on painting the weapons. Use metallic paints like Leadbelcher for the metallic parts, such as the barrel and trigger of the gun. Apply a wash, like Nuln Oil, over the metallic areas to add depth and definition. For any other non-metallic parts, choose appropriate colors, such as black for the grip of the gun or red for the laser sight. - Step 5: Details and Highlights
Now it’s time to add details and highlights. Use a fine brush to carefully pick out smaller details, such as buttons, insignia, and straps, with appropriate colors. Retributor Armour is an excelent option for this job. - Step 6: Basing
Paint the base of the miniature to complement the overall theme. You can use a texture paint like Stirland Mud to represent soil or apply a layer of brown paint followed by drybrushing with lighter earth tones for a more natural effect. Add grass tufts or small rocks for extra detail. - Step 7: Varnish
To protect your hard work, apply a layer of varnish over the painted miniature. This will help preserve the paint job and provide a matte or glossy finish, depending on your preference.

