In the ranks of the Adeptus Custodes, conformity is not valued, and the concept of blind obedience is scorned. Instead, every warrior is encouraged to exercise their own voice and judgment. It is the esteemed role of the Shield-Captain to embody these qualities, earning the respect of the Ten Thousand through their exceptional strategic acumen, unwavering resolve, and proven prowess. As natural leaders, Shield-Captains inspire unwavering loyalty and dedication among their fellow Custodians, forging a formidable force united under their guidance.
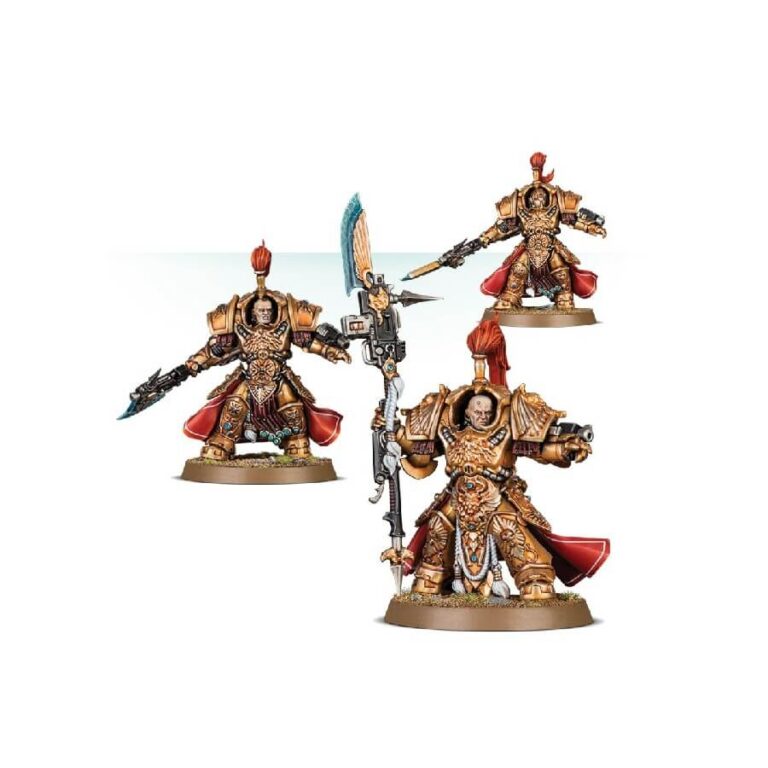
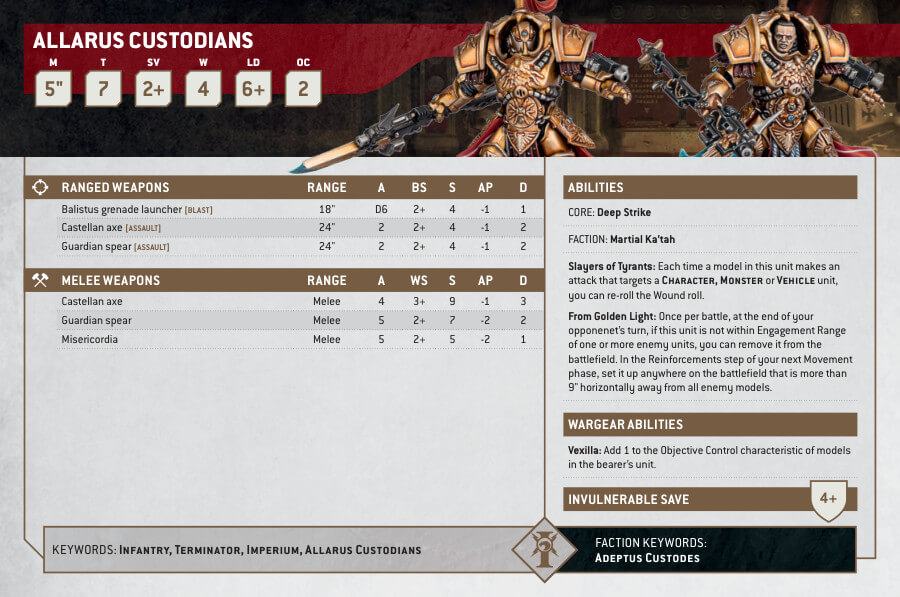
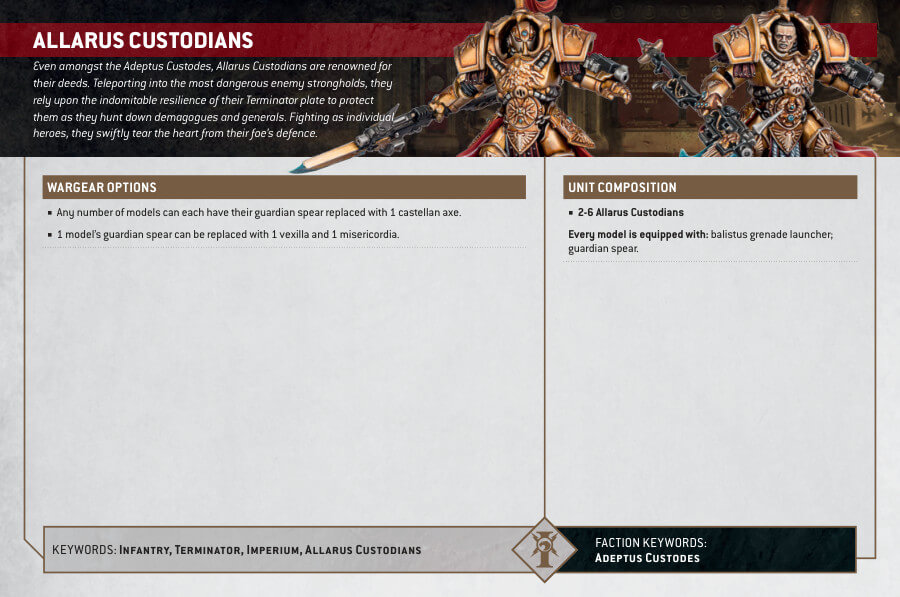
Additionally, the kit allows you to build either two Allarus Custodians or one Allarus Custodian and a Vexilus Praetor. The Allarus Custodians can be equipped with a guardian spear or castellan axe, accompanied by a balistus grenade launcher and a misericordia. The Vexilus Praetor proudly carries an ornate vexilla.
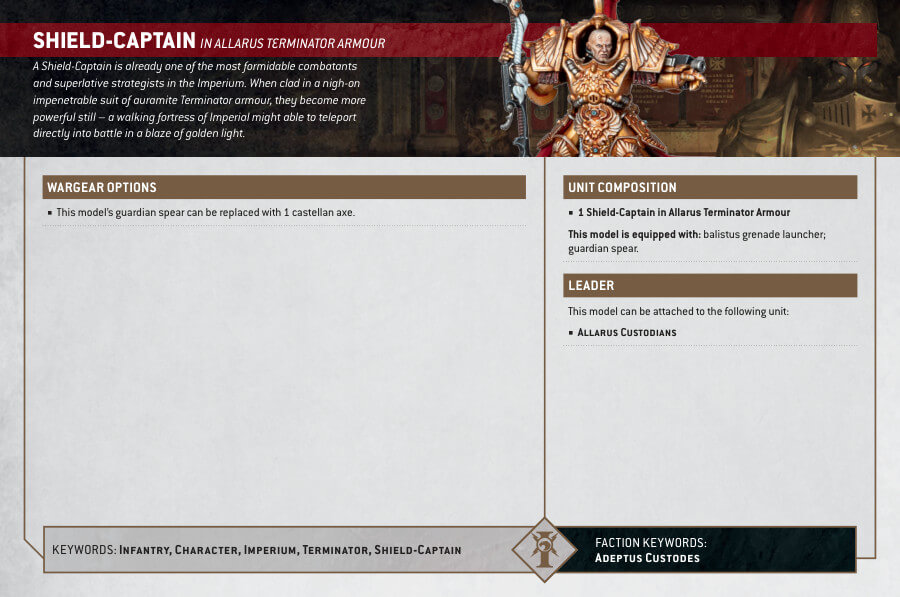
Shield-Captain in Allarus Terminator Armour Datasheets
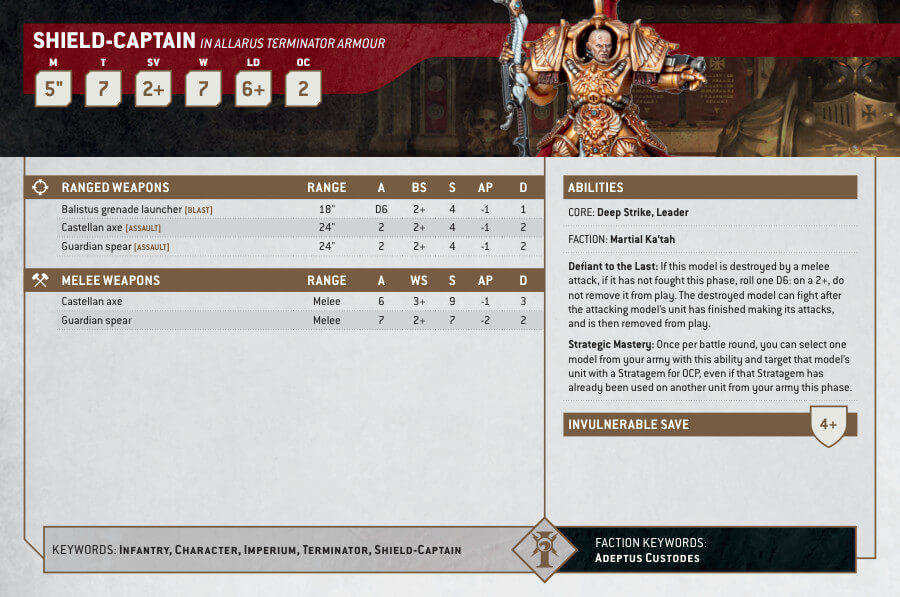
Allarus Custodians Datasheets
What’s in the Shield-Captain in Allarus Terminator Armour box
- x73 plastic components are everything you need to assemble a Shield-Captain in Allarus Terminator Armour and 2 Allarus Custodians, or 1 Allarus Custodian and a Vexilus Praetor. The kit also provides helmet plumes, shoulder pads, and thigh plates to distinguish the Shield-Captain from other Allarus Custodians.
- x3 Citadel 40mm Round bases.
How to paint the Shield-Captain in Allarus Terminator Armour Set
- Step 1: Prepare Your Workspace
Set up a well-lit, clean, and comfortable workspace where you can paint your Shield-Captain in Allarus Terminator Armour. Ensure you have all the necessary painting supplies within reach, such as brushes, paints, a palette, water, and a paper towel for brush cleaning. - Step 2: Prime the Model
Apply a thin, even coat of primer to the model. Primer helps the paint adhere better and provides a smooth surface for painting. Use a black or grey primer for a darker overall look, or a white primer for brighter colors. - Step 3: Base Coat
Begin by applying base coats to the various parts of the model. For the armor, you can use Retributor Armor for a golden hue. For the cloak, Macragge Blue provides a vibrant blue color. Remember to thin the paint slightly with water for smooth application. - Step 4: Layering
Add depth and dimension to the model by layering paints. Apply a lighter shade of gold, such as Liberator Gold, to the raised areas of the armor to create highlights. For the cloak, use Wild Rider Red to add lighter tones to the edges and folds. Apply the paint with a smaller brush for more precision. - Step 5: Washes
Use washes to add shading and bring out details. Apply Agrax Earthshade wash over the gold armor to accentuate the recesses and create a weathered effect. For the cloak, use Druchii Violet to deepen the red color and define the crevices. Apply the wash sparingly and allow it to settle into the recesses. - Step 6: Details
Paint the smaller details, such as the trim, insignia, and weapon details. Use paints like Stormhost Silver for the trim and Retributor Armor for the symbols. Apply these colors carefully with a fine brush, ensuring clean and precise lines. - Step 7: Highlights
Add highlights to further enhance the model’s details. Use a lighter shade, like Liberator Gold mixed with a touch of Stormhost Silver, to highlight the edges and prominent areas of the armor. For the cloak, apply a gentle dry brush of Alaitoc Blue mixed with a small amount of White Scar on the raised folds. - Step 8: Basing
Finish the model by painting the base. Use textures like Astrogranite or Stirland Mud for a realistic ground effect. Paint the base’s rim with a color that complements the model, such as Abaddon Black or Steel Legion Drab. - Step 9: Varnish and Protect
To protect your paintwork, apply a varnish over the entire model. Choose between a matte or gloss varnish based on your preference. This will safeguard your hard work and provide a uniform finish.

