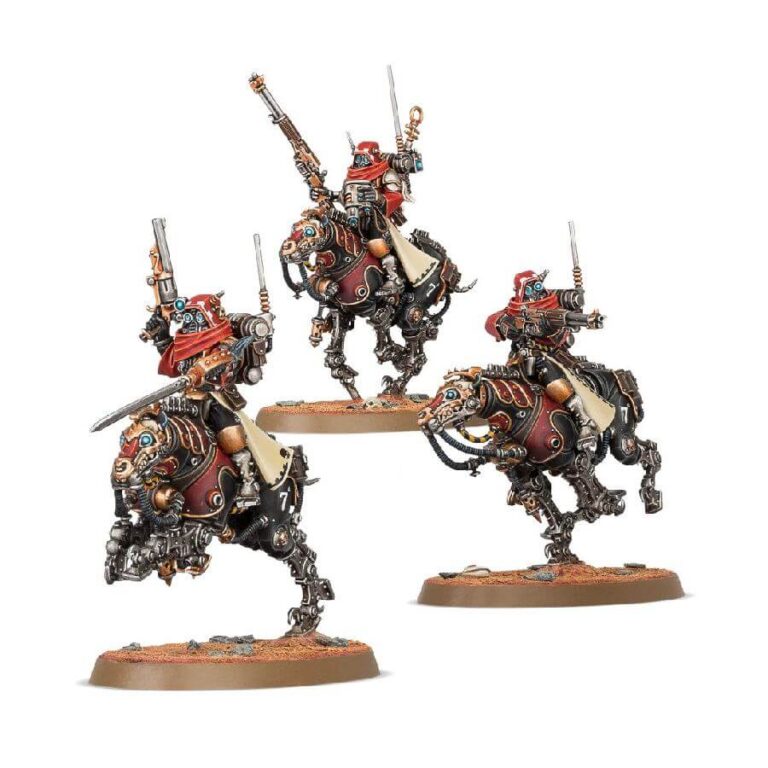
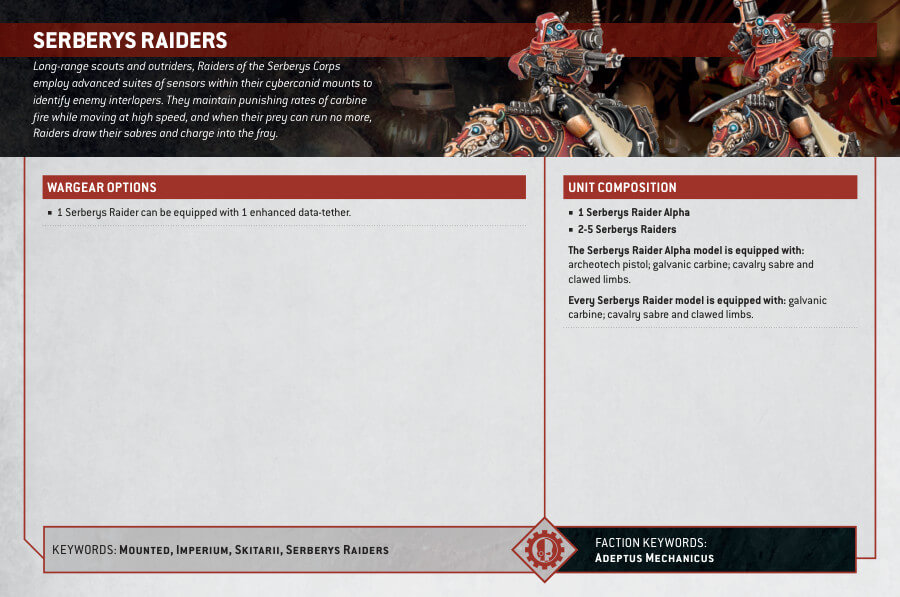
The promotion from Skitarii maniples to the prestigious Serberys corps is a highly esteemed accomplishment in the ranks of Adeptus Mechanicus. Mounted on swift quadrupedal constructs with razor-clawed limbs, the Serberys Raiders possess exceptional mobility over even the most rugged terrain. Their mag-locked riders maintain gyro-stabilized positions, ensuring stability and control. These long-range scouts and outriders excel at flanking enemy forces and eliminating vulnerable targets. Enhanced ocular arrays linked to their mounts provide unparalleled accuracy, while heightened olfactory sensors and advanced augury equipment make them relentless and feared trackers.
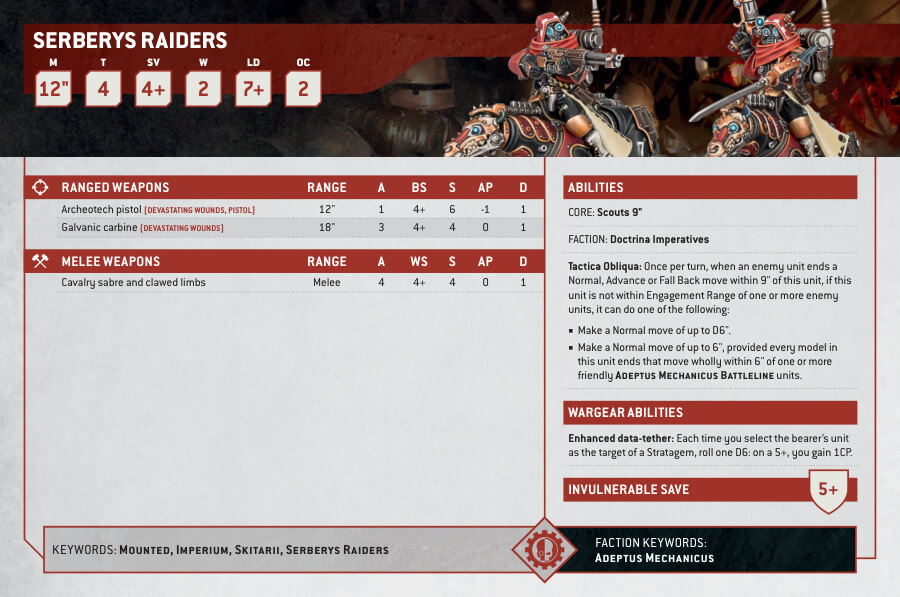
Equipped for combat at any range, Serberys Raiders wield galvanic carbines for potent ranged attacks and finely crafted cavalry sabres for deadly melee engagements. The squad’s alpha is armed with an archeo-revolver, delivering devastating firepower. With their versatility, they serve as a formidable vanguard, capable of riding ahead of their Skitarii comrades and even targeting high-value enemy command assets.
Serberys Raiders Datasheets
What’s in the Serberys Raiders box
- x103 plastic components with which to assemble 3 models.This kit can alternatively be used to build a unit of Serberys Sulphurhounds instead, meaning that regardless of which unit you assemble, you’ll end up with plenty of spare components for customising your collection.
- x3 Citadel 60mm x 35mm Oval Bases
- x1 Adeptus Mechanicus transfer sheet.
How to paint the Serberys Raiders Set
- Step 1: Priming
Apply a thin, even coat of Chaos Black spray primer to the Serberys Raiders. This will provide a solid base for the paint to adhere to. - Step 2: Base Colors
Using a small brush, paint the armor plates with Leadbelcher, ensuring full coverage. Paint the trim, including the weapons and other details, with Retributor Armor. For the riders robes, use Khorne Red. - Step 3: Wash
Apply a wash of Nuln Oil over the entire model, including the armor, weapons, and robes. This will help add depth and definition to the details. - Step 4: Highlighting
Using a finer brush, highlight the edges of the armor plates with Ironbreaker. Focus on the raised areas and edges to create a metallic shine. For the robes, highlight with Evil Sunz Scarlet to add dimension. - Step 5: Details
Paint the lenses of the ocular arrays with Mephiston Red, followed by a small dot of White Scar to create a glowing effect. Use Retributor Armor to paint the details on the weapons, such as the mechanisms and inscriptions. Add additional details like purity seals, symbols, and cables as desired. - Step 6: Basing
Paint the base of the model with Stirland Mud for a textured earth effect. Once dry, drybrush Karak Stone over the raised areas to highlight the texture. Finish by adding tufts of Dead Grass or other foliage to complete the base. - Step 7: Varnish
Apply a coat of Munitorum Varnish or another suitable varnish to protect the paint job and give the model a finished look.

