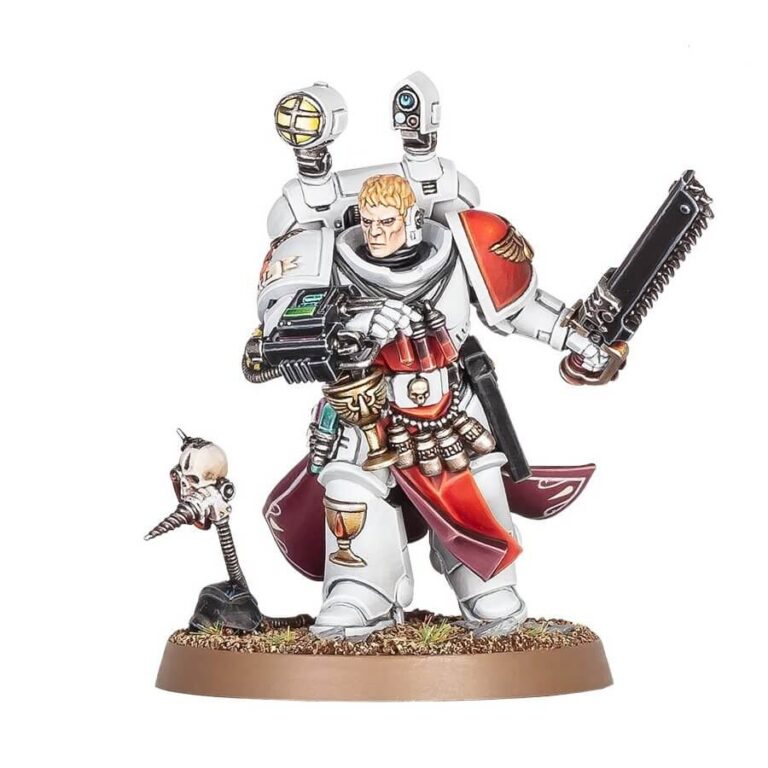
The Sanguinary Priests serve as the Apothecaries of the Blood Angels Chapter, responsible for protecting and preserving their precious gene-seed. Each Priest carries a blood chalice, said to contain a fragment of the essence of Sanguinius himself, which empowers nearby Blood Angels to achieve even greater acts of bravery and heroism. These Priests are among the most respected and revered members of the Chapter, embodying its noble ideals and selfless service to the Emperor.
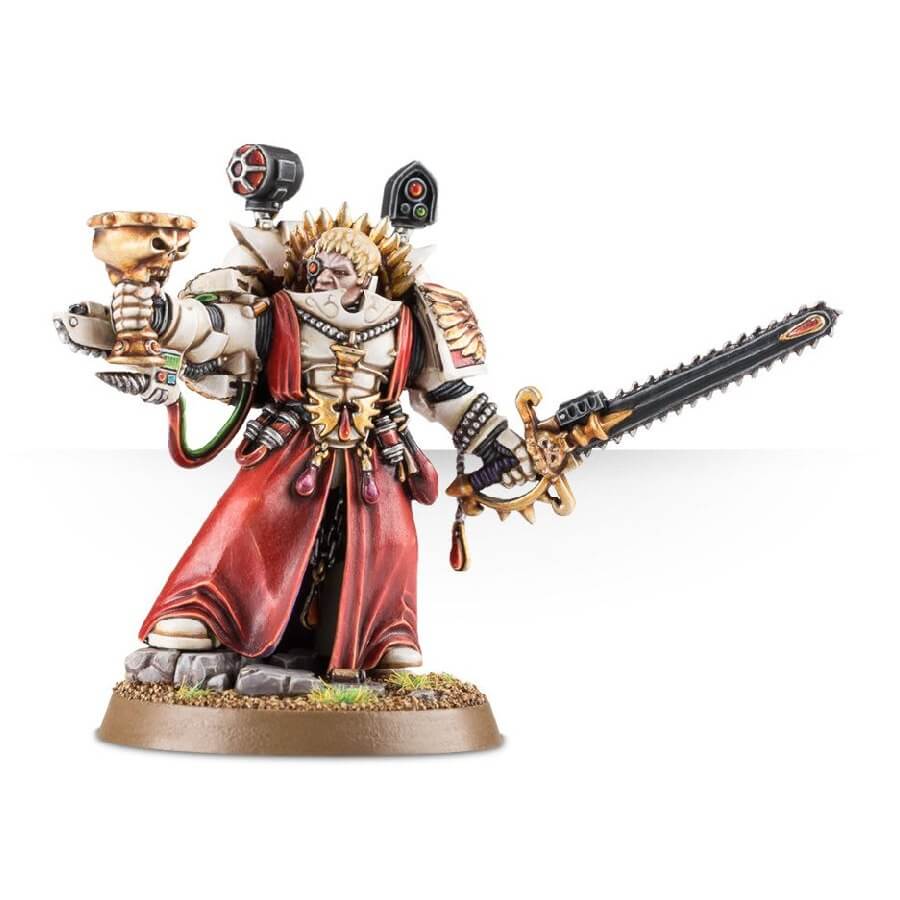
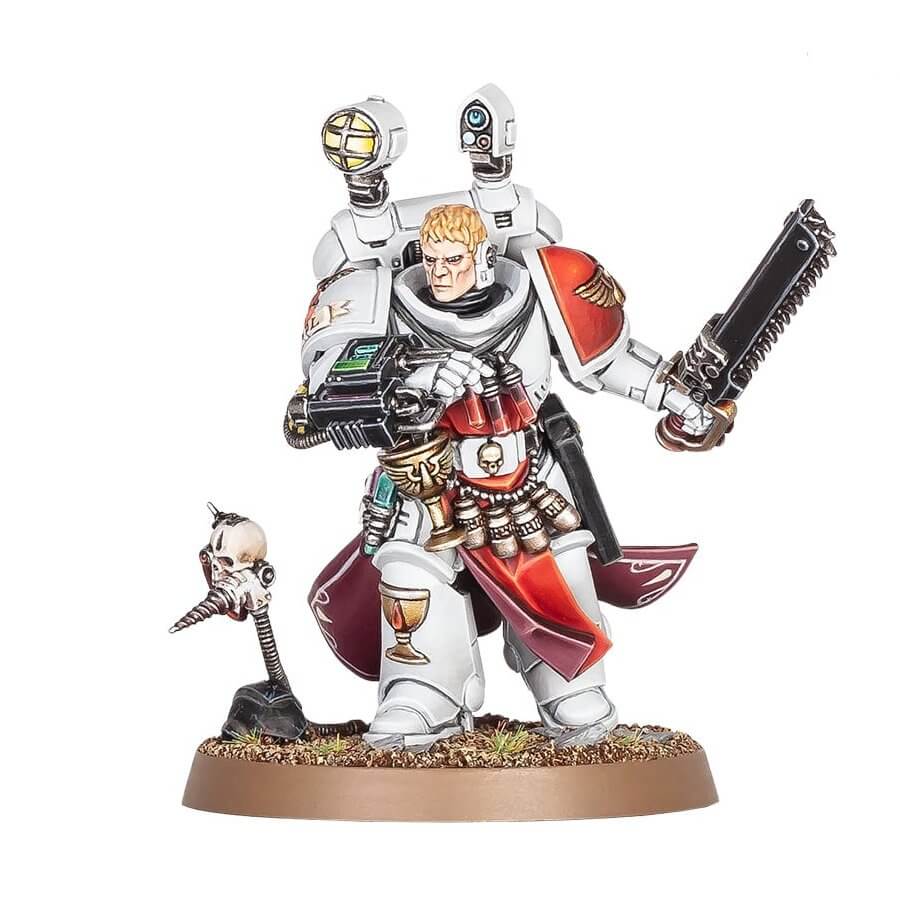
Sanguinary Priest Old vs New model comparison
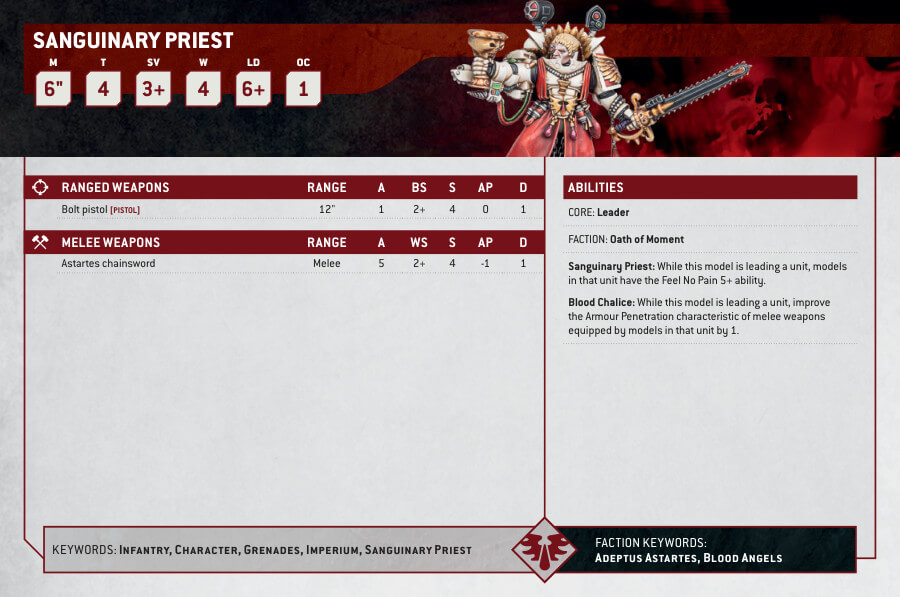
Sanguinary Priest Datasheets

What’s in the Sanguinary Priest box
- x27 plastic components that make one Sanguinary Priest Model.
- x1 Citadel 40mm Round Base.
How to paint the Sanguinary Priest
- Step 1: Primer Coat
Begin by applying a thin, even coat of White Scar – Spray to your Sanguinary Priest. Primer helps the paint adhere and gives a consistent base for your colors. - Step 2: Base Coat – Armor
With the primer in place, paint the Sanguinary Priest’s armor with a base coat of Corax White, a bright white paint. Ensure you cover all the armored areas evenly. - Step 3: Layer – Armor
To add highlights and dimension to the white armor, layer it with an even lighter white, such as White Scar. Focus on the raised areas and edges for a vibrant appearance. - Step 4: Shading – Armor
Enhance the depth and details of the white armor by applying a shade of Reikland Fleshshade, a brown shade. Focus on the recesses and crevices of the armor, allowing the shade to settle and create shadows. - Step 5: Painting Gold and Black Details
For the metallic and black elements, like the priest’s accessories and instruments, use a base coat of Retributor Armour for gold and Abaddon Black for black. Ensure smooth coverage on these intricate parts. - Step 6: Shading – Gold and Black Details
Enhance the metallic and black details by applying a shade of Agrax Earthshade for gold and Nuln Oil for black. Focus on the crevices and edges to create contrast. - Step 7: Layer – Gold and Black Details
Highlight the gold and black areas with a lighter gold, such as Liberator Gold for gold and Eshin Grey for black. Apply this sparingly to the raised portions for a polished look. - Step 8: Painting Exposed Face
Paint it using flesh tones like Rakarth Flesh as a base coat, Reikland Fleshshade for shading, and Flayed One Flesh for layering. Ensure attention to detail on the facial features. - Step 9: Painting the Base
Consider using texture paints like Astrogranite Debris or Armageddon Dunes to create a realistic terrain effect on the base. Apply the chosen texture paint evenly across the base. - Step 10: Varnishing for Protection
To safeguard your beautifully painted Sanguinary Priest set and give it a lasting finish, consider applying a varnish. You can use Ardcoat for a glossy finish or Munitorum Varnish for a matte/satin finish, depending on your preference. Make sure the miniatures are entirely dry before applying the varnish.

