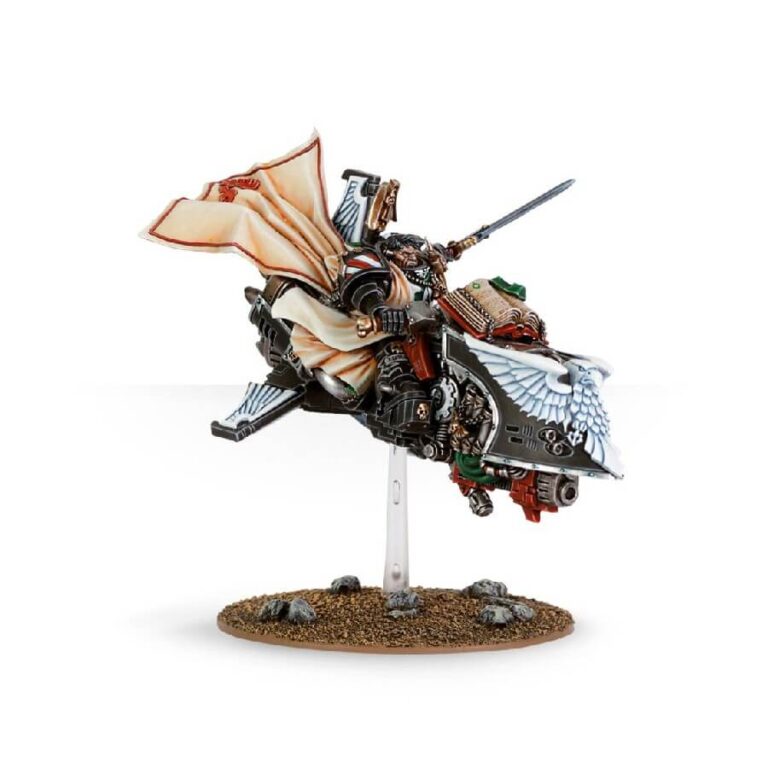
Sammael is the fearless leader of the Ravenwing, a mobile company that relies on speed and surprise to succeed. This exquisitely detailed model depicts Sammael riding his jetbike, Corvex, complete with intricate and arcane features such as his Adamantine Mantle cloak and a tome held open by chains.
In addition to his Raven Sword and personal heraldry on his shoulder pad, Corvex is adorned with a large and stunning Aquila, winged iconography, and the symbol of the Mechanicum.
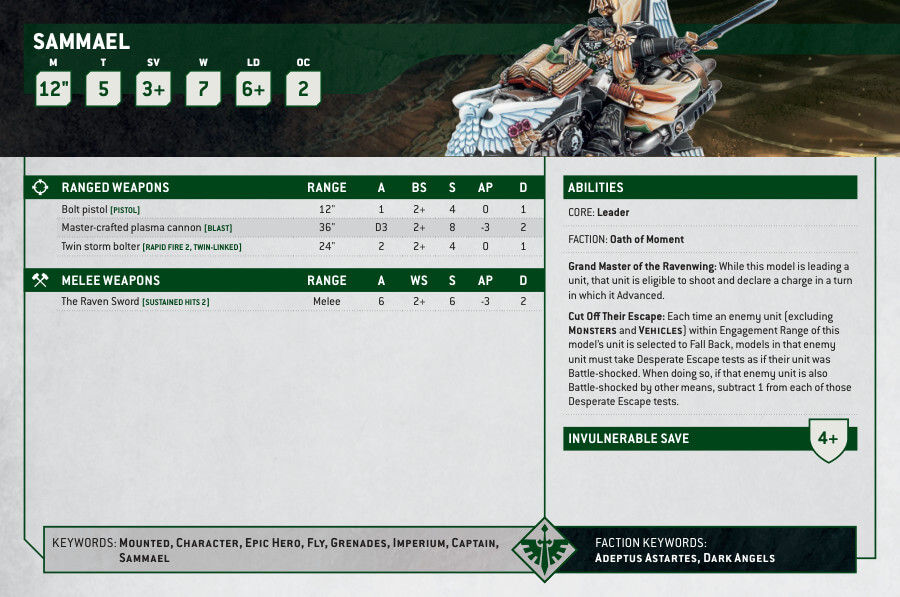
The jetbike is equipped with an underslung plasma cannon and twin-linked storm bolter. This premium Citadel Finecast resin model is a must-have for any Dark Angels collection.
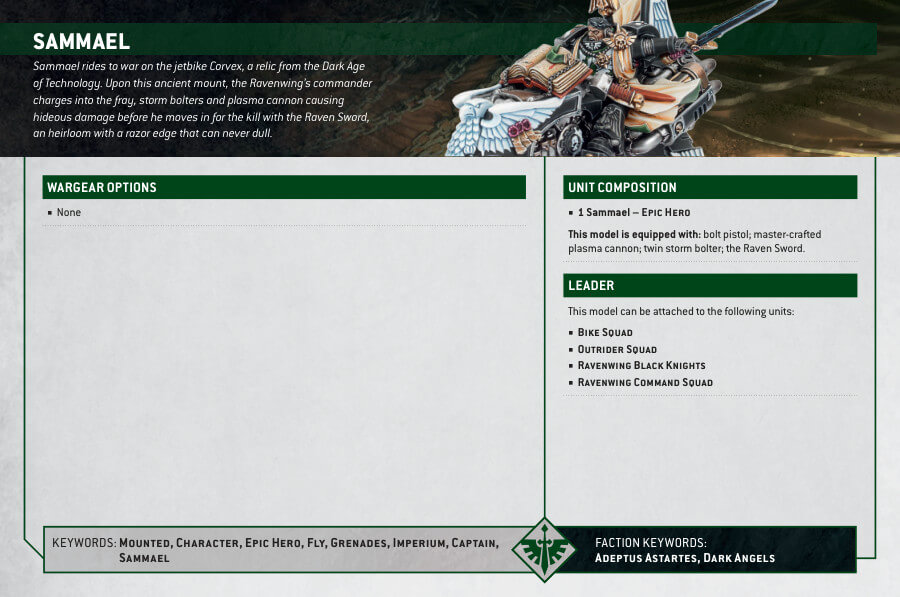
Sammael Datasheets
What’s in the Sammael box
- x33 resin components used to make Sammael.
- x1 Citadel 40mm flying base.
- x2 flying stems to support the miniature.
How to paint the Sammael
- Step 1: Primer Coat
Begin by applying a thin, even coat of Chaos Black primer to the miniature. Primer helps the paint adhere and gives a consistent base for your colors. - Step 2: Base Coat – Armor
With the primer in place, paint Sammael’s armor and his jetbike with a base coat of black, such as Abaddon Black. Ensure you cover all the black areas evenly. - Step 3: Shading – Armor
Enhance the depth of the black armor by applying a shade of black, like Nuln Oil. Focus on the recesses and crevices of the armor, allowing the shade to settle and create shadows. - Step 4: Layer – Armor
To add highlights and dimension to the black armor, layer it with a lighter black or dark gray, such as Eshin Grey. Focus on the raised areas and edges for a polished look. - Step 5: Painting Red Details
For the red details on Sammael’s armor, like his helmet and shoulder pads, use a base coat of red, such as Mephiston Red. Ensure clean and even application for a crisp appearance. - Step 6: Shading – Red Details
Enhance the red details by applying a shade of red, like Carroburg Crimson. Focus on the areas that should appear darker and recessed. - Step 7: Layer – Red Details
Highlight the red areas with a lighter red, such as Evil Sunz Scarlet. Apply this sparingly to the raised portions for depth. - Step 8: Painting Gold Details
For the gold trims and emblems on Sammael’s armor, use a base coat of gold, like Retributor Armour. Ensure clean lines and full coverage for these intricate elements. - Step 9: Shading – Gold Details
Enhance the gold details by applying a shade of brown, like Agrax Earthshade. Focus on the crevices and recessed areas to create depth and definition. - Step 10: Layer – Gold Details
Highlight the gold trims and emblems with a lighter gold, such as Liberator Gold. Apply this sparingly to the raised portions for a shining effect. - Step 11: Painting the Winged Sword
For the winged sword, use a base coat of silver, like Leadbelcher. Ensure smooth coverage on this prominent detail. - Step 12: Shading – Winged Sword
Enhance the sword’s details by applying a shade of black, like Nuln Oil. Focus on the crevices and edges to create contrast. - Step 13: Layer – Winged Sword
Highlight the sword with a lighter silver, such as Ironbreaker. Apply this sparingly to the raised portions for a polished look. - Step 14: Painting the Wings
For Sammael’s wings, use a base coat of white, like White Scar. Ensure full coverage on these large, feathered areas. - Step 15: Shading – Wings
Enhance the wing’s details by applying a shade of light blue, like Drakenhof Nightshade. Focus on the areas where shadows would naturally fall. - Step 16: Layer – Wings
Highlight the wings with a lighter white, such as White Scar. Apply this to the raised portions for a feathered and luminous effect. - Step 17: Painting the Base
Consider using texture paints like Astrogranite Debris or Armageddon Dunes to create a realistic terrain effect on the base. Apply the chosen texture paint evenly across the base. - Step 18: Varnishing
To protect your beautifully painted Sammael set, consider applying a varnish. A matte varnish like Stormshield provides a protective layer without altering the finish. Ensure the miniatures are entirely dry before varnishing.

