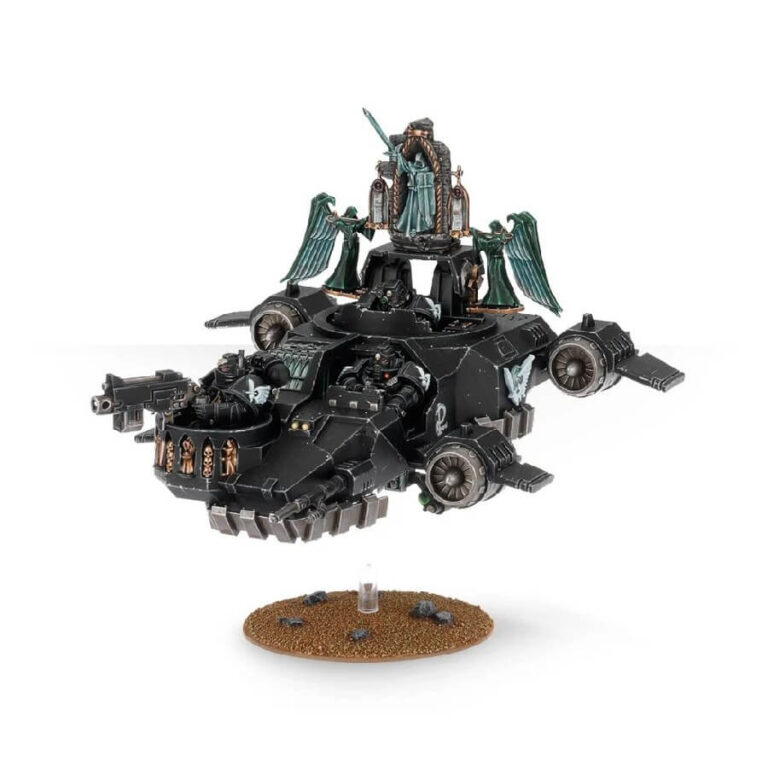
A formidable and unique vehicle used by the Dark Angels in battle. Its appearance is unsettling to those who face it on the battlefield, with a caliginous pall that strikes fear in the hearts of even the bravest soldiers.
The design of the Darkshroud incorporates elements of religious imagery, with icons and structures taken from Caliban, the Dark Angels homeworld. Angel wings, shrouded statues, parchments, and stained glass with lead frames are all featured on the vehicle, evoking a sense of glorious reverence.
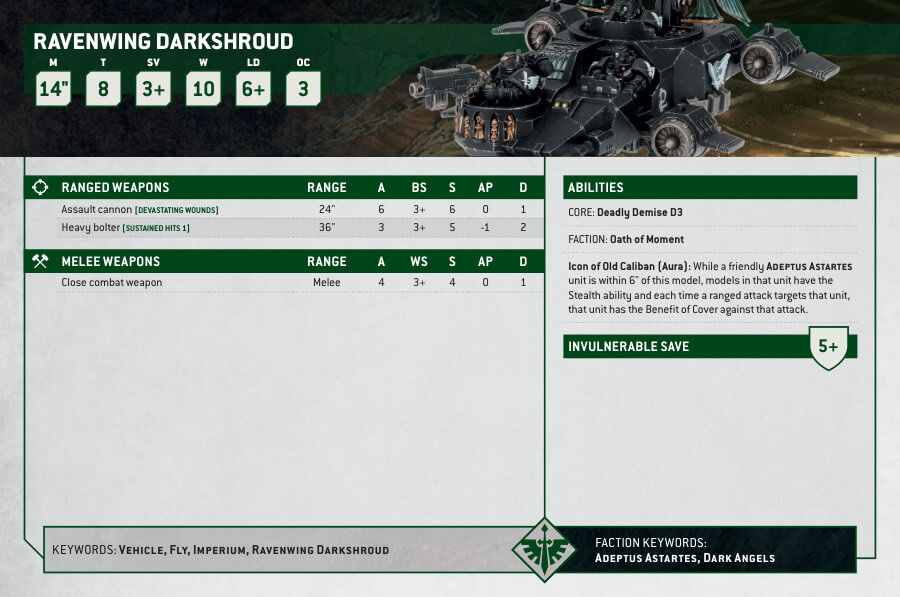
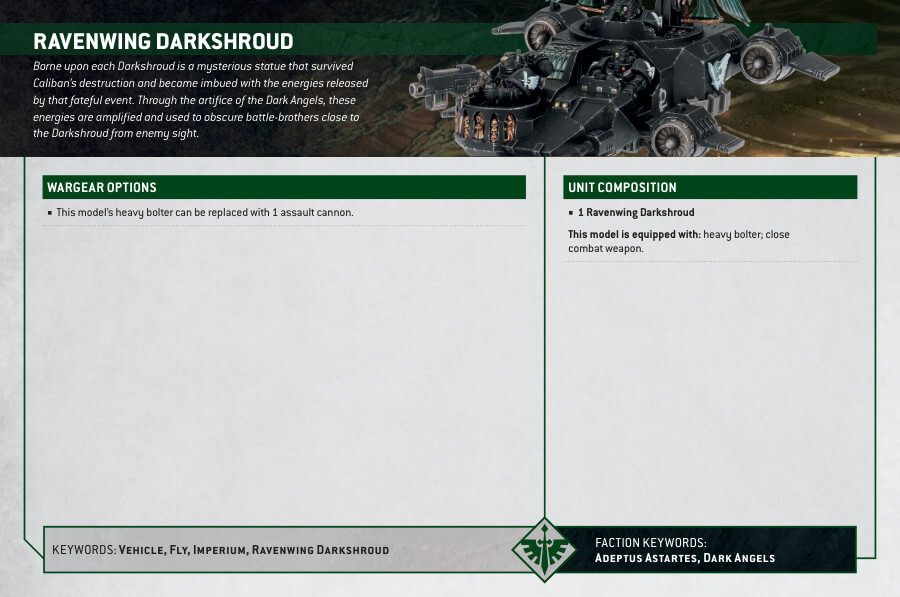
Equipped with a pulpit-like cupola, the Darkshroud has a Space Marine gunner who can operate either a heavy bolter or an assault cannon to devastating effect. The vehicle is covered in metal panels and rivets, giving it a tough and robust appearance that is characteristic of Space Marine design.
Inside the Darkshroud are three Space Marines, strategically positioned throughout the vehicle. These soldiers are adept at stealth and deception, making the Darkshroud a valuable asset in any Dark Angels army.
Ravenwing Darkshroud Datasheets
What’s in the Ravenwing Darkshroud box
- x88 components that can be used to construct either a Ravenwing Darkshroud or a Land Speeder Vengeance.
- x1 flying base to support the construction of the chosen vehicle.
- x2 flying stems are included to support the vehicle once it is constructed.
How to paint the Ravenwing Darkshroud
- Step 1: Base Coat – Darkshroud Body
Begin by painting the body of the Darkshroud with Abaddon Black. Ensure complete coverage and a smooth finish. - Step 2: Base Coat – Metallic Details
For metallic details like wings or weapons, use Leadbelcher to create a metallic appearance. Apply this evenly to achieve a realistic effect. - Step 3: Base Coat – Smaller Details
Paint smaller details with Runelord Brass. This includes chapter-specific elements or other intricate details. Be precise and careful during this step. - Step 4: Base Coat – Chapter Details
Use White Scar to paint chapter-specific details on the Darkshroud. Ensure clean lines and coverage for these elements. - Step 5: Shading
To add depth and shadows, apply Nuln Oil to the black areas, such as the body. This will create depth and enhance the overall look. - Step 6: Layering
For the wings and metallic details, layer them with a lighter shade to create highlights. Use Ironbreaker for the metallic parts and Pallid Wych Flesh for the wings. Focus on raised areas and edges. - Step 7: Weathering
Create weathering effects by dry brushing Ryza Rust lightly on some metallic areas, giving the impression of wear and tear. Use a light touch for a subtle effect. - Step 8: Painting the Base
Consider using texture paints like Astrogranite Debris or Armageddon Dunes to create a realistic terrain effect on the base. Apply the chosen texture paint evenly across the base. - Step 9: Varnishing
To protect your beautifully painted Darkshroud, consider applying Munitorum Varnish for a satin/matte finish. Ensure the model is entirely dry before varnishing.

