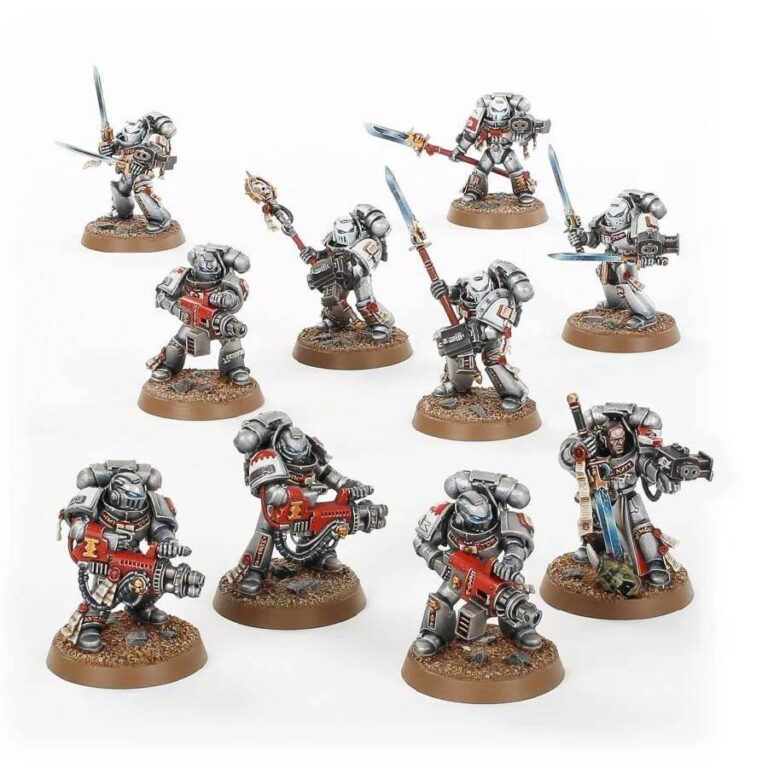
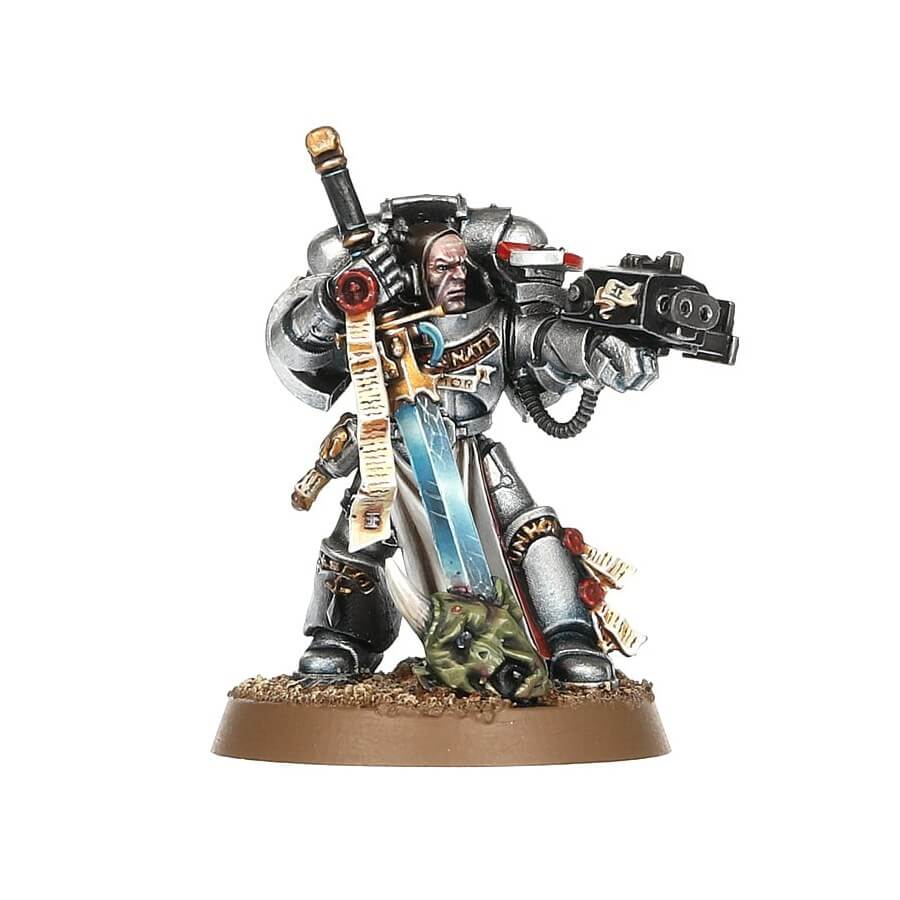
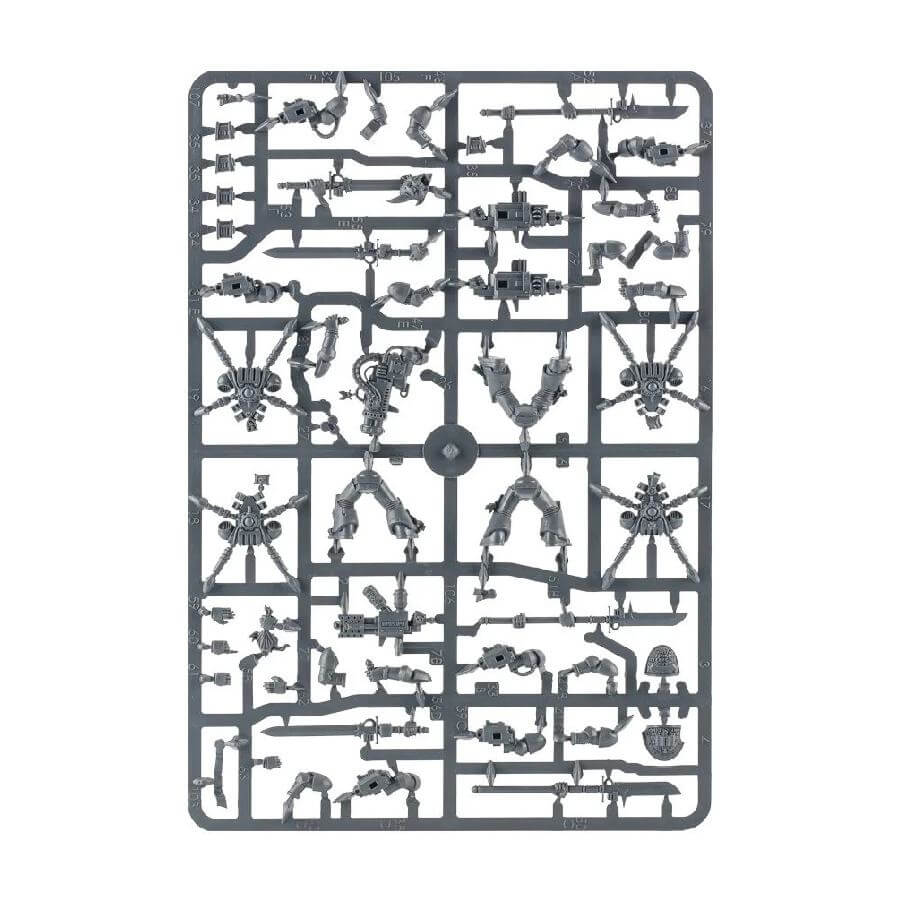
This kit allows you to build 10 Grey Knights Purgation Squad models armed with Nemesis force swords and storm bolters, with one model that can be assembled as the unit leader, a Purgator Justicar. The kit includes six Nemesis force halberds, six pairs of Nemesis force falchions, two Nemesis daemon hammers, and two Nemesis warding staves for customizing each model’s weapon options. Additionally, four psycannons, two psilencers, and two incinerators are included for special ranged weapons. These intricately detailed models also feature inscriptions, purity seals, and a severed head of a daemon. The Purgator Justicar has a unique helmetless head to set him apart from the rest of the squad. Overall, this kit is a must-have for any Grey Knights force looking to add powerful and customizable heavy support units to their arsenal.
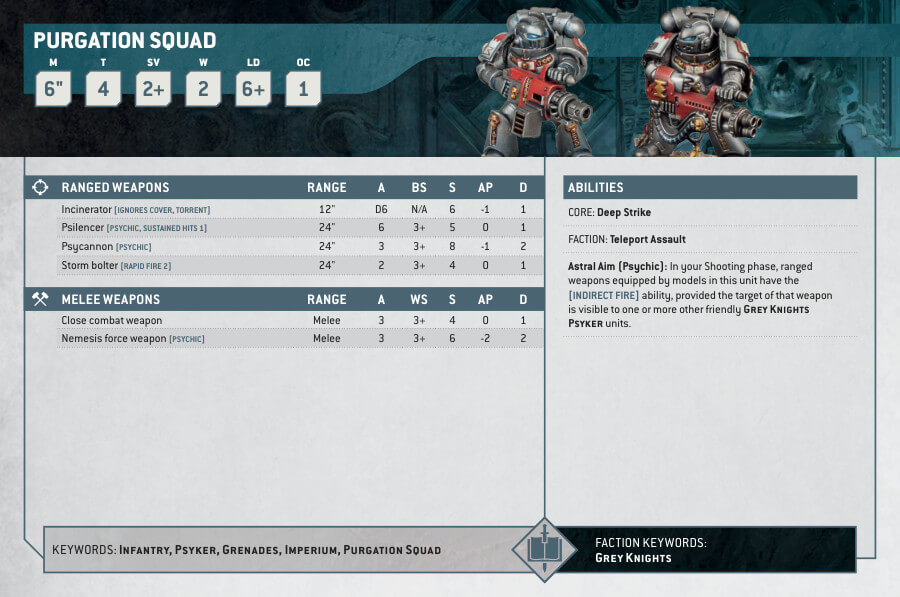
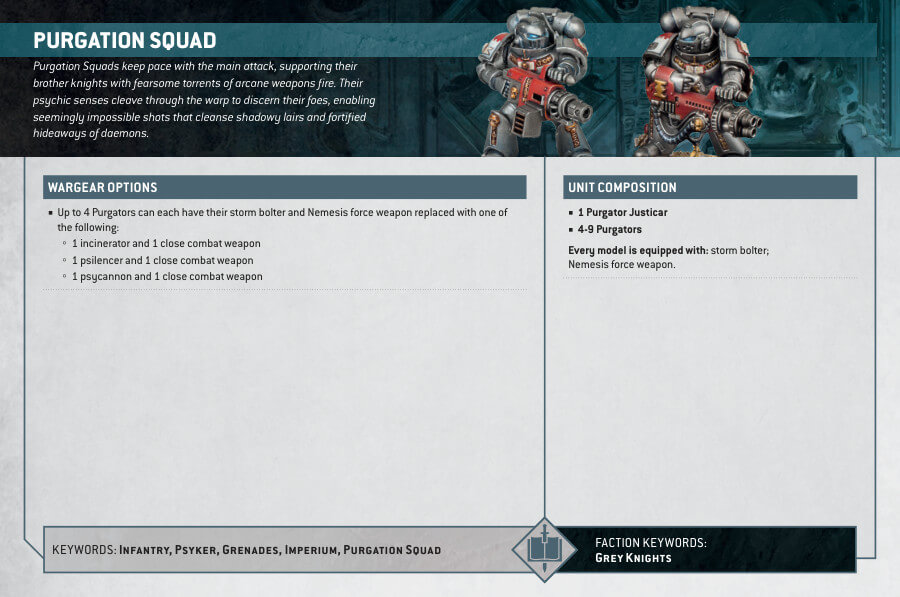
Purgation Squad Datasheets
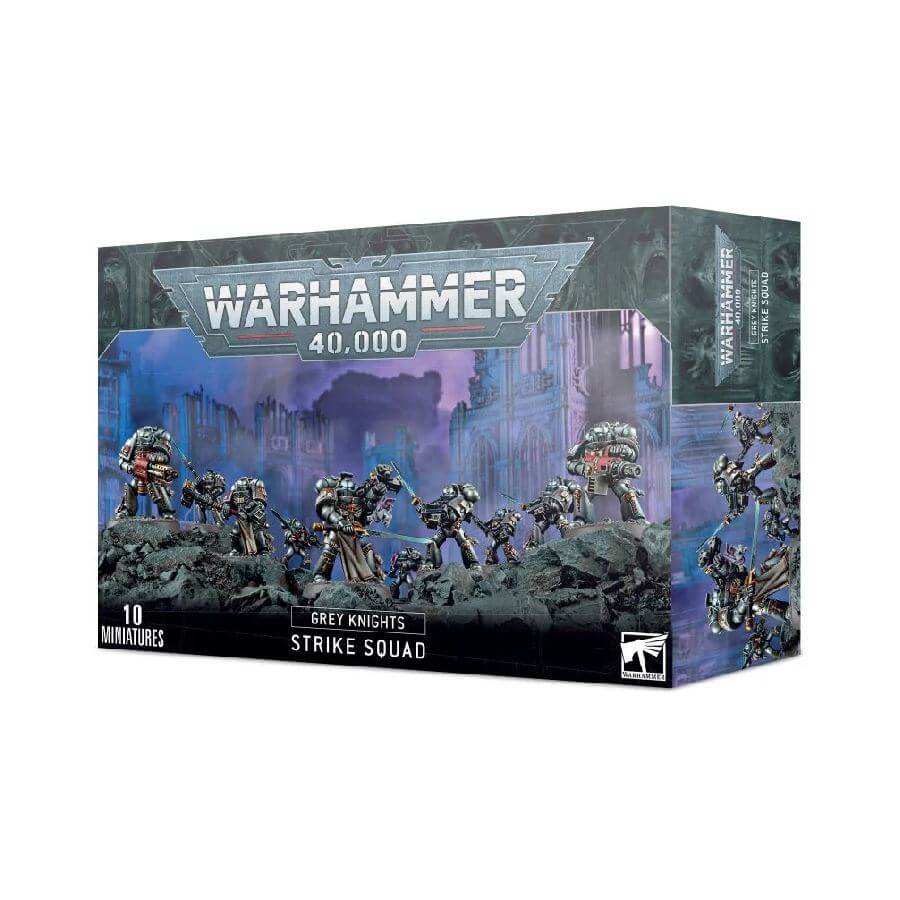
What’s in the Purgation Squad box
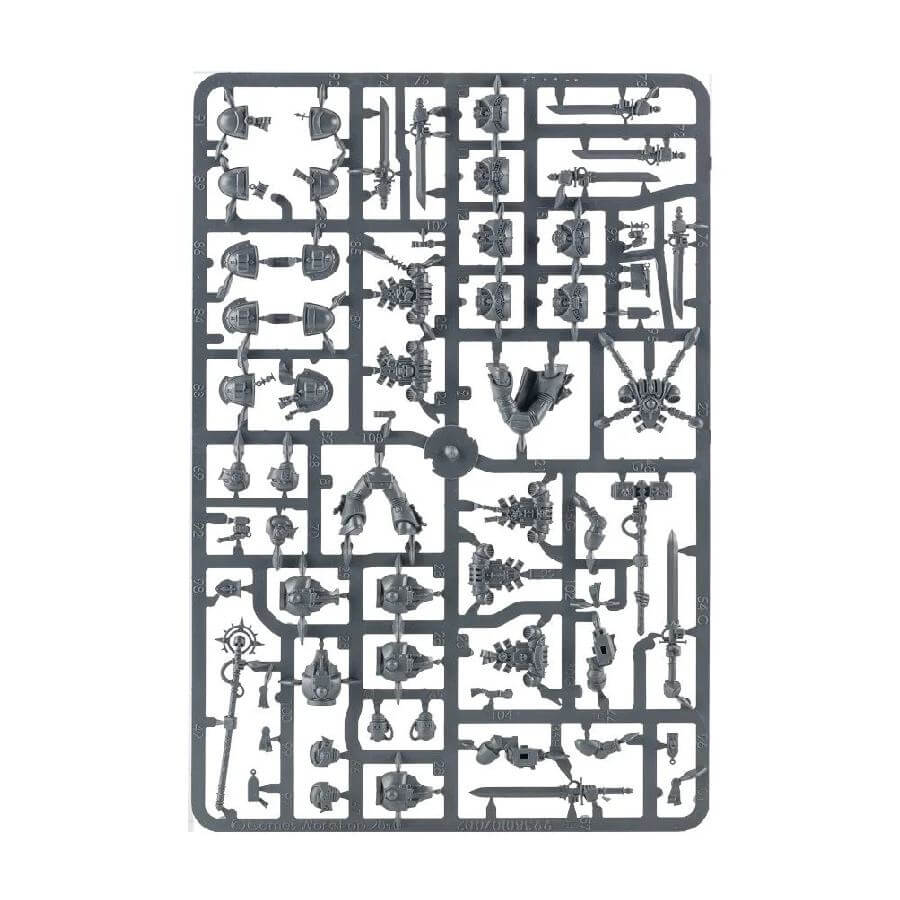
- x236 plastic components to create a Grey Knights Purgation Squad. The kit also allows for assembling the miniatures as a Grey Knights Interceptor Squad, a Grey Knights Purifier Squad or a Grey Knights Strike Squad.
- x10 Citadel 32mm Round Bases
How to paint the Purgation Squad
- Step 1: Primer Coat
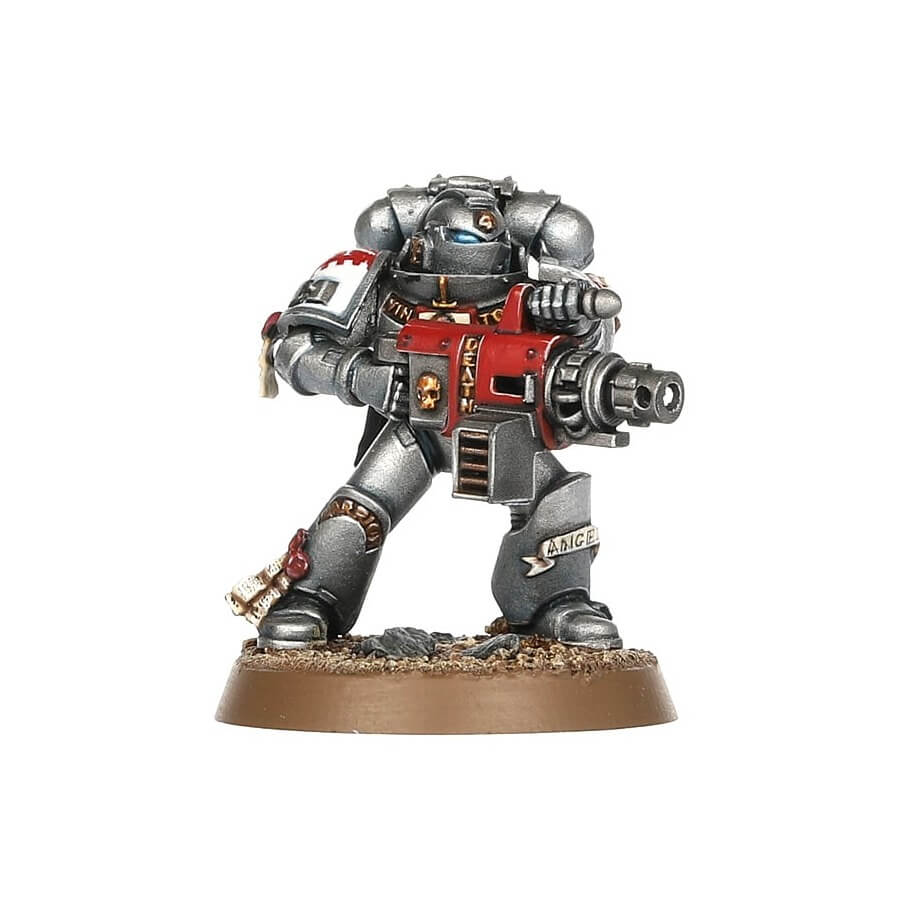
Begin by applying a thin, even coat of Chaos Black primer to all the miniatures in your Purgation Squad. Primer helps the paint adhere and gives a consistent base for your colors. - Step 2: Base Coat – Armor
With the primer in place, paint the squad’s armor with Leadbelcher. Ensure you cover all the armored areas evenly. - Step 3: Shading – Armor
Enhance the depth of the armor by shading it with Drakenhof Nightshade. Apply the shade into the recesses and crevices of the armor, allowing it to settle and create shadows. - Step 4: Layer – Armor
To add highlights and dimension to the armor, layer it with Stormhost Silver. Focus on the raised areas and edges for a polished look. - Step 5: Painting Weapons
For the squad’s weapons, use Mephiston Red for the red areas and Abaddon Black for the black parts, like handles. Ensure clean and even application for a crisp appearance. - Step 6: Painting Force Swords for a Glowing Effect (optional)
Begin by applying a base coat using Kantor Blue to establish a deep blue foundation. This will serve as the starting point for the radiant effect
Next, add shading with Drakenhof Nightshade to create shadowed areas on the force swords. This step adds depth and contrast.
Layer on Altdorf Guard Blue to bring out a brighter blue tone, focusing on the areas where the light would hit the swords the most.
Finally, to achieve a vibrant glow, apply a last layer of Baharroth Blue. This will make the force swords appear as if they’re emanating energy. - Step 7: Painting Helmet Lenses
Use the same glowing blue paint you used for the force swords (Baharroth Blue) to paint the helmet lenses. Apply it evenly to achieve a consistent glow effect. - Step 8: Painting the Unique Head for Purgator Justicar (optional)
For the distinctive head of the Purgator Justicar, follow these painting steps to bring it to life:
Begin by applying a base coat with Cadian Fleshtone to establish the foundation for the flesh tones.
To add depth and realism, use Reikland Fleshshade to shade the facial features, emphasizing the contours and creases.
Now, layer on Kislev Flesh for highlights, focusing on the prominent areas of the face where the light would naturally hit. - Step 9: Painting Parchments
Paint the squad’s parchments and scrolls with Screaming Skull. Be precise when painting these small details to make them stand out. - Step 10: Painting Bases
Consider using texture paints like Astrogranite Debris or Armageddon Dunes to create realistic terrain effects on the bases. Apply the chosen texture paint evenly across the bases. - Step 11: Varnishing
To protect your beautifully painted Purgation Squad, consider applying a varnish. A matte varnish like Stormshield provides a protective layer without altering the finish. Ensure the miniatures are entirely dry before varnishing.