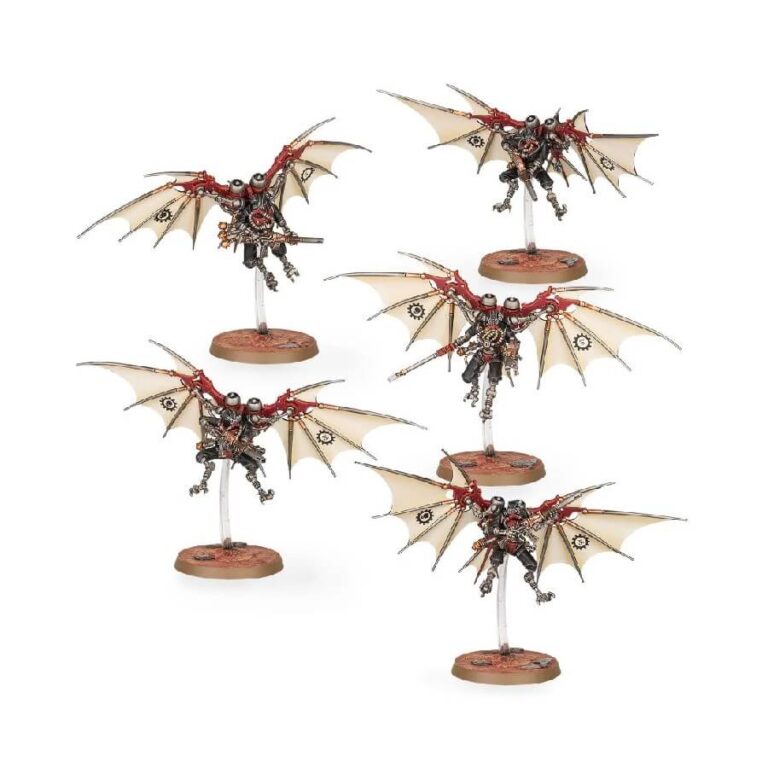
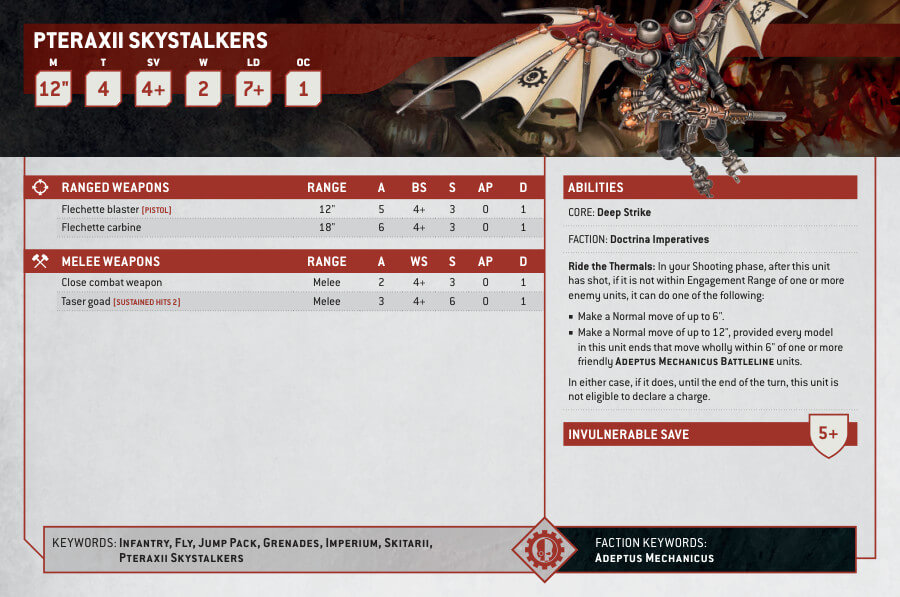
The Pteraxii, a specialized caste of cyborg warriors within the Adeptus Mechanicus, possess enhanced reflexes and unmatched agility due to their streamlined cognitive functions. Equipped with scapuli superior, additional limb attachments on their backs, and flight packs with thrusters and reactive surfaces, the Pteraxii serve various roles on the battlefield. Among them, the Skystalkers excel at finding strategic positions to engage their targets, whether they be isolated foes or menacing psyber familiars and servo-cherubim, employing a relentless barrage of razor-sharp flechettes.
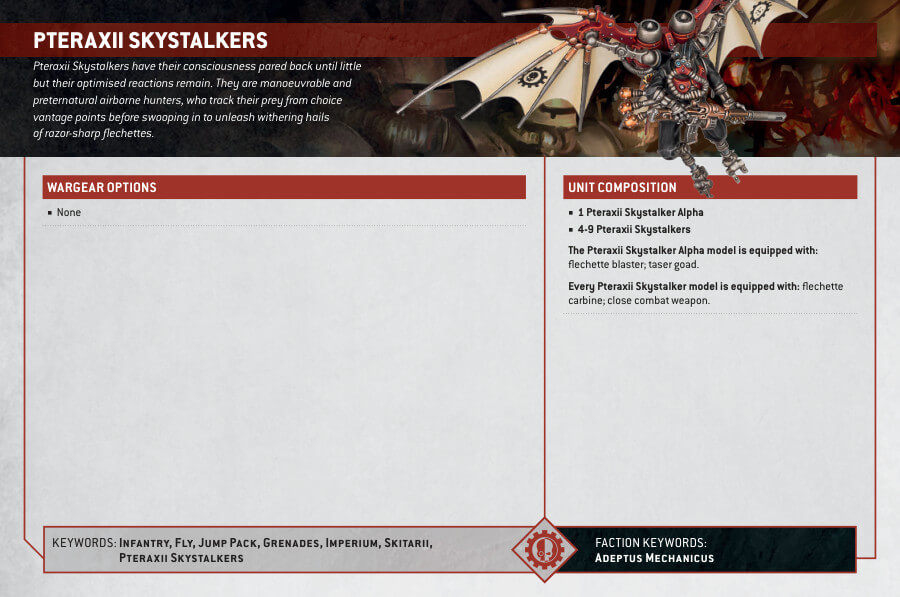
Armed with flechette carbines, the Pteraxii Skystalkers rain down a relentless storm of solid shot upon their adversaries from a secure distance. The Alpha of the unit, however, wields a more potent flechette blaster and taser goad. Their arsenal not only provides exceptional anti-infantry fire support but also includes arc grenades that can be dropped among the enemy ranks as they soar above, further increasing their tactical effectiveness.
Pteraxii Skystalkers Datasheets
What’s in the Pteraxii Skystalkers box
- x115 plastic components: This kit can alternatively be used to build a unit of Pteraxii Sterylizors instead, meaning that regardless of which unit you assemble, you’ll end up with plenty of spare components for customising your collection.
- x5 Citadel 40mm Round Bases and flying stems.
- x1 Adeptus Mechanicus transfer sheet
How to paint the Pteraxii Skystalkers Set
- Step 1: Prepare the Miniatures
Clean the Pteraxii Skystalkers using warm soapy water to remove any residue or mold-release agents. Once dry, assemble the miniatures according to the instructions provided in the kit. - Step 2: Prime the Miniatures
Apply a thin and even coat of primer to the assembled miniatures. Priming helps the paint adhere better and provides a consistent base color. A recommended primer color is Chaos Black Spray. - Step 3: Basecoat the Armor
Using a medium-sized brush, apply a base coat of Leadbelcher to the Skystalker armor. Ensure even coverage while avoiding the smaller details. - Step 4: Paint the Flight Pack
Using a smaller brush, paint the flight pack with Abaddon Black. Take care to paint around any adjacent areas that should remain in a different color. - Step 5: Highlight the Armor
Using a lighter silver color like Ironbreaker, carefully apply highlights to the raised edges and contours of the armor. This adds depth and definition to the miniatures. - Step 6: Paint the Weapons
Use Mephiston Red to paint the weapons, such as the flechette carbines and the Alpha’s flechette blaster. Apply multiple thin coats for smooth and vibrant coverage. - Step 7: Detail the Miniatures
Using a fine brush, add additional details such as the visors, straps, and decorative elements with appropriate colors. Averland Sunset works well for visors, and Retributor Armor can be used for decorative accents. - Step 8: Add Base Colors
Paint the base of each miniature with Stirland Mud or any desired base color. You can add texture or additional details to the base using Citadel texture paints, such as Astrogranite Debris or Armageddon Dust. - Step 9: Apply Wash
Using Nuln Oil, carefully apply a wash over the entire miniature. This will darken recesses and enhance the details, adding depth to the overall appearance. - Step 10: Highlight the Flight Pack
Using Dawnstone, highlight the flight pack by dry brushing the edges and raised surfaces. This will create a worn metallic effect. - Step 11: Varnish the Miniatures
Once the paint has fully dried, protect your work by applying a varnish. Munitorum Varnish is a recommended choice to preserve the paint and add a protective layer. - Step 12: Basing
Finish off the miniatures by basing them. You can add grass, rocks, or other scenic elements to the base using PVA glue. Astrogranite or Stirland Battlemire, can be applied to create realistic ground textures.

