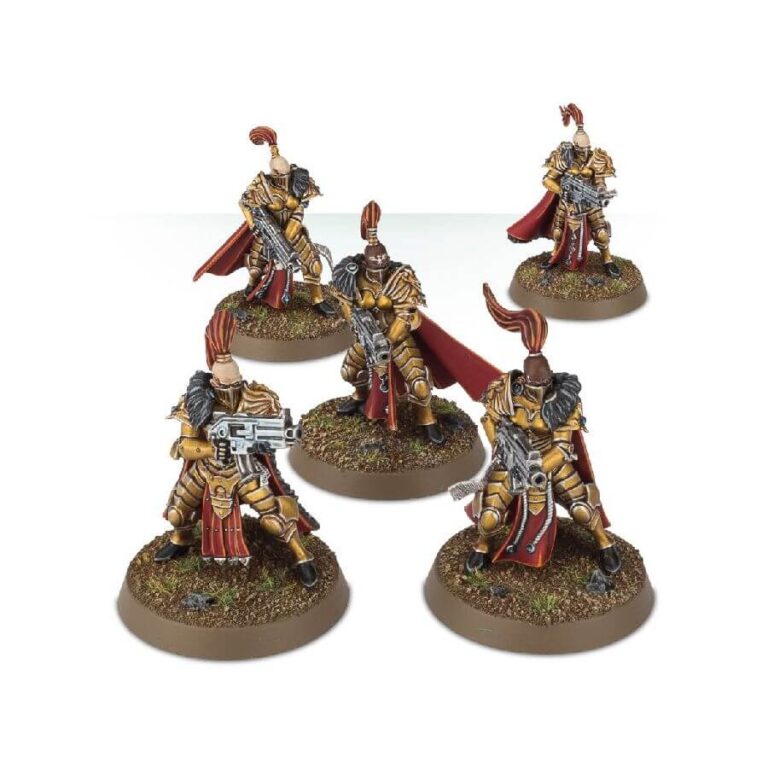
The Silent Sisterhood’s backbone lies in its formidable Prosecutors, who possess unrivaled prowess in both offense and defense. These exceptional warriors are not ordinary soldiers; they are invaluable assets, living weapons capable of disrupting the minds and souls of those tainted by Chaos. With their tightly coordinated movements, the Prosecutors advance as a cohesive unit, their Umbra-pattern bolters resounding with a thunderous roar that surpasses any mere verbal challenge.
This multipart plastic kit provides all the components needed to assemble a 5-model Prosecutor Squad, comprising the elite warriors of the Silent Sisterhood. Armed with potent Umbra-pattern bolters, these warriors excel in long-range combat, delivering precise and devastating firepower. Additionally, one model can be built as a Sister Superior, distinguished by her unique loincloth, shoulder pad, seal, and a choice of two heads, embodying leadership within the squad.
For added versatility, the kit can also be assembled as Vigilators, specialized in close-quarters combat, wielding lethal executioner greatswords, or as Witchseekers, equipped with flamers for devastating assaults against multiple targets. The kit includes six executioner greatswords, five Umbra-pattern boltguns, and five flamers, ensuring a variety of loadout options to suit different battlefield scenarios.
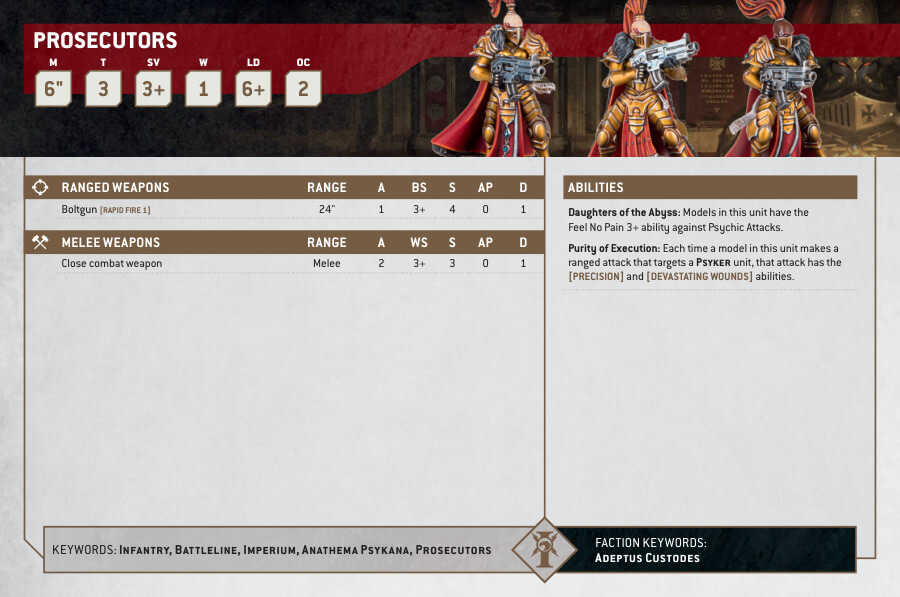
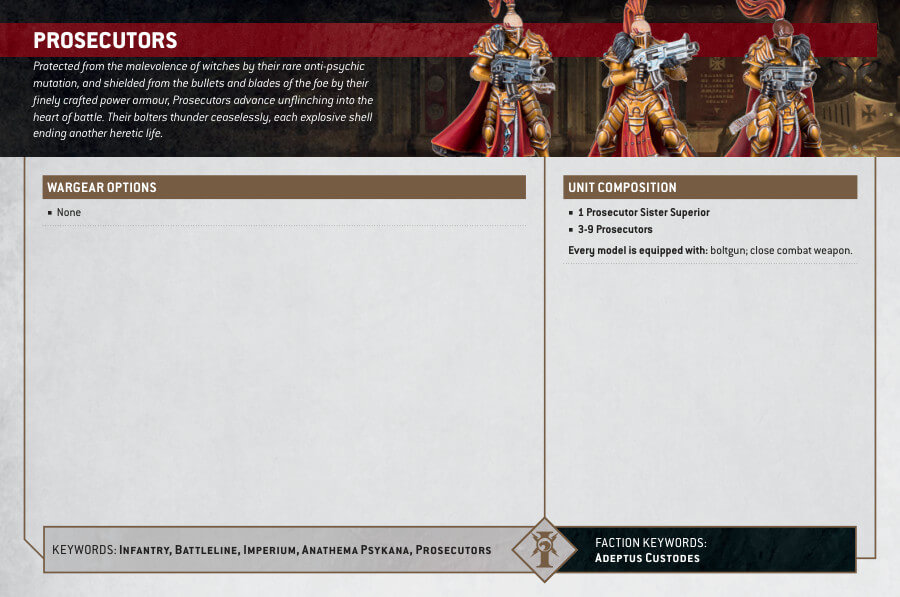
Prosecutor Squad Datasheets
What’s in the Prosecutor Squad box
- x67 plastic components: all the necessary parts to assemble the Prosecutor Squad.
- x5 Citadel 32mm Round bases: The kit comes with 5 round bases, specifically Citadel 32mm Round bases, which serve as the sturdy foundation for each model in the Prosecutor Squad.
- x1 Burning of Prospero transfer sheet: Included in the kit is a transfer sheet featuring designs and symbols related to the Burning of Prospero, adding additional thematic options for customizing your Prosecutor Squad. These transfers can be applied to the models armor, shields, or other surfaces to enhance their visual appeal and tie them to the rich lore of the Warhammer 40,000 universe.
How to paint the Prosecutor Squad set
- Step 1: Basecoat the models
Start by applying a basecoat to the models using a suitable color, such as a light gray or bone color. This will provide a solid foundation for the subsequent layers of paint. For example, you can use Corax White or Ushabti Bone as a basecoat. - Step 2: Paint the armor
Using a medium-sized brush, carefully paint the armor of the Prosecutors with your chosen color. This could be a metallic shade like silver or a deep blue, depending on your desired look. For instance, you can use Runefang Steel for a metallic finish or Kantor Blue for a blue armor scheme. - Step 3: Highlight the edges
With a smaller brush, apply a lighter color to the edges of the armor to create highlights and add depth. This technique, called edge highlighting, can be done with a lighter shade of the base color. For example, you can use Stormhost Silver for metallic edges or Altdorf Guard Blue for blue armor. - Step 4: Paint the details
Use a fine brush to paint the smaller details of the models, such as the faces, weapons, and accessories. Take your time and be precise to bring out the intricate features. You can use various colors for different details, such as Screamer Pink for the lips, Leadbelcher for the weapons, and Retributor Armor for the gold accents. - Step 5: Apply wash for shading
Apply a wash, such as a dark brown or black, over the painted areas to add shading and depth. This will help to bring out the details and create a more realistic look. For example, you can use Agrax Earthshade or Nuln Oil for shading the armor and other areas. - Step 6: Paint the bases
Finish off the models by painting the bases. You can use various techniques and colors to create a suitable environment for your Prosecutors. For example, you can paint the base with a brown color to represent earth or use a technical paint to simulate rocky terrain. Add additional details like grass tufts or small rocks for added realism. - Step 7: Varnish the models
Once the paint has dried, apply a layer of varnish to protect the models and give them a finished look. You can use a matte or gloss varnish depending on your preference.

