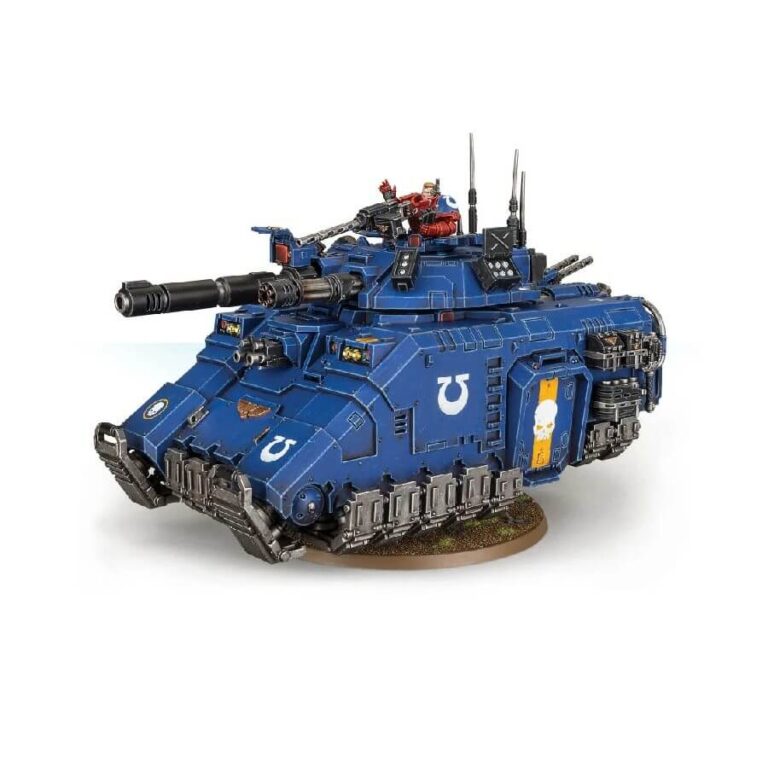
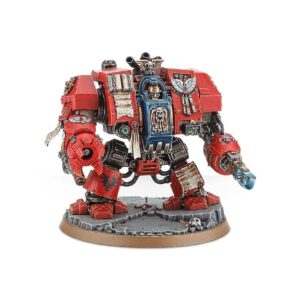
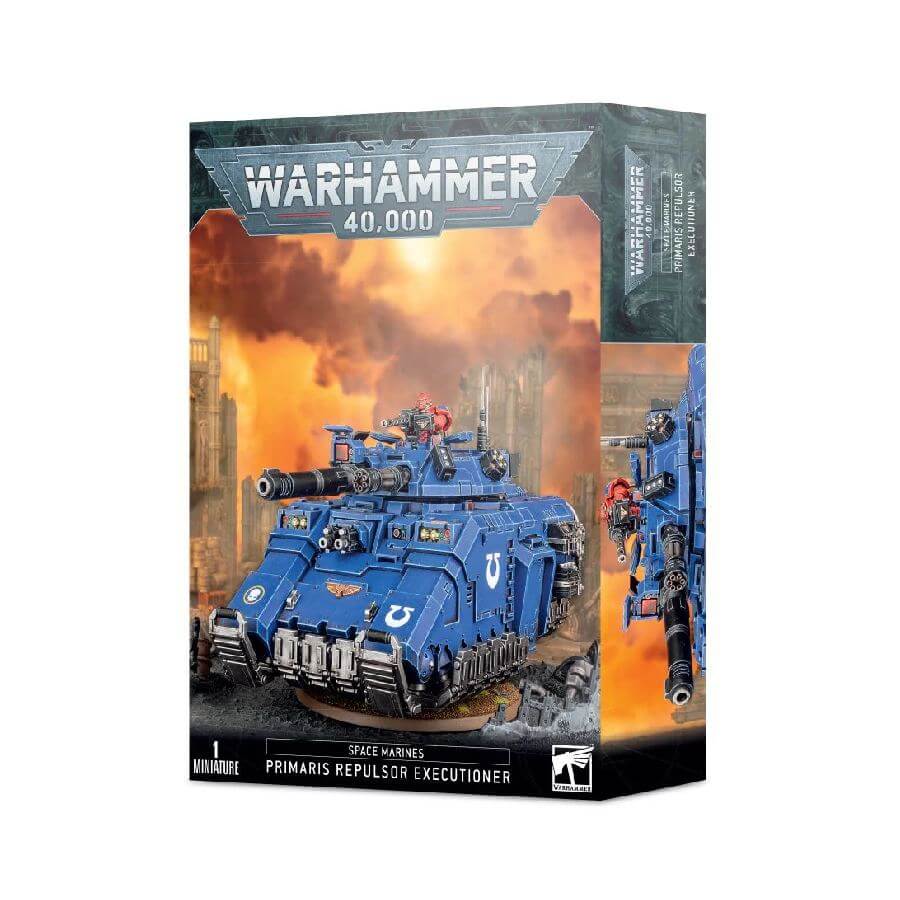
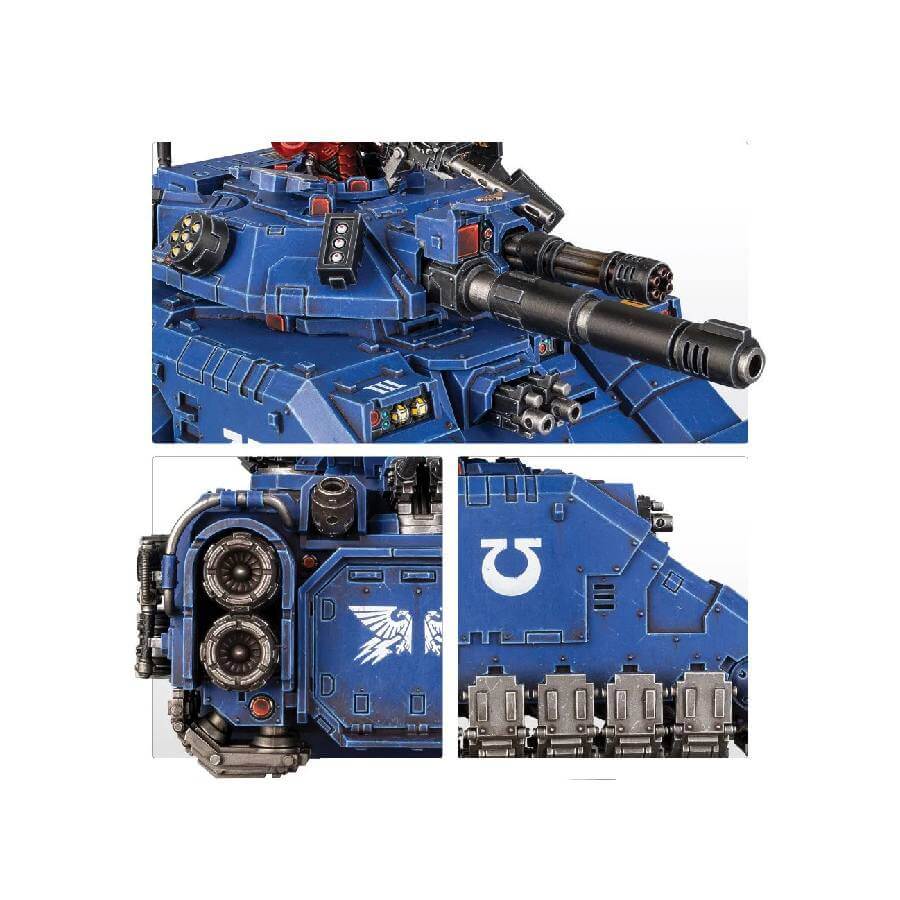
The Repulsor Executioner is a heavily armed battle tank often used by Space Marine Chapters as transports for Hellblasters and other specialist Primaris squads. It is equipped with a primary turret-mounted weapon, a choice between a macro plasma incinerator or heavy laser destructor, supported by a coaxial heavy onslaught gatling cannon, as well as secondary weapons such as krakstorm grenade launchers, storm bolters, twin Icarus ironhail heavy stubber, and an ironhail heavy stubber. Defensive auto launchers and an Icarus rocket pod are also available to supplement the tank’s offensive capability.
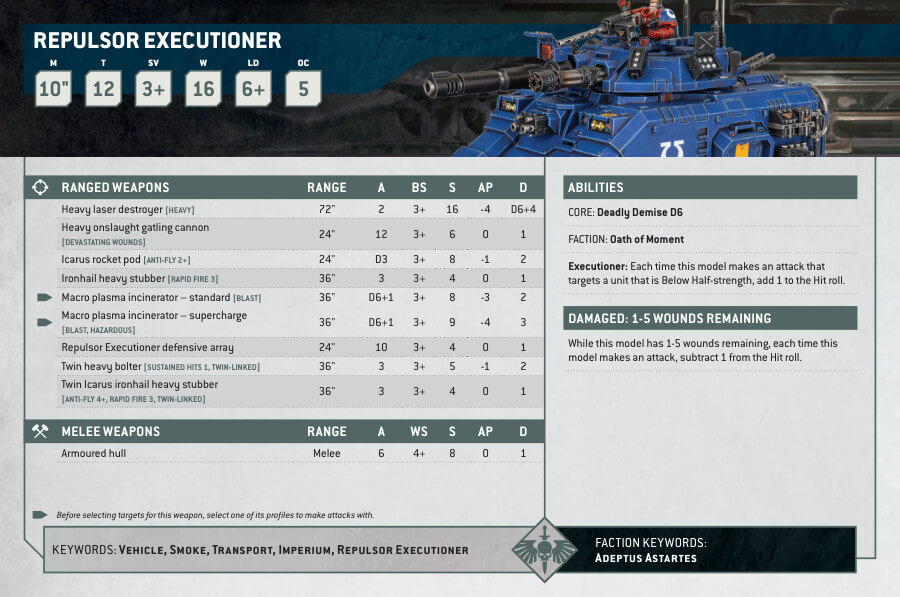
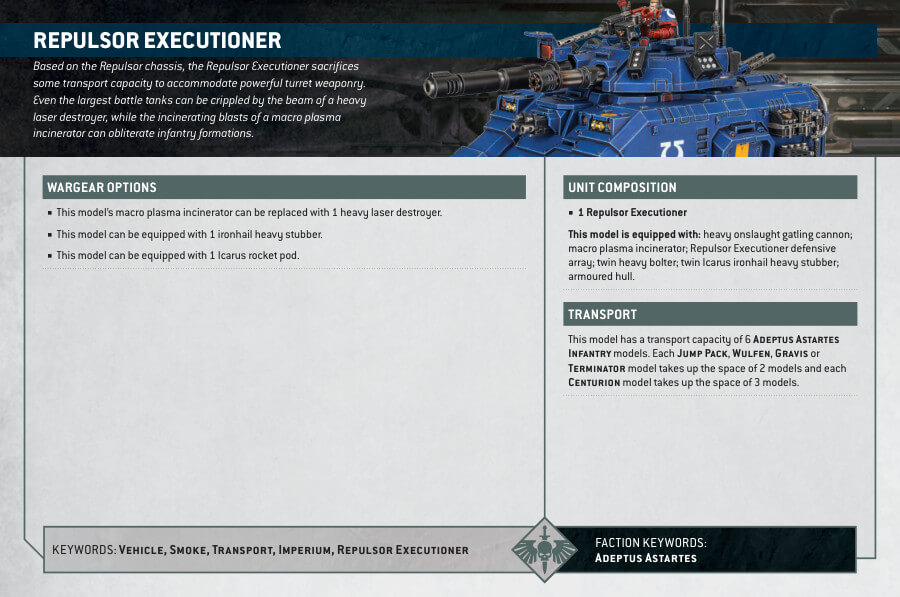
Primaris Repulsor Executioner Datasheets
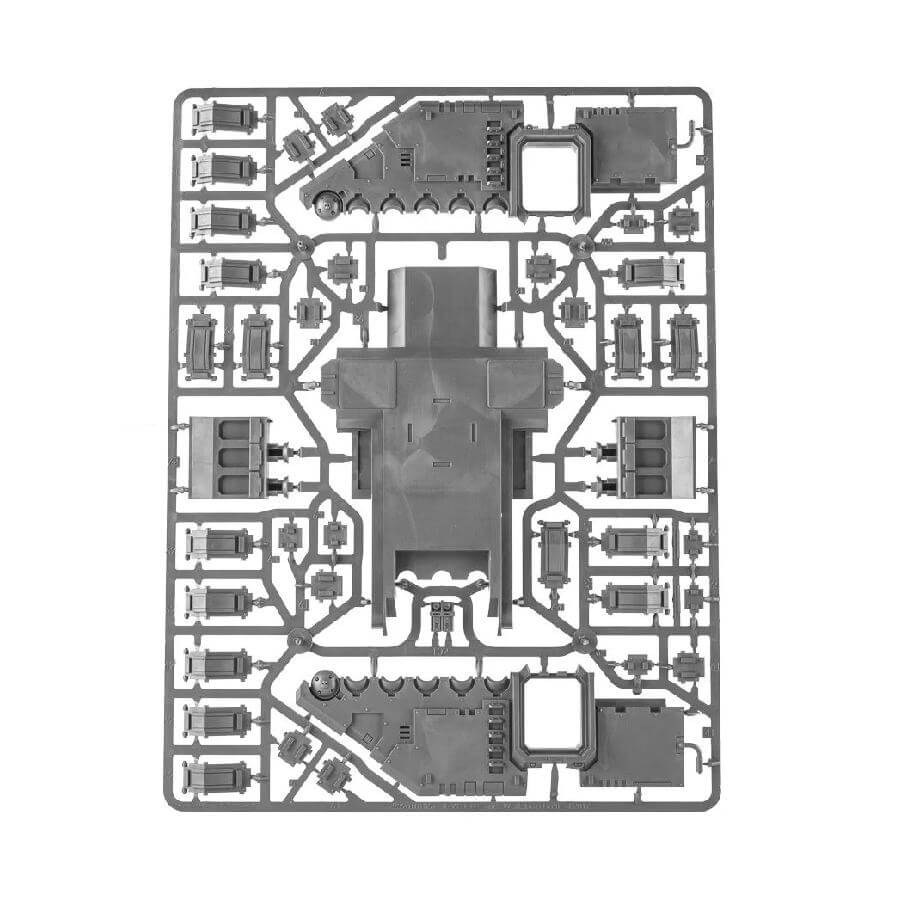
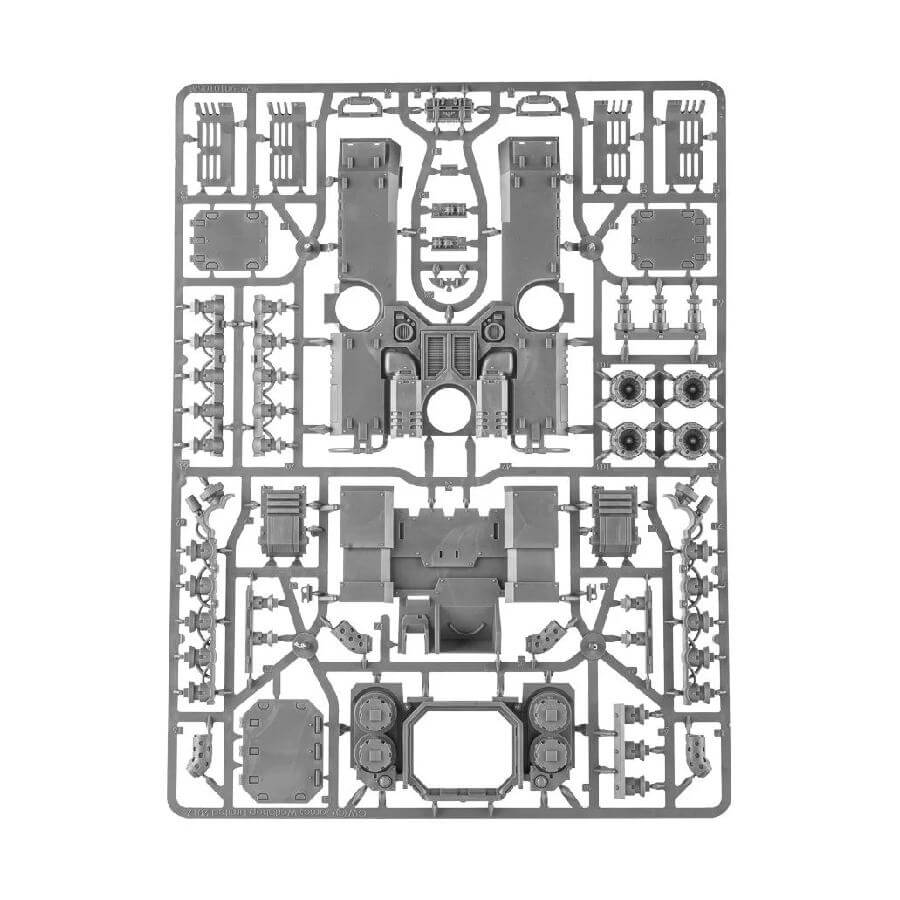
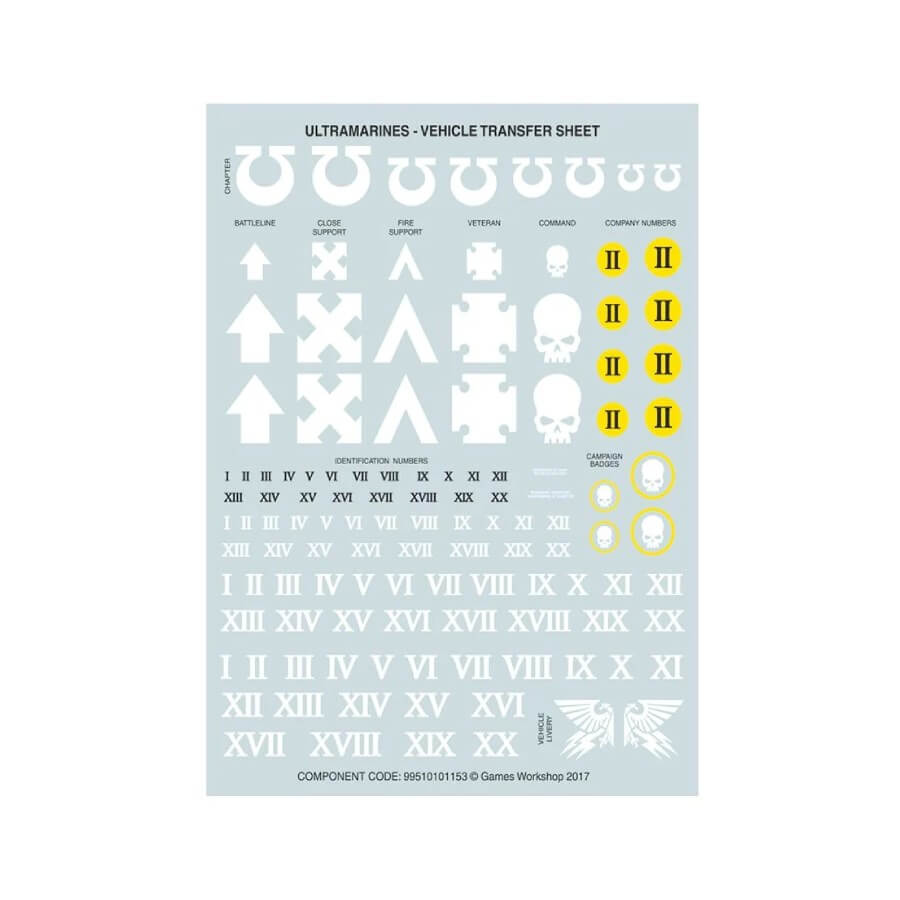
What’s in the Primaris Repulsor Executioner box
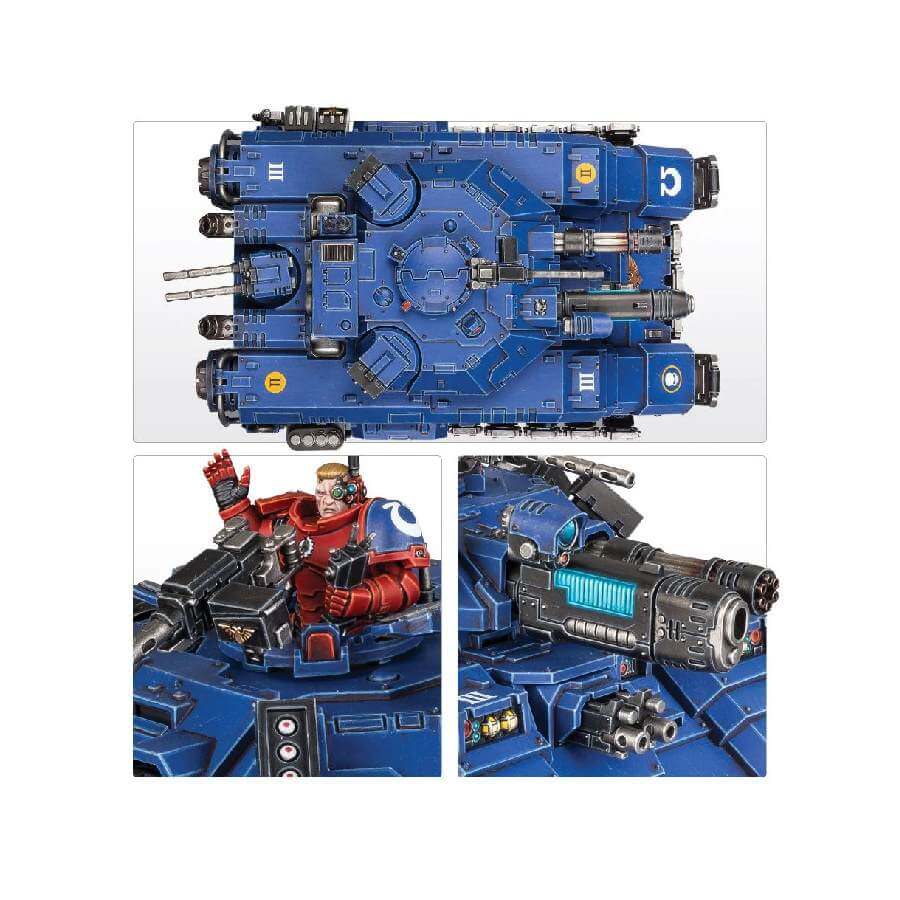
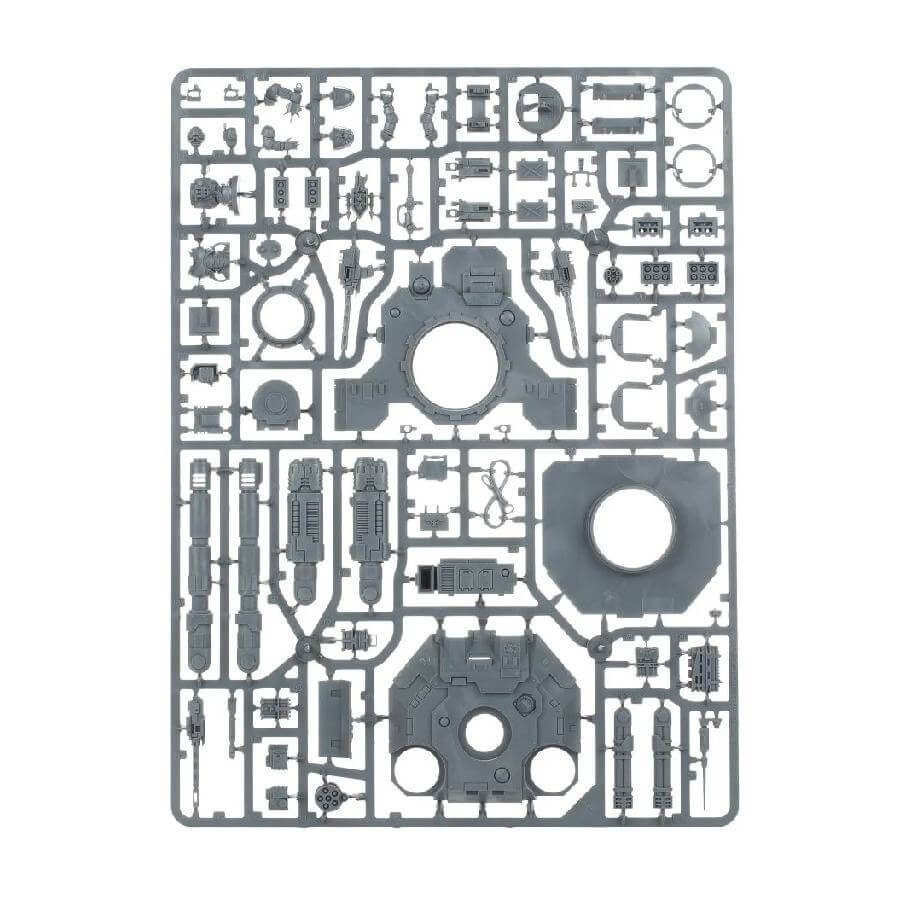
- x150 components that make the Primaris Repulsor tank. The kit can be assembled with or without a gunner, who can be built scanning with an auspex or with his hands on the trigger of the pintle-mounted ironhail heavy stubber.
- x8 pieces of optional stowage and two antennae that can be used to decorate the vehicle as desired.
- x1 Citadel 100mm Round Base
- x1 clear hover stand, which can be set at an angle, adding a certain degree of camber to your model.
How to paint the Primaris Repulsor Executioner
- Step 1: Prime Your Model
Begin by priming your model with a thin, even coat of Chaos Black primer. This provides a clean canvas for your paints and ensures proper adhesion. - Step 2: Base Coat the Body
Select Macragge Blue for the base color of the main body. Apply this paint evenly, covering the entire surface. Multiple thin coats are better than one thick coat for a smooth finish. - Step 3: Apply Shading
To deepen shadows and enhance details, generously apply Nuln Oil shade over the entire blue body. Ensure the shade settles into the recesses and corners, and let it dry thoroughly. - Step 4: Layer the Blue
Using Calgar Blue, layer the raised areas of the model. This step adds highlights and dimension to your model, creating a visually striking effect. - Step 5: Edge Highlighting
For an extra level of detail, use Fenrisian Grey to carefully highlight the edges of the blue sections. This step adds sharpness and definition to the model. - Step 6: Metallic Parts – Silver
Paint the propulsors, antennas, and other metallic details with Ironbreaker. Apply this metallic paint evenly to achieve a shiny silver finish. - Step 7: Metallic Parts – Gold
Switch to Retributor Armour to paint gold emblems and other small metallic details. Take your time to make these elements stand out. - Step 8: Detail the Weapons – Silver
With a steady hand, use Ironbreaker to highlight the edges and details of the black-painted weapons. This gives them a metallic look without overwhelming the black. - Step 9: Weathering Effects
To add battle-worn realism, use Typhus Corrosion to simulate rust and grime on the model’s edges and corners. Apply sparingly for a weathered appearance. - Step 10: Apply Texture Paint to the Base
Choose a texture paint like Agrellan Earth or Astrogranite Debris to add depth and realism to the base of your model. Apply the texture paint evenly across the base, creating the desired terrain effect. Let it dry completely. - Step 11: Matte Varnish (Optional)
For an overall matte finish and to protect your paint job, consider applying a matte varnish like Munitorum Varnish. This step is especially useful if you plan to handle your model frequently or use it in games.