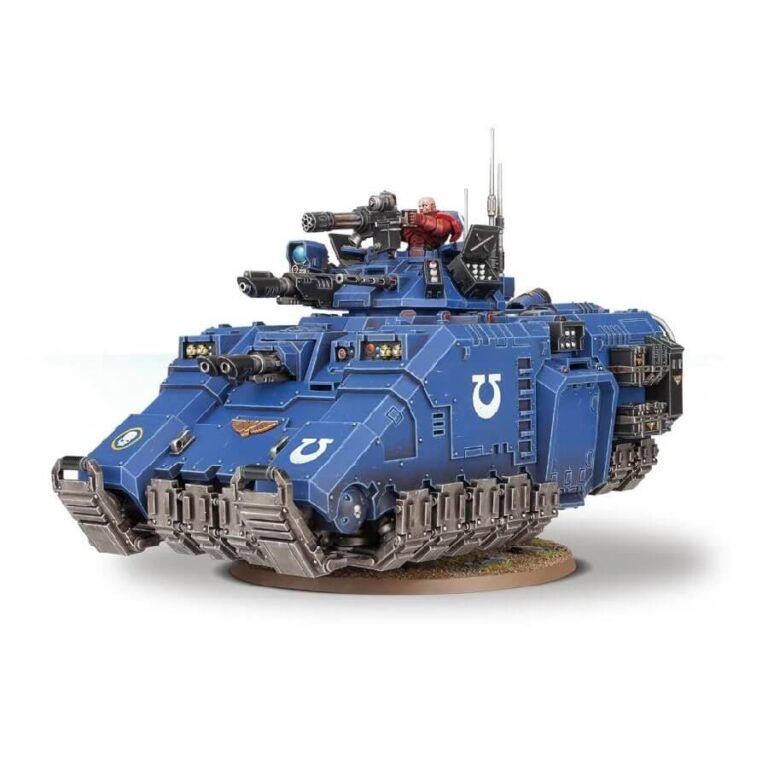
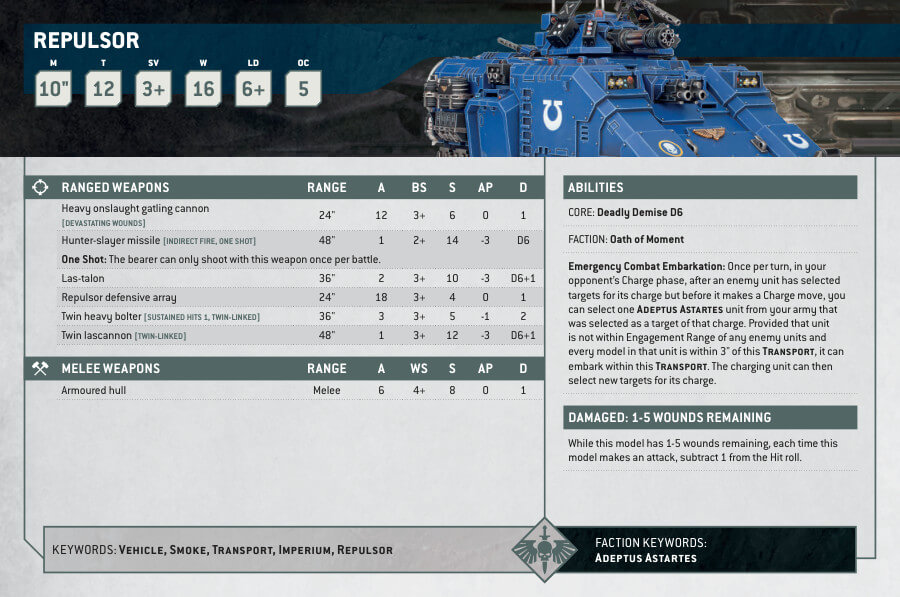
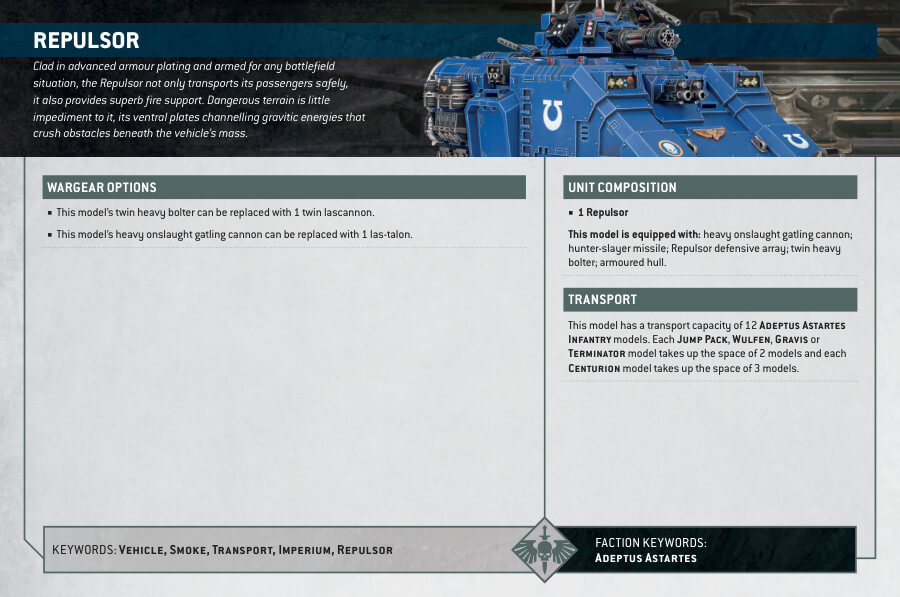
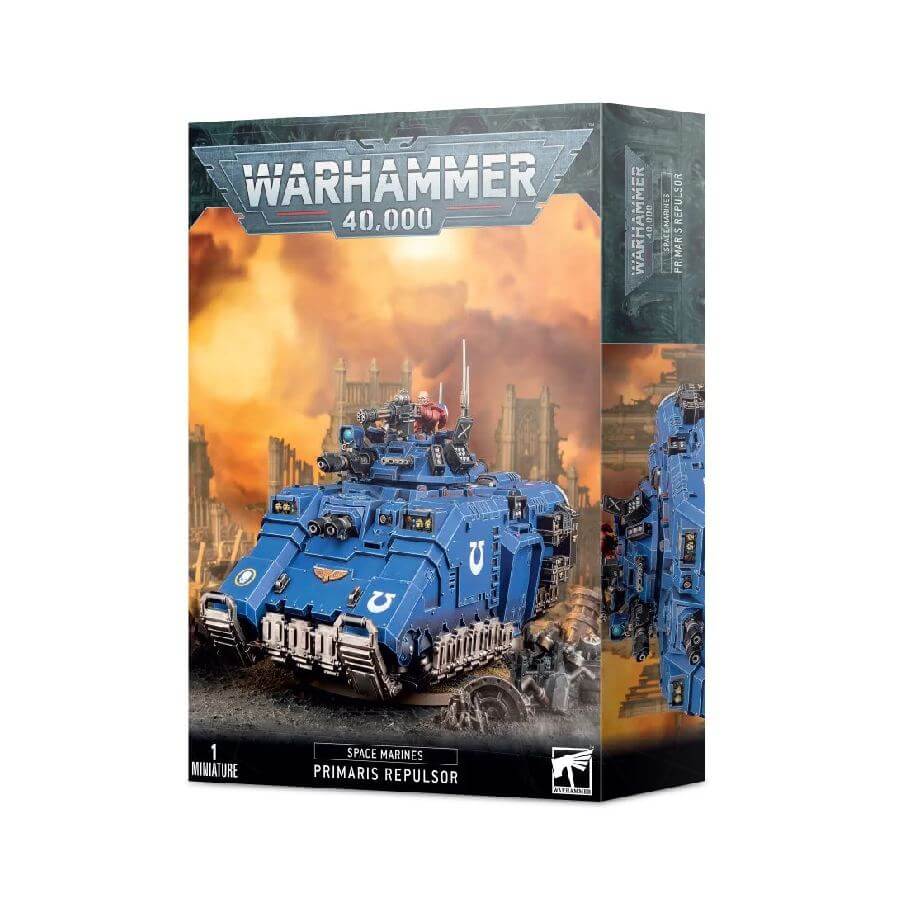
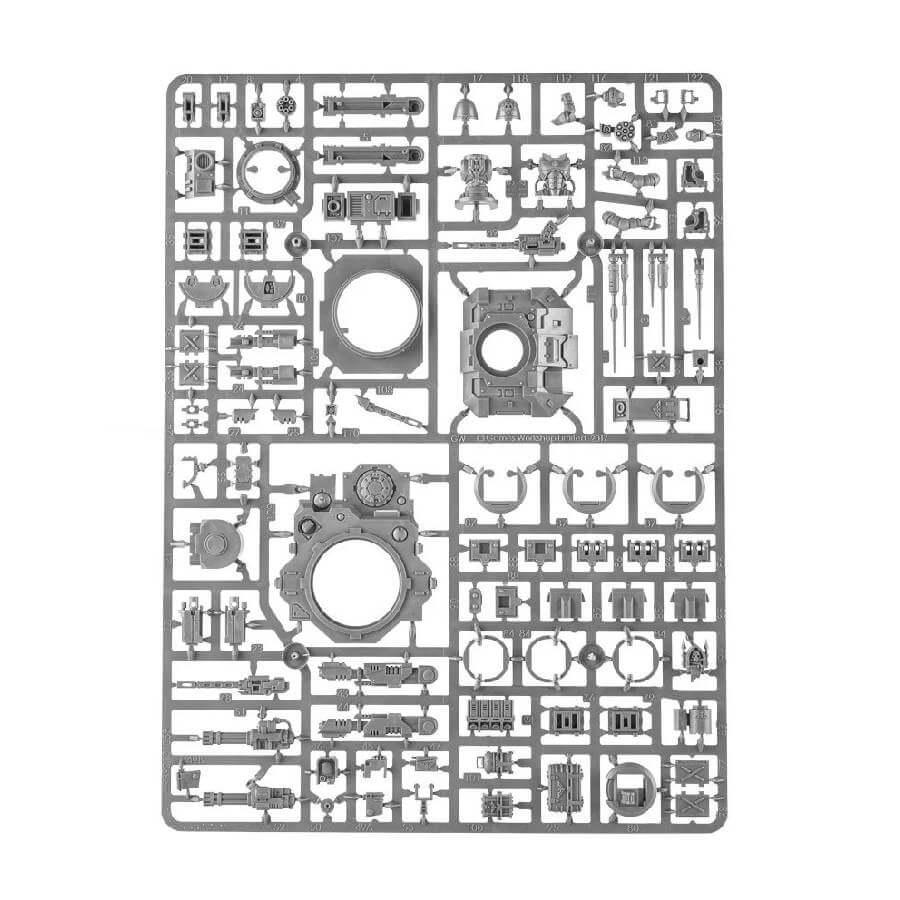
This multi-part plastic kit contains all the necessary components to assemble a Space Marines Primaris Repulsor that can carry up to 10 soldiers into battle while also providing them with a vast array of weaponry to defend themselves. The Repulsor has various options, including a turret-mounted heavy onslaught gatling cannon that can be swapped with a las-talon, a front-mounted twin heavy bolter that can be replaced with a twin lascannon, a pintle-mounted ironhail heavy stubber that can be replaced with an onslaught gatling cannon, and a rear-mounted Icarus ironhail heavy stubber that can be swapped with an Icarus rocket pod, storm bolter, or fragstorm grenade launcher. Additionally, it has two storm bolters that can be replaced with two fragstorm grenade launchers or Auto Launchers, which can also be replaced with two fragstorm grenade launchers.
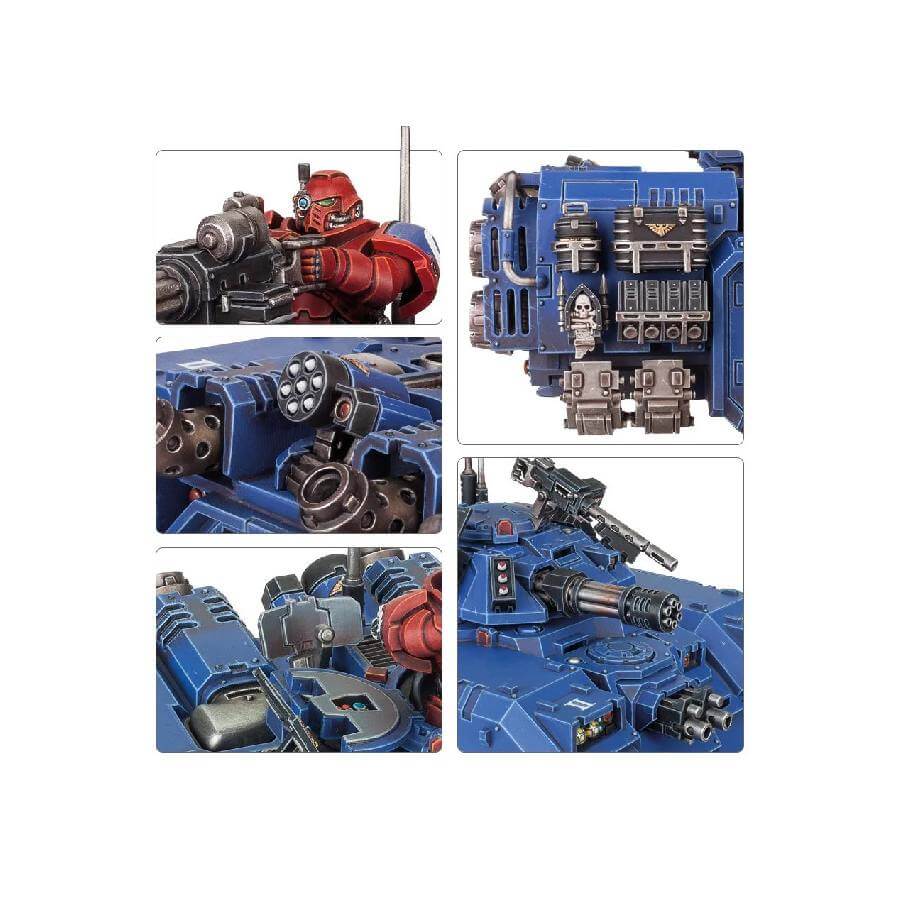
The Repulsor also features a variety of modelling options, including six stowage assemblies that can be configured in countless different ways with cases of grenades and rocket pods modelled open or closed. The top hatch can be modelled either open or closed, and if the open option is chosen, a Tech-marine can be placed in the hatch either operating the pintle-mounted weapon or pointing toward the foe. The Repulsor also boasts various details expected from an Imperial craft, including lights, radar arrays, huge exhaust vents, and an aquila displayed prominently at the fore.
Primaris Repulsor Datasheets
What’s in the Primaris Repulsor box
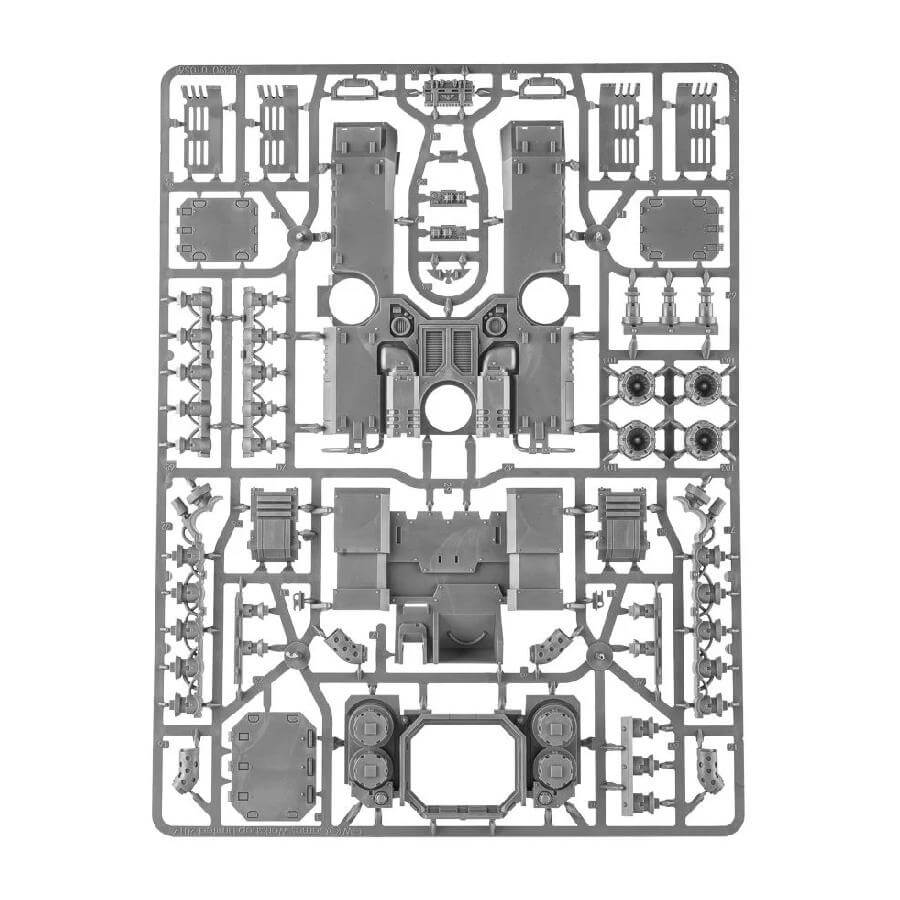
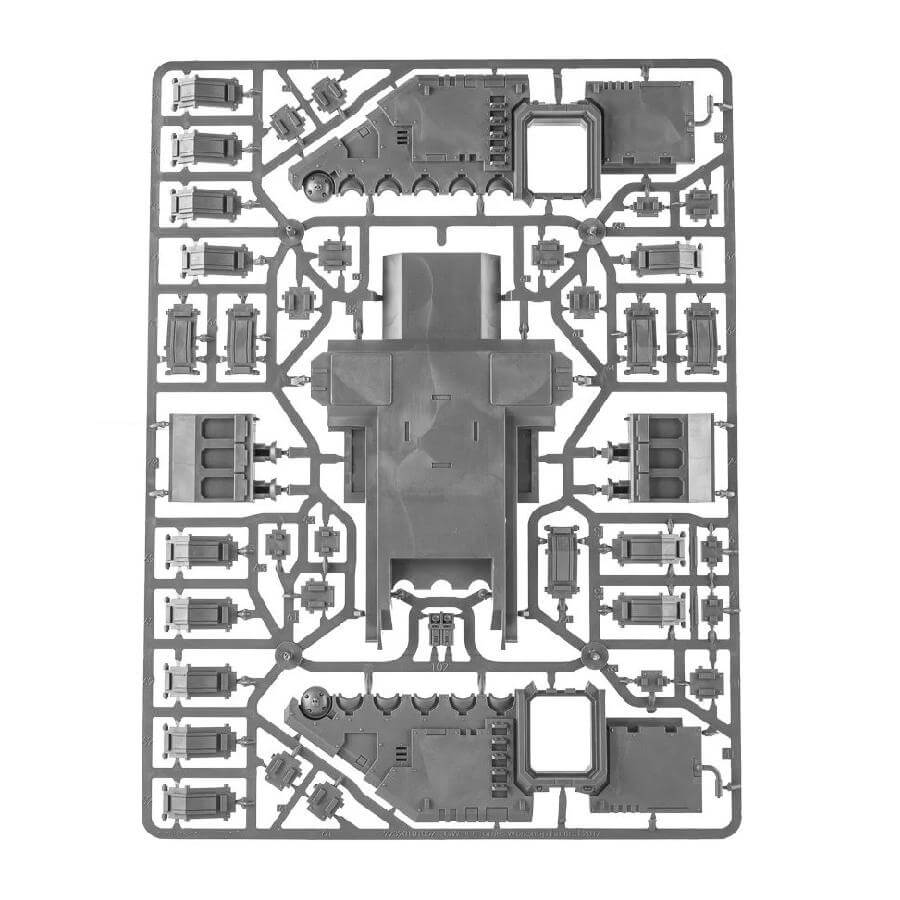
- x168 plastic components that make the Primaris Repulsor.
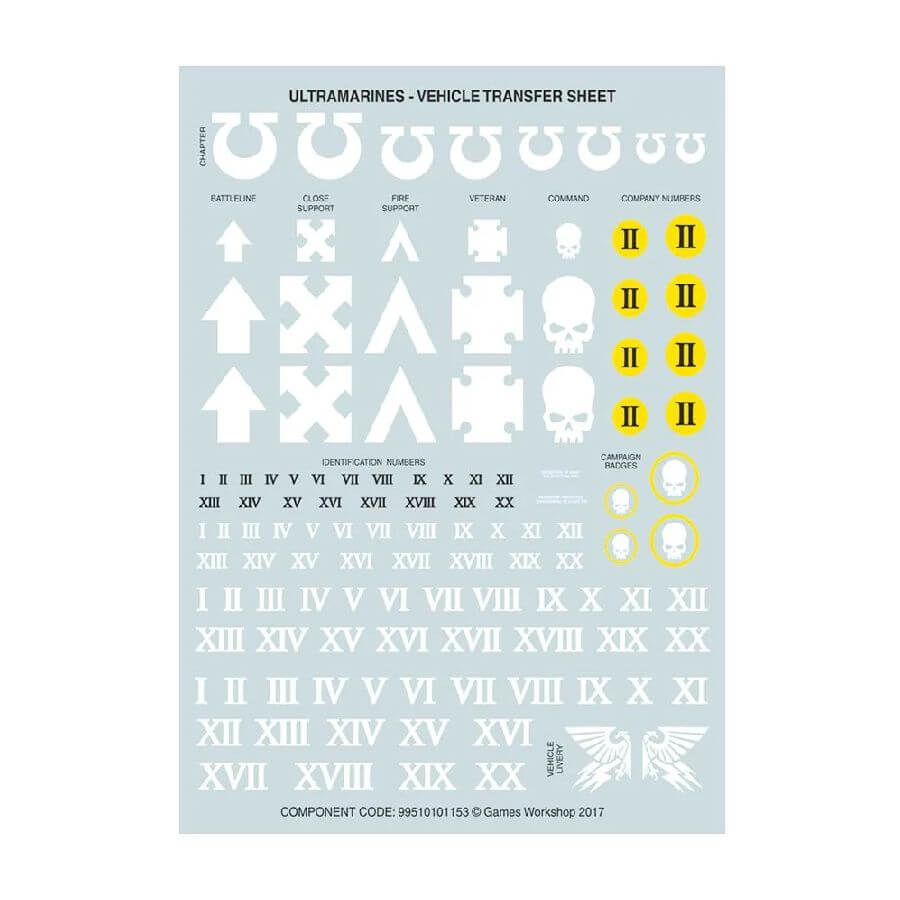
- x1 transfer sheet to customize the vehicle’s decals
- x1 Citadel 100mm Round base with a clear hover stand. The clear hover stand can be set at an angle to give the model a dynamic look. Additionally, the hover stand adds camber, which is the tilt of the wheels or the entire vehicle towards one side or the other, depending on the angle set.
How to paint the Primaris Repulsor
- Step 1: Priming – A Strong Foundation
Let’s begin by priming your Primaris Repulsor. Apply Chaos Black primer to create a solid base for your paint. - Step 2: Base Coating – The Armor Panels
For the armor panels, choose a bold color like Ultramarines Blue. This will serve as your base coat. Apply it evenly across all the armor sections. - Step 3: Shading – Adding Depth
To create depth on the armor, apply a shade. Nuln Oil is a good choice. Focus on the recessed areas, like the gaps between panels. This shading adds realism. - Step 4: Layering – Brightening the Blue
Now, layer the armor with a lighter blue, like Altdorf Guard Blue. Concentrate on the edges and raised areas, leaving the darker blue in the shadows. Layering gives your model depth and definition. - Step 5: Trims and Details – Adding Elegance
Identify the gold trims and other details, such as symbols and emblems. Paint them with Retributor Armor to make them shine like a coin. This adds an elegant touch to your Repulsor. - Step 6: Weapons – Deep Black
For the weapons, like the heavy Onslaught Gatling Cannon or Icarus Rocket Pod, choose a strong black, like Abaddon Black, as your base coat. Ensure a smooth application. - Step 7: Layering Weapons – Adding Dimension
Layer the black weapon parts with a lighter gray, such as Eshin Grey. Focus on edges and raised areas. Layering adds depth and makes the weapons more striking. - Step 8: Lights and Sensors – A Splash of Color
For the lights and sensors, like those on the turret, use vibrant colors like Mephiston Red for a striking contrast. These lights make your Repulsor look advanced and powerful. - Step 9: Metallic Parts – Metallic shine
Focus on the metallic parts, such as the propulsors or other mechanical components. Paint them with a metallic color like Leadbelcher. Ensure an even application. - Step 10: Layering Metallics – Adding Depth
Layer the metallic parts with a slightly lighter metallic shade, like Ironbreaker. Concentrate on the raised areas to make them shine. This layering technique adds dimension to the mechanical details. - Step 11: Shading Metallics – Realistic Shadows
Apply a shade, such as Nuln Oil, to the metallic parts. Focus on the recesses and corners. This shading adds a touch of realism and depth to the metallic components. - Step 9: Texture Paints – Realistic Terrain
Enhance the base of your Repulsor with textured paints. Consider Martian Ironearth and Agrellan Badland for a realistic terrain effect. This adds depth and context to your model. - Step 10: Varnish – Protection and Shine
To protect your beautifully painted Repulsor and give it a polished finish, apply a varnish of your choice. This not only safeguards your work but also enhances specific areas, making them shine.