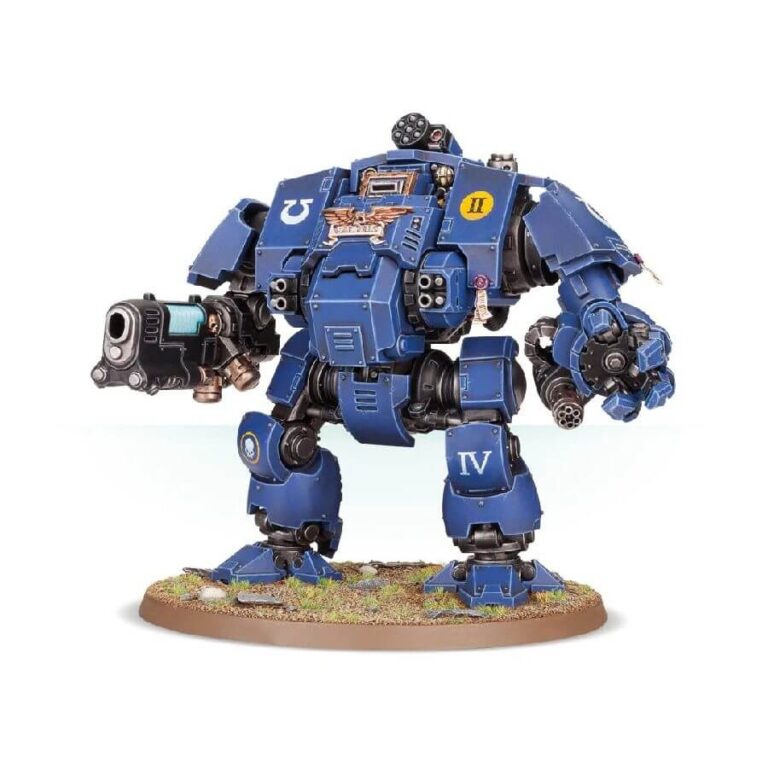
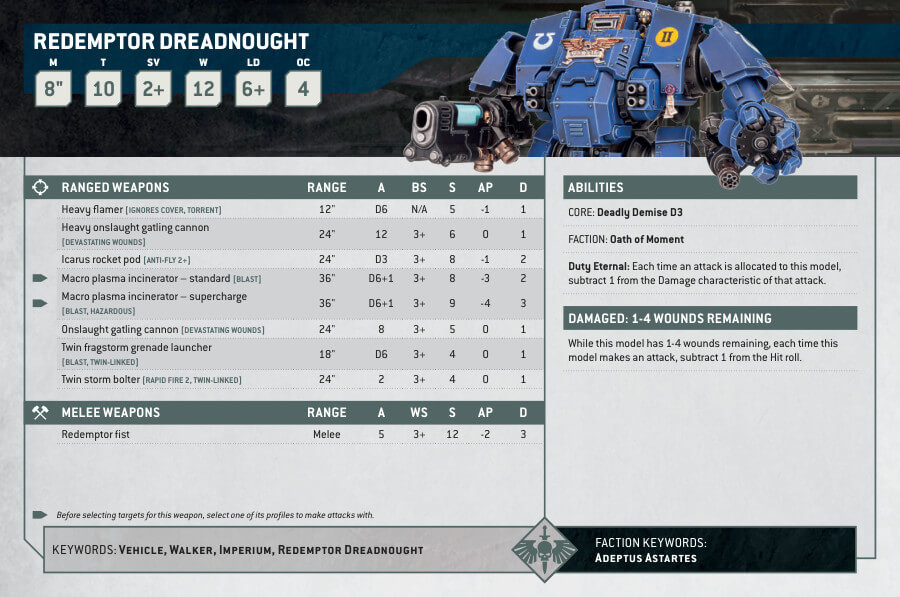
The Primaris Redemptor Dreadnought is a towering Space Marines war machine that can crush through enemy lines with ease, thanks to its hyper-dense reactors and sophisticated fibre bundles. This multi-part plastic kit includes all the components required to assemble this aggressive-looking model, complete with a choice of weapons on both arms and chest-mounted fragstorm grenade launchers or storm bolters. The model also features a pivoting chest armour, which can be opened to reveal the sarcophagus within, and detachable pegs on the waist, arms, and legs for greater posing options. Perfect for the adventurous hobbyist looking to add a powerhouse to their gaming table.
Primaris Redemptor Dreadnought Datasheets
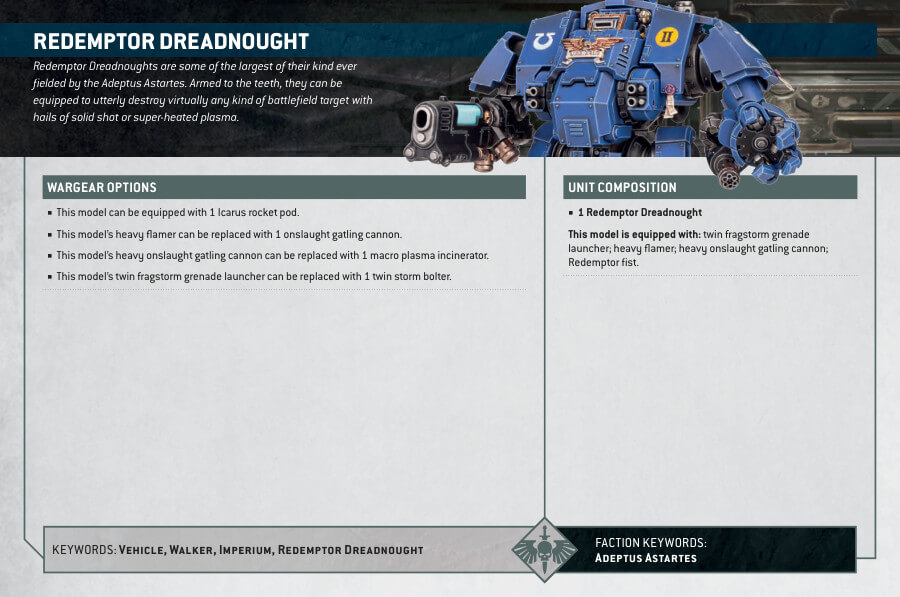
What’s in the Primaris Redemptor Dreadnought box
- x109 plastic components that make The Primaris Redemptor Dreadnought.
- x1 Citadel 90mm Round base
- x1 transfer sheet
How to paint the Primaris Redemptor Dreadnought
- Step 1: Priming – A Solid Start
Commence by priming your Primaris Redemptor Dreadnought with Chaos Black primer. This essential step provides a solid base for your paint to adhere effectively. - Step 2: Armor Panels – Mighty Blue
For the armor panels, pick up Macragge Blue. This bold blue is the base color for your Dreadnought’s armor. Apply it evenly across all the armor sections. - Step 3: Shading – Adding Depth
To create depth on the armor, apply a shade. You can choose a shade like Nuln Oil. Concentrate on the recessed areas, allowing shadows to form naturally. This shading technique adds a touch of realism. - Step 4: Layering the Armor – Brighter Blues
Now, layer the armor with a brighter blue like Altdorf Guard Blue. Focus on the raised areas and edges, leaving the darker blue in the recesses. Gradually layer for a vibrant and dimensional appearance. - Step 5: Emblems – Golden Details
Identify the emblems on your Dreadnought, and paint them with Retributor Armour. This lustrous gold adds an elegant touch to your model. - Step 6: Weapons – Deep Black
For the weapons, like the heavy Gatling cannon or the onslaught gatling cannon, choose Abaddon Black as your base coat. Ensure even application and precision. - Step 7: Layering the Weapons – Adding Dimension
Layer these black weapon parts with Eshin Grey. Focus on edges and raised areas. This layering technique adds dimension and highlights. - Step 8: Parchments – Ancient Scrolls
The parchments on the Dreadnought can be painted with Screaming Skull. This off-white color creates a weathered and aged effect, perfect for ancient scrolls. - Step 9: Energy Sources – A Glowing Touch
For the energy sources like plasma coils, choose a vibrant glowing blue color. For example, you can use a mix of Baharroth Blue and White Scar. This creates a dynamic and electrifying look. - Step 10: Texture Paints – Creating Realism
Enhance the base of your Dreadnought with textured paints. Consider using Martian Ironearth and Agrellan Badland for a realistic terrain-like effect. This adds depth and immersion to the model’s base. - Step 11: Varnish – Protect and Shine
To protect your meticulously painted Primaris Redemptor Dreadnought and give it a polished finish, apply Ardcoat Varnish. This step not only safeguards your work but also enhances specific areas, making them shine.

