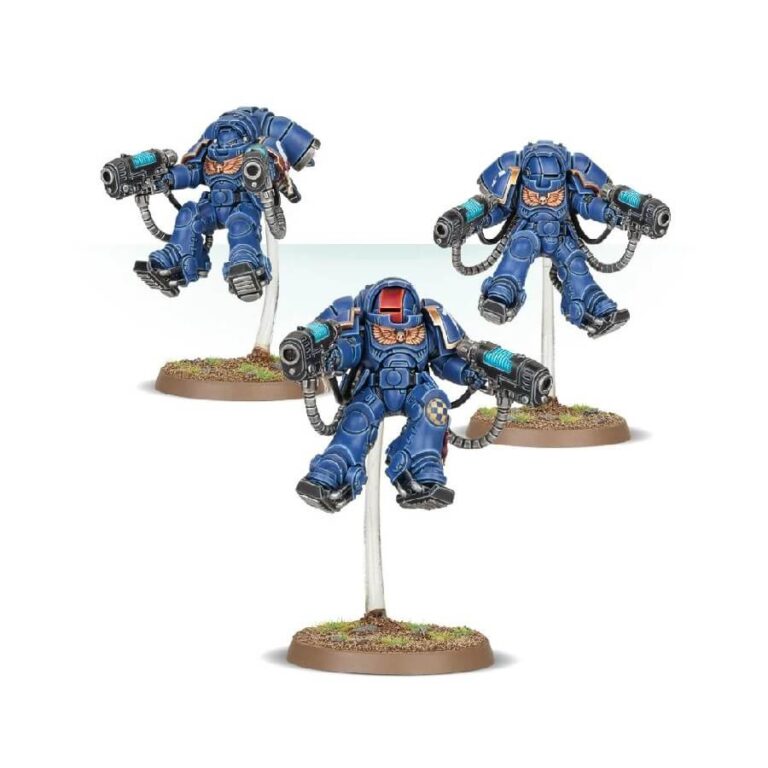
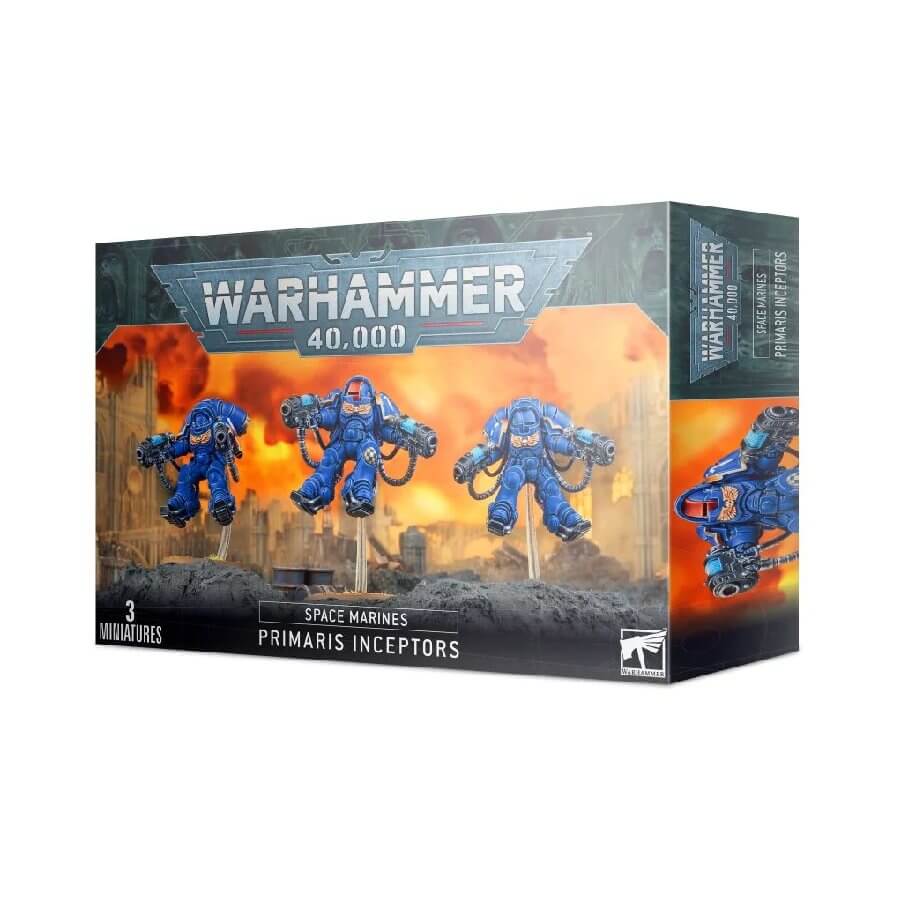
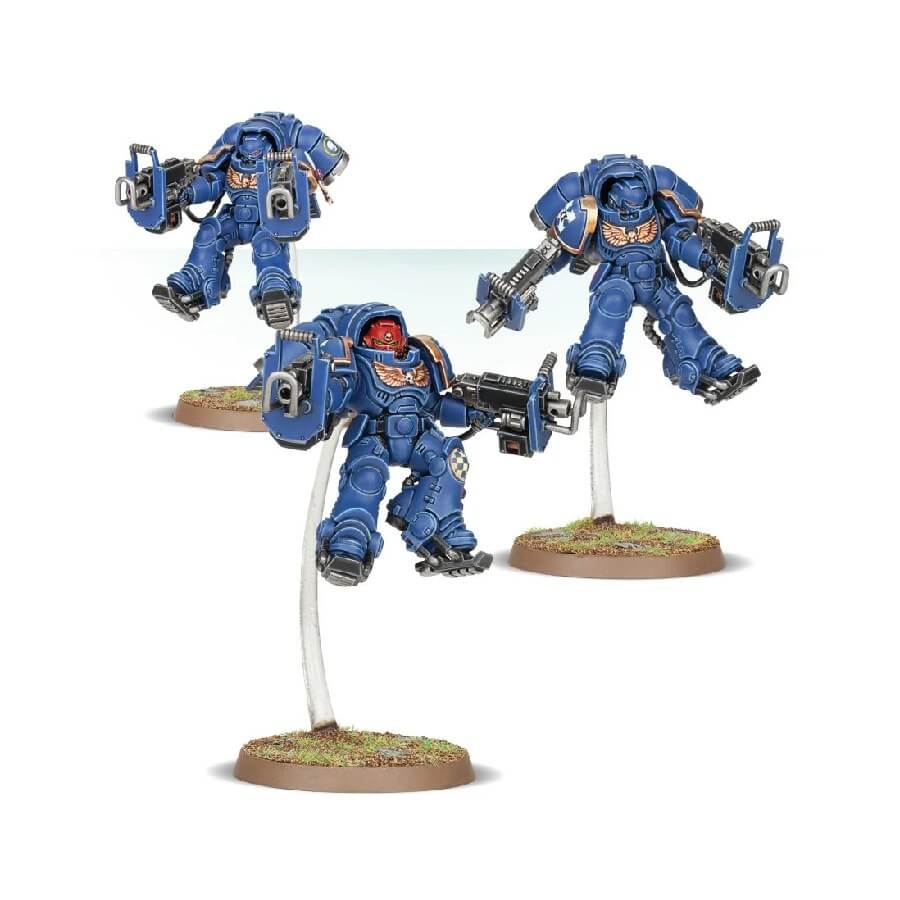
Primaris Inceptors, the swiftest of their brethren, serve as the leading edge of Space Marine forces. They execute lightning-fast strikes, leaving their enemies in disarray while paving the way for subsequent waves of Space Marines. These warriors are equipped with jump packs and robust armor, enabling them to descend from a planet’s upper atmosphere and maneuver through the skies before landing amidst their foes.
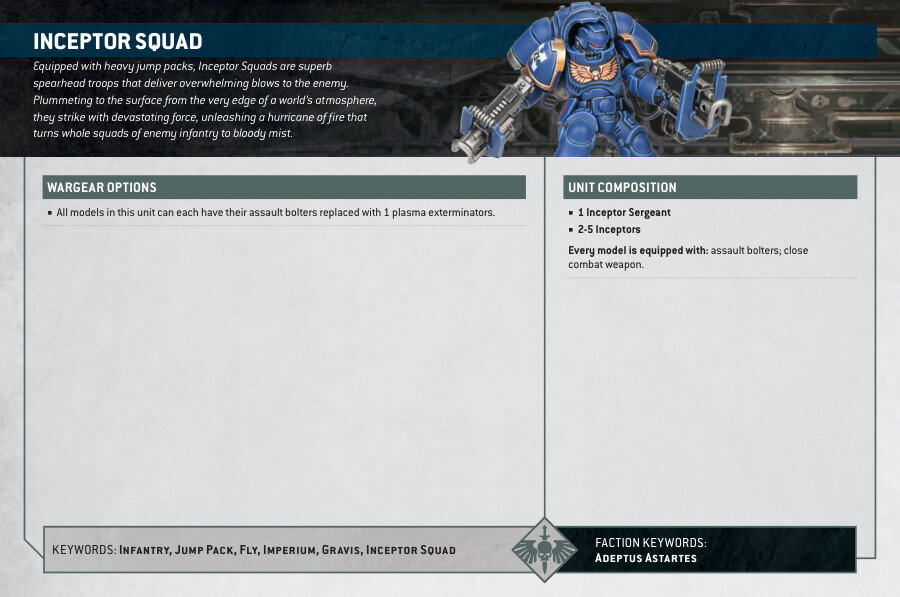
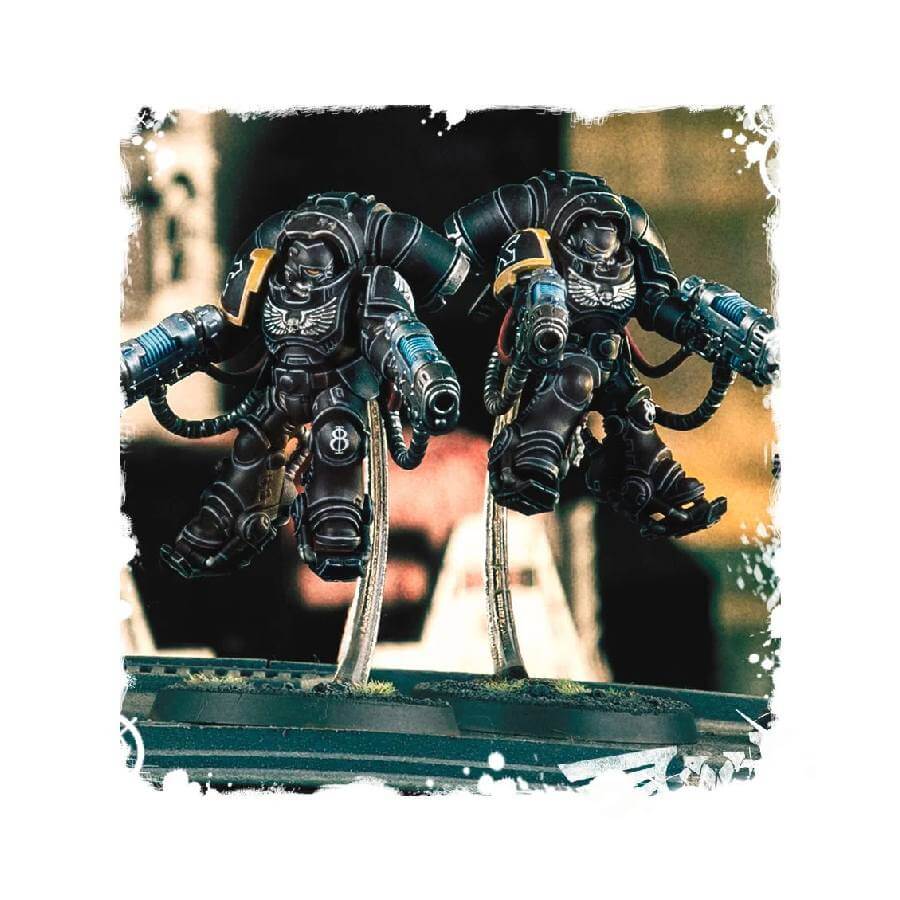
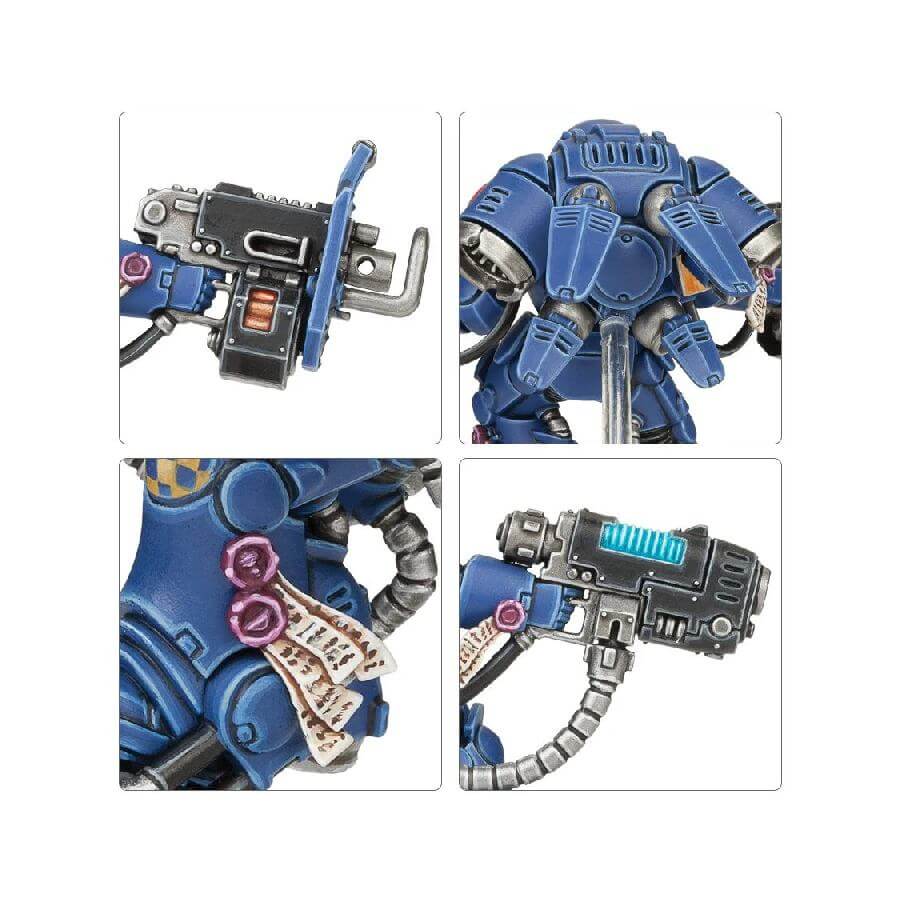
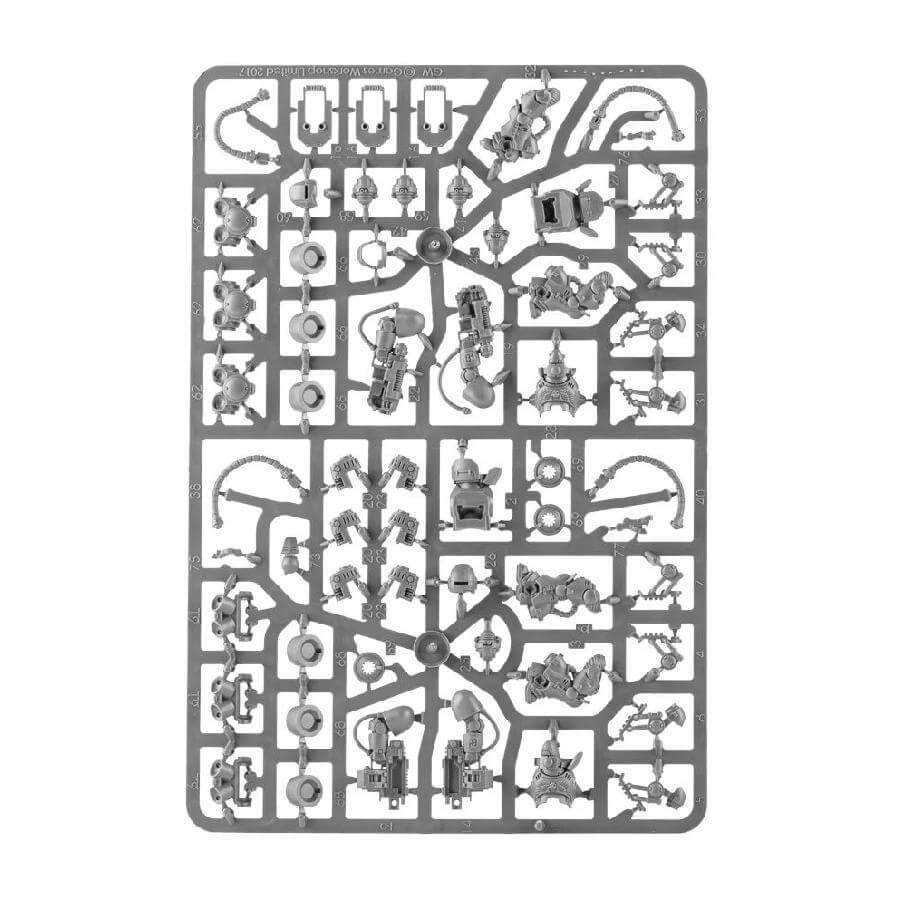
This multipart plastic kit provides all the components needed to construct a trio of Primaris Inceptors. These soldiers wear Mk X power armor with distinctive jump packs mounted on their backs, allowing them to perform rapid, bounding leaps to close in on the enemy swiftly. The jump packs are a central feature of the miniatures, featuring adjustable fins, shock-absorbing apparatus on the boots, and unique cabling and vents exclusive to this kit. Inceptors can be armed with either two plasma exterminators each, with heavy shielding against heat discharge, or two assault bolters each, featuring distinctive box magazines.
The kit also includes five helmets designed to be used with the blast shield cowls, ensuring there are no bare heads. Additionally, you’ll find three blast shield helmets and four purity seals, one of which is a double seal to designate the Sergeant. These intricate details contribute to the individuality of each Inceptor in your collection.
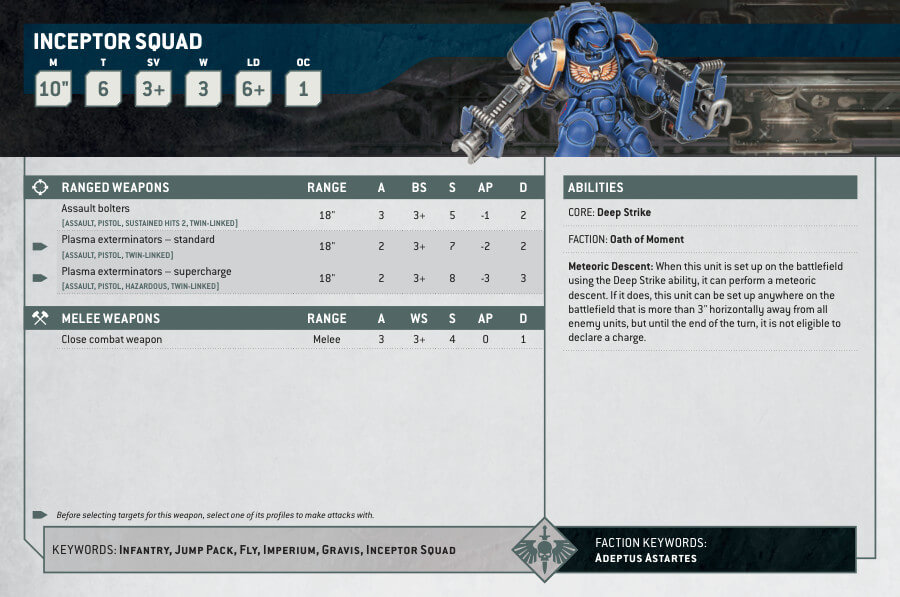
Primaris Inceptors Datasheets
What’s in the Primaris Inceptors box
- x117 plastic components that make 3 Primaris Inceptors, giving you plenty of options for customization and making each miniature unique. This allows you to create a truly personalized unit that reflects your own style and preferences.
- x3 Citadel 40mm Round bases.
- x3 45mm flying stems, which are used to mount the miniatures and give them the appearance of flying through the air. This adds to the unit’s dynamic, high-speed look and makes them stand out on the tabletop.
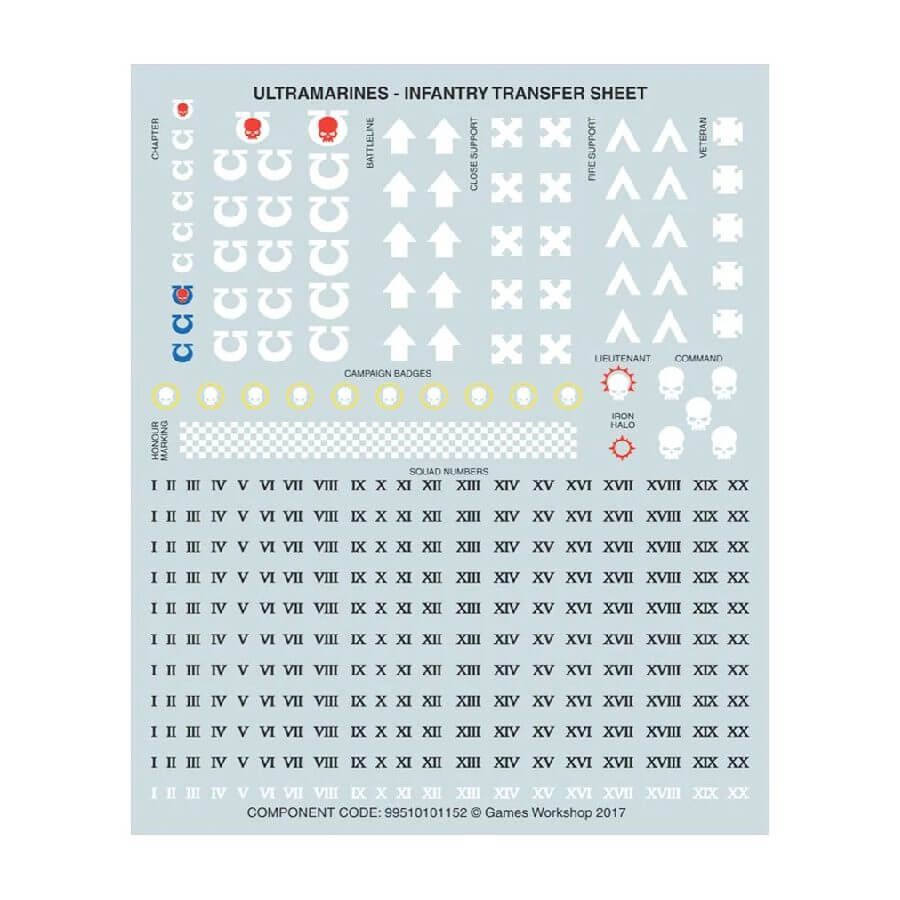
- x1 Ultramarines Infantry Transfer Sheet, which allows you to add some extra detail to your miniatures by applying decals with ease. This is a great way to personalize your miniatures and make them stand out even more on the battlefield.
How to paint the Primaris Inceptors
- Step 1: Clean and Prime the Miniature
Begin by ensuring that your miniature is thoroughly clean, free from any dust or debris. Cleaning with a gentle brush or compressed air can help. Then, prime the miniature using your chosen primer spray. A matte primer is often preferred for a smoother paint application. - Step 2: Base Coat
Start by applying a base coat of Macragge Blue to the armor panels. For a rich, vibrant look, consider applying two thin coats, allowing the first to dry before applying the second. This ensures even coverage and a deeper color.
For the emblems and details you want to appear in gold, use Retributor Armour. Apply it carefully, keeping within the lines and edges to maintain a clean look. - Step 3: Wash
To add depth and shading to the armor panels, apply Agrax Earthshade wash. Focus on the recesses and crevices, allowing the wash to settle naturally to create shadows. For the metallic areas, such as the jump pack vents and cabling, apply Nuln Oil. Be precise to enhance the metallic look. - Step 4: Details
Now, it’s time to add finer details to bring your miniature to life. Use Abaddon Black to paint the weapons, ensuring a steady hand for clean lines.
For the jump packs, use Leadbelcher to highlight the vents and cabling. This adds a metallic sheen and makes these parts stand out.
To create striking helmet lenses, use either Mephiston Red for a fiery look or Moot Green for a more eerie appearance. Thin your paint slightly and carefully paint the lenses. - Step 5: Layering
Layering is essential to achieve depth and detail in your painting.
After the base coat of Macragge Blue on the armor panels, create highlights by adding a layer of Altdorf Guard Blue. Focus on the raised areas and edges to give the armor a more pronounced, three-dimensional look.
For the gold details painted with Retributor Armour, apply a layer of Auric Armour Gold. Concentrate on the raised parts and edges of the gold elements to make them shine.
To make the black weapons stand out, apply a layer of Eshin Grey. This step adds subtle highlights and depth to the weapons. If needed, you can apply a second layer to intensify the effect. - Step 6: Base Painting
Now, let’s move on to painting the base of your miniature. Use a suitable base color for your terrain. For a grim, war-torn landscape, consider Steel Legion Drab for an urban feel or Zandri Dust for a desert environment. Apply the chosen color evenly across the base, ensuring full coverage. - Step 7: Texture and Detail
To add texture to the base, apply Stirland Mud texture paint. This will give your base a realistic, earthy appearance. Use a texture tool or an old brush to create natural-looking patterns and variations in the mud.
For additional details, like rocks or debris, use Mechanicus Standard Grey. Paint these small elements carefully to enhance the overall base’s realism. - Step 8: Varnish
Finally, it’s time to protect your hard work with a varnish. Apply a matte varnish to maintain a consistent finish across your miniature. This not only protects the paint but also reduces unwanted reflections and shine.