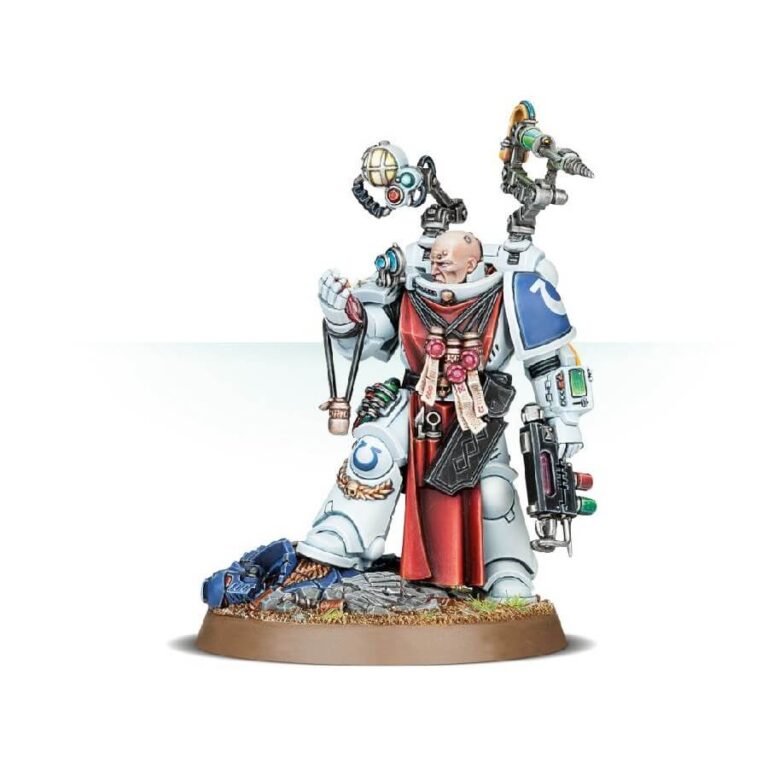
The Apothecaries are highly respected members of the Space Marines chapter, responsible for ensuring the physical well-being of their battle-brothers on the battlefield and harvesting the progenoid organs of fallen Marines to create new warriors. The Primaris Apothecary miniature, which comes in a multi-part plastic kit, features highly detailed Mk X power armor and a variety of medical gadgets and canopic jars filled with organs. The miniature also includes options for various surgical inspection lenses and instruments such as a chainsaw, injector servo arm, drill, and stapler. Additionally, a slain Space Marine with a large incision made by the Apothecary’s narthecium can be added to the base for added narrative detail.
Also available in this box:
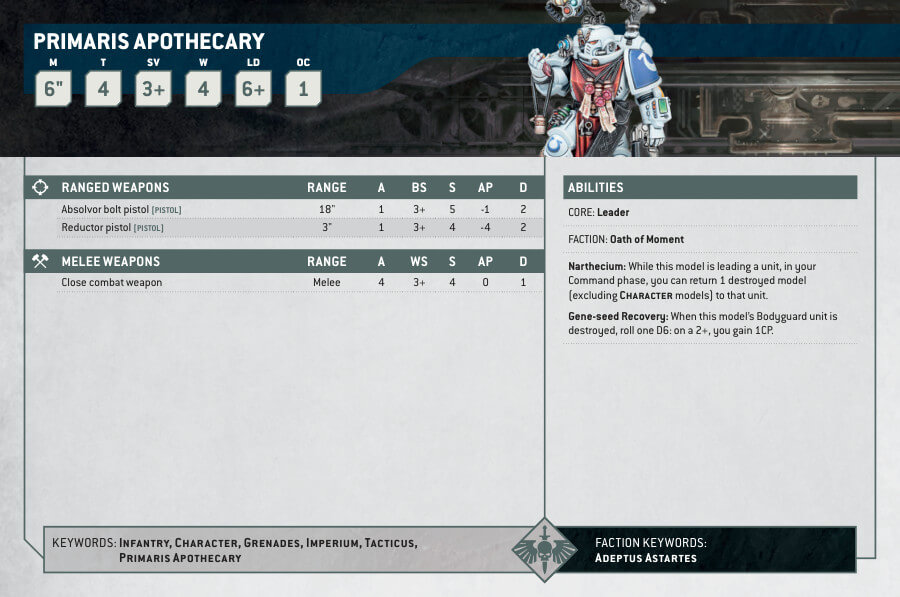
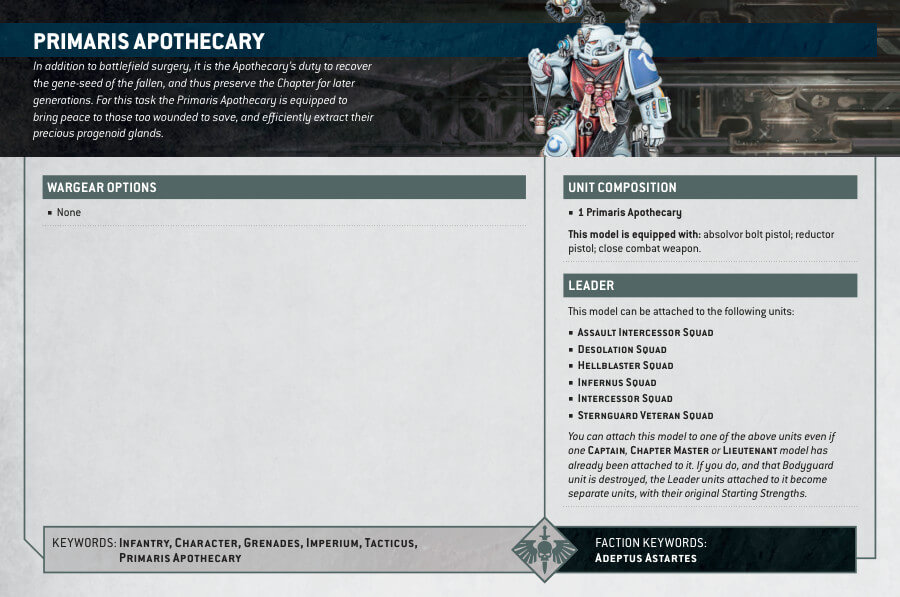
Primaris Apothecary Datasheets
What’s in the Primaris Apothecary box
- x28 components that make 1 Primaris Apothecary.
- x1 Citadel 40mm Round base
- x1 Ultramarines-Character Transfer Sheet, which features Captain, Chaplain, Librarian and Lieutenant iconography.
How to paint the Primaris Apothecary
- Step 1: Primer
Start by priming the entire miniature with Chaos black. This gives a solid base for the subsequent paint layers and helps the colors adhere better. - Step 2: Basecoat
With a medium-sized brush, paint the main armor of the Apothecary using White Scar. Make sure the coverage is even to achieve the desired color. - Step 3: Black Details
Paint the bolt pistol, narthecium, belts, and pouches, along with any other black details, using Abaddon Black. Be precise in this step to maintain clean lines. - Step 4: Metal Parts
Apply Leadbelcher to the metal parts, ensuring you capture the metallic look of these components. - Step 5: Gold Details
Highlight the gold details, like the chapter symbols, using Retributor Armour. This adds a splendid shine to these areas. - Step 6: Parchment Parts
For the parchment parts of the armor, including purity seals or scrolls, use Screaming Skull. Add detail to make them look authentic. - Step 7: Creating Depth
Apply a wash of Nuln Oil over the entire miniature. This wash settles into the recesses, creating depth and shadows, providing a weathered appearance. - Step 8: Highlighting
Use Apothecary White to highlight the edges and corners of the grey armor with thin lines. This step enhances the depth and brings out the armor’s details. - Step 9: Highlighting the Black Details
Highlight the edges and corners of the black details, like the pistol and pouches, with Eshin Grey. This adds dimension to these areas. - Step 10: Highlighting the Metal Parts
Make the metal parts shine by using Stormhost Silver to highlight the edges and corners with thin lines. This creates a metallic gleam. - Step 11: Highlighting the Gold Details
To make the gold details stand out even more, use Liberator Gold to highlight the edges and corners. This adds a brilliant sheen. - Step 12: Highlighting the Parchment Parts
Use Ushabti Bone to highlight the edges and corners of the parchment parts with thin lines. This adds authenticity to the parchments. - Step 13: Adding Texture
Select your preferred texture paint, such as Astrogranite or any other you prefer, to create a textured base on the miniature. Apply it to any surfaces you want to have a textured appearance. Allow the texture paint to dry completely. - Step 14: Varnishing
To safeguard your intricate work and give your Primaris Apothecary a polished finish, use Ardcoat varnish. Apply the varnish evenly over the entire miniature, allowing it to dry completely. This varnish provides a glossy and reflective finish, enhancing the overall appearance of your miniature while preserving your paint job.

