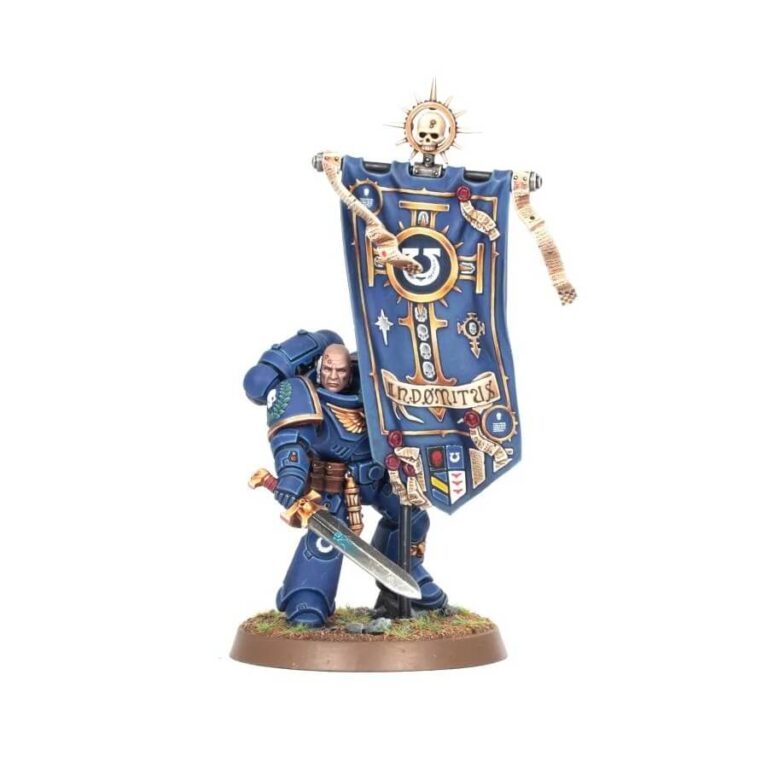
Introducing the Ancients – a highly regarded Elites choice for your Space Marine armies. These experienced warriors bear the sacred standards of their Chapter, beautifully crafted relics that honor the most notable battles and heroic deeds of their brethren. These relics symbolize the unwavering loyalty and selfless commitment of Space Marine battle-brothers. In the field, the presence of these veterans with their priceless relics inspires nearby battle-brothers to perform courageous feats and display aggression in the name of their Chapter.
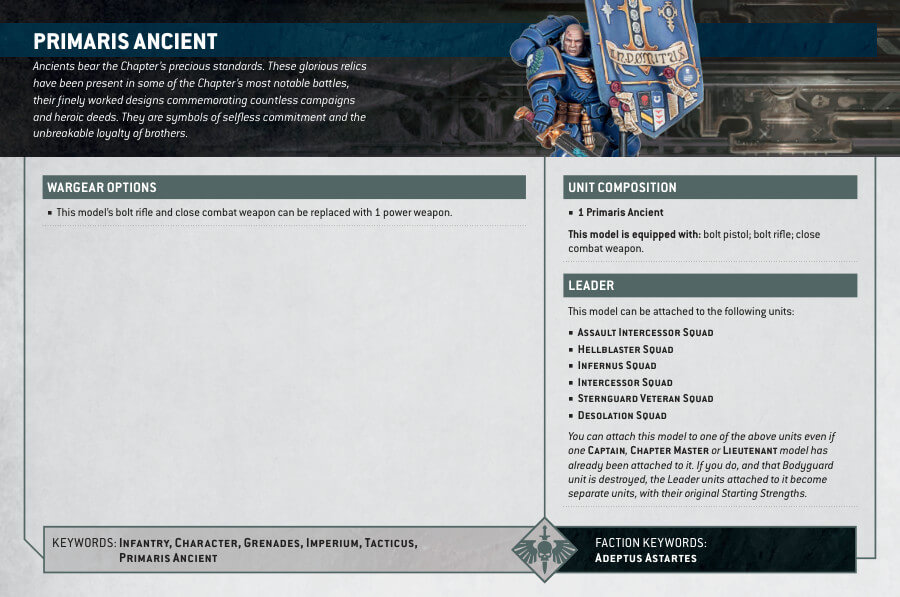
Primaris Ancient Datasheets
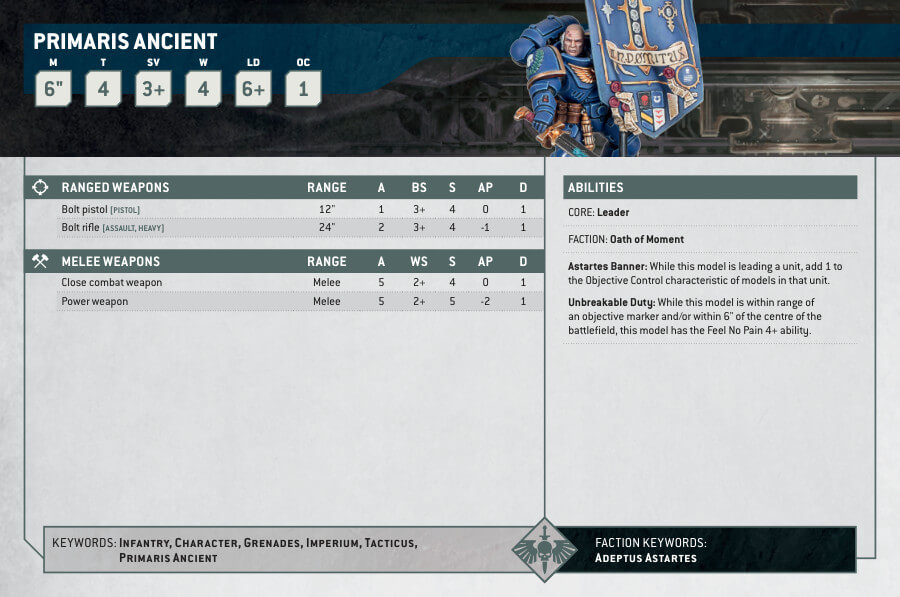
What’s in the Primaris Ancient box
- x22 plastic components, with which you can assemble 1 Primaris Ancient with the option to build either a helmeted or unhelmeted version, and two different banners with exquisite sculpted details. Additionally, you can equip the model with either a bolt rifle or a power sword.
- x1 Citadel 40mm Round Base.
How to paint the Primaris Ancient
- Step 1: Prime with Chaos Black Primer
Begin by priming the entire miniature with Chaos Black primer. This provides a solid base for the subsequent paint layers and helps the colors adhere better. Allow the primer to dry completely. - Step 2: Main Armor with Macragge Blue
Using a medium-sized brush, paint the main armor of the Primaris Ancient with Macragge Blue. Ensure a thorough and even application. - Step 3: Gold Details with Retributor Armour
Highlight the gold details of the armor, such as ornaments, shoulder pads, and other decorations, with Retributor Armour. This will give a shining effect to the gold parts. - Step 4: Metallic Sword with Leadbelcher
Paint the metallic parts of the sword, including the blade and hilt, with Leadbelcher. Pay attention to detail to achieve depth and shine. - Step 5: Exposed Head with Kislev Flesh
If your miniature has an exposed head, use Kislev Flesh to give it a lifelike appearance. Be meticulous and precise when painting the face and any exposed skin. - Step 6: Creating Depth with Nuln Oil
Apply a wash of Nuln Oil over the entire miniature. This will settle into the recesses and details, creating depth and shadows. It adds a weathered and realistic look to the Primaris Ancient. - Step 7: Highlighting the Blue Armor with Alaitoc Blue
Use Alaitoc Blue to highlight the edges and corners of the blue armor with thin lines. This step adds depth and makes the blue parts stand out. - Step 8: Highlighting the Gold Details with Liberator Gold
To make the gold details even more striking, use Liberator Gold to highlight the edges and corners of these parts with thin lines. This adds a brilliant sheen to the gold ornaments. - Step 9: Highlighting the Metallic Sword with Stormhost Silver
Highlight the edges and corners of the metallic sword with Stormhost Silver. This gives a gleaming appearance to the weapon. - Step 10: Painting the Icon
Grab Macragge Blue again and use it to paint the main body of the icon. Make sure to apply it evenly to get that deep, rich blue shade just right.
Now, for the holder of the icon, you’ll need either Leadbelcher or Abaddon Black, depending on the effect you want.
To bring out the beauty of the icon’s gold details, like ornaments and edges, use Retributor Armour.
With Screaming Skull, carefully paint the parchments and skulls on the icon. Take your time to add intricate details to make them stand out.
Lastly, bring your icon to life by adding those delicate touches and highlights with White Scar. This will truly enhance its appearance. - Step 11: Varnishing with Munitorum Varnish
To protect your exceptional work and give your Primaris Ancient a professional finish, apply Munitorum Varnish evenly over the entire miniature. This matte varnish preserves your paint job and provides a clean and non-reflective appearance. Allow it to dry completely before showcasing your Primaris Ancient with pride on the tabletop. Enjoy your painting journey and the remarkable results!
We also left you a more detailed video guide here

