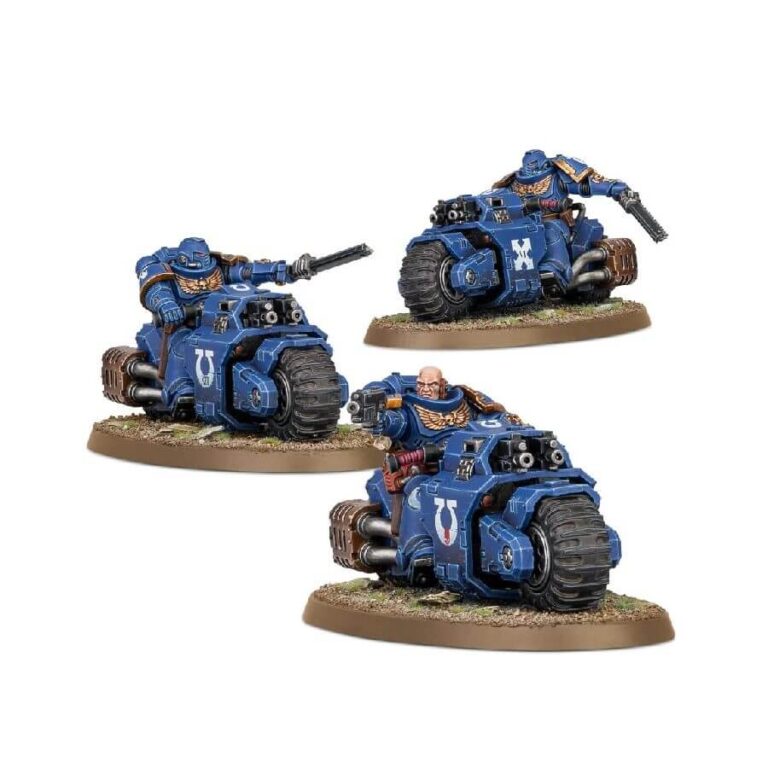
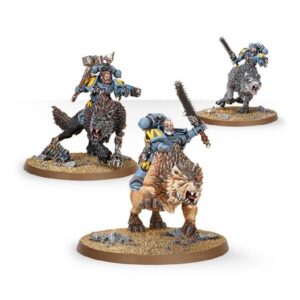
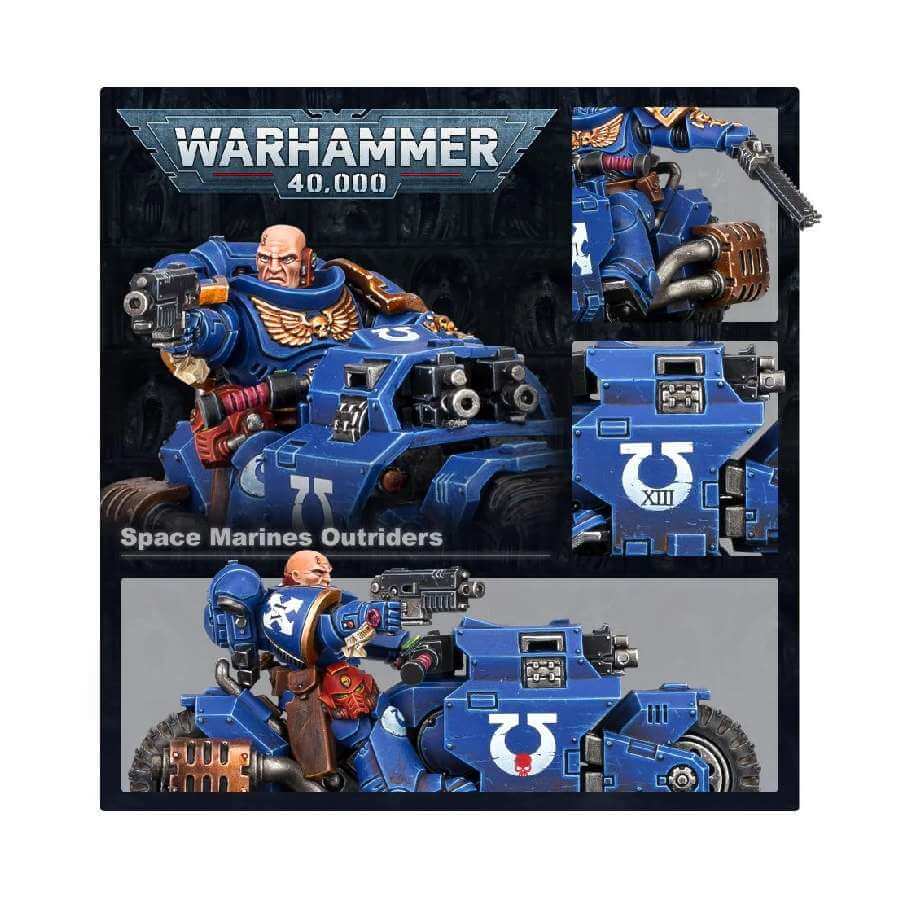
The Outrider Squad is the perfect choice for Space Marines players looking to take the battle to the enemy’s vanguard or flank. With their swift and deadly bike-mounted hunters, they can easily guard the flanks of larger formations or hunt down enemy infiltrators. In battle, they conduct lightning-fast hit-and-run attacks on defended positions and are experts at running down fleeing enemies. With their speed and maneuverability, the Outriders provide a versatile addition to any Space Marine army.
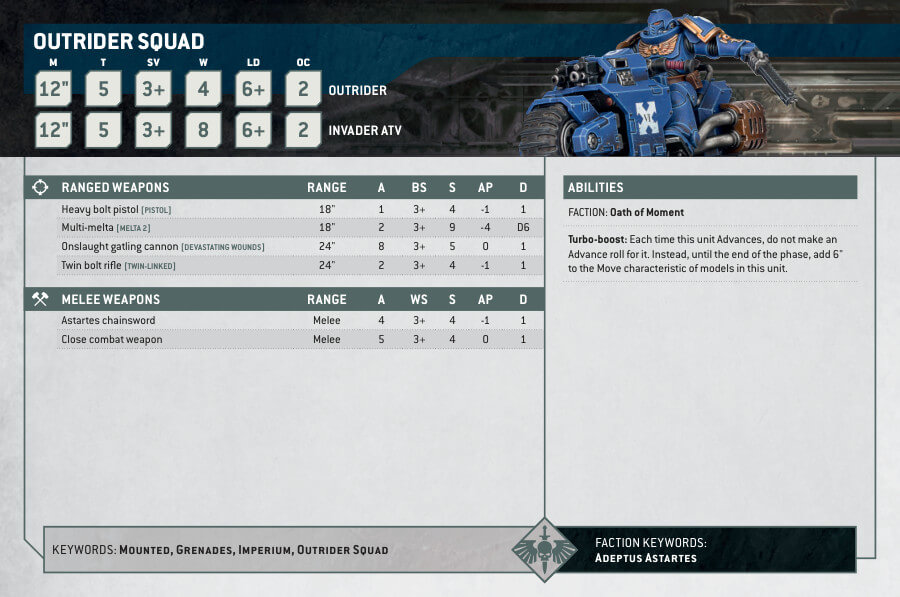
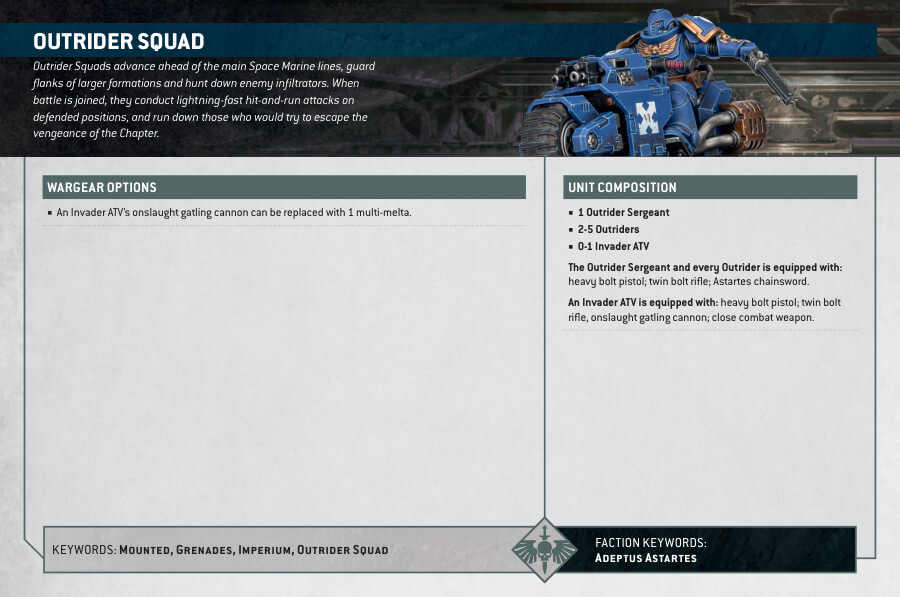
Outriders Datasheets
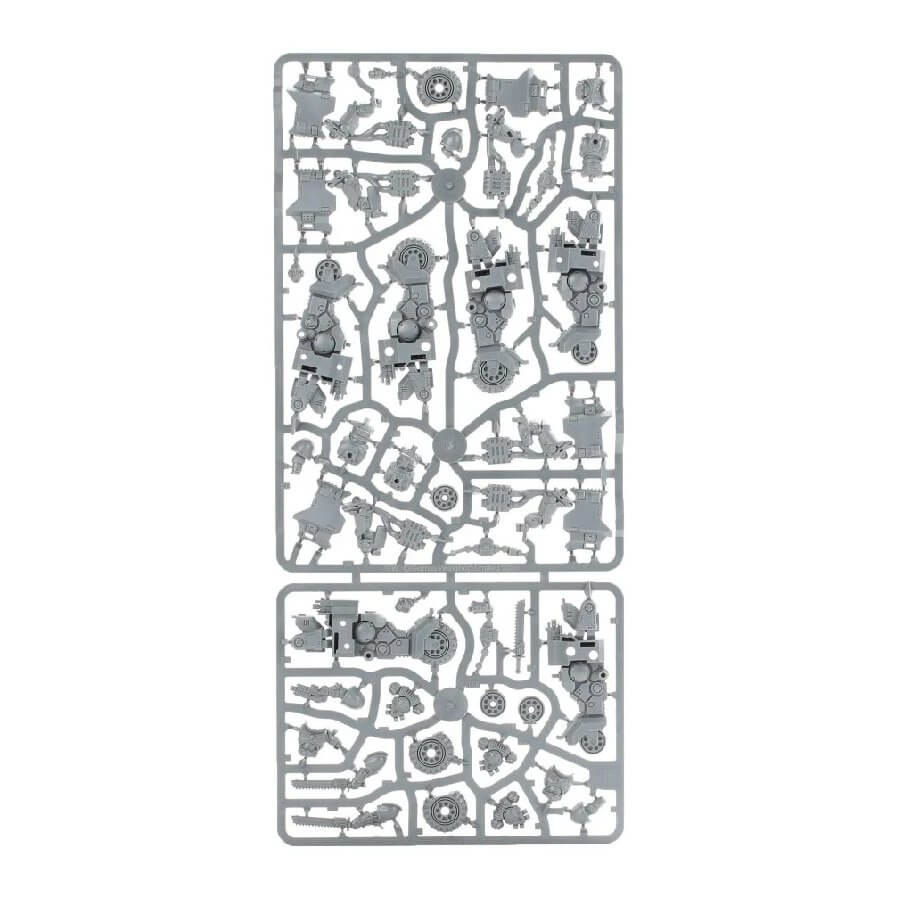
What’s in the Outriders box
- x40 plastic components that make 3 Outriders
- x3 Citadel 90mm Hex Holed Oval Bases that are perfect for displaying the Outriders
- x1 Primaris Space Marines Transfer Sheet is included to help you add some extra detail to your miniatures
How to paint the Outriders
- Step 1: Primer
Begin by priming your Outriders with Chaos black. This covers the entire miniature and prepares it for painting by giving the paint something to grip onto. Let it dry completely. - Step 2: Main Armor
Using a medium-sized brush, paint the main armor of the Outriders with Kantor Blue. Make sure to leave the shoulder pads and the chest eagle for now. This is our base color for the blue parts. - Step 3: Black Details
Paint the bolt pistol and other black details, such as straps and pouches, with Abaddon Black. Be careful and precise when painting these small areas. - Step 4: Metal Parts
For the metal parts of the bike and the bolt pistol, use Leadbelcher. This paint gives a metallic look to these components. - Step 5: Gold Details
To highlight the gold details of the armor, like the chest eagle and shoulder pads, use Retributor Armour. This paint adds a shining effect to the gold parts. - Step 6: Creating Depth
Apply a wash of Nuln Oil over the entire miniature. This will settle into the recesses and details, creating depth and shadows. It makes the model look more realistic. - Step 7: Highlighting the armor
Use Alaitoc Blue to highlight the blue armor. Apply thin lines along the edges and corners of the armor plates. This makes the blue parts stand out. - Step 8: Highlighting the black parts
For the black details, like the bolt pistol and straps, use Eshin Grey to create highlights. Apply thin lines along the edges and corners to add depth. - Step 9: Highlighting the metal parts
To make the metal parts shine, use Stormhost Silver. Highlight the edges and corners of these areas with thin lines. This gives a metallic gleam to the bike and bolt pistol. - Step 10: Adding Texture
To create a realistic base, use texture paints like Agrellan Earth for a cracked earth effect or Astrogranite Debris for a rocky terrain appearance. Apply them to the base of your Outriders, spreading them evenly and adding any additional details like rocks or debris as desired. Let these paints dry to achieve the desired texture. - Step 11: Varnish
Finally, for overall protection and a matte finish, apply Munitorum Varnish evenly over the entire miniature. This not only seals and protects your paintwork but also gives your Outriders a professional, finished look. Allow the varnish to dry thoroughly before displaying or using your miniatures on the tabletop.
