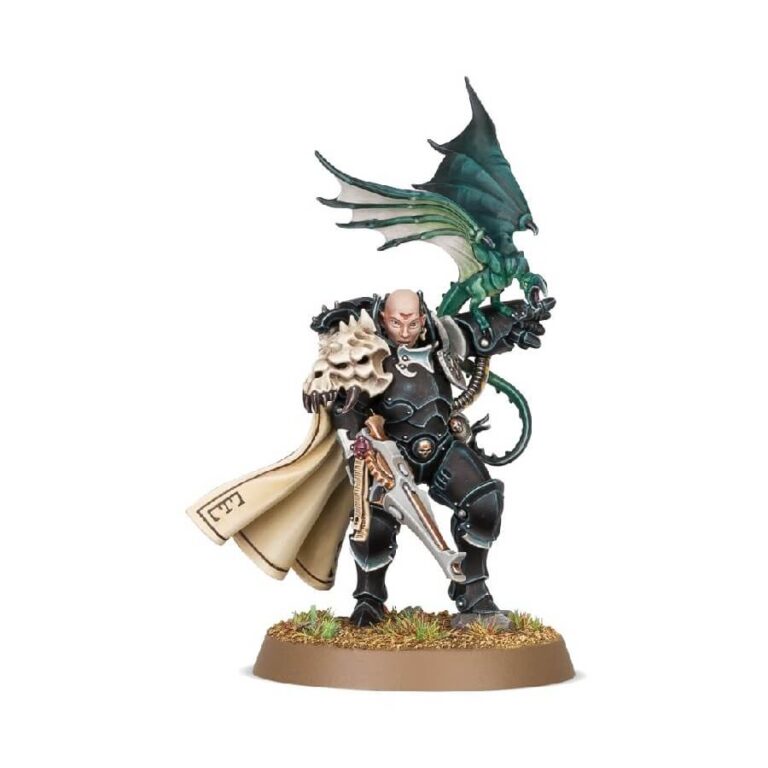
Meet Kyria Draxus, the audacious Lord Inquisitor of the Ordo Xenos, renowned for her specialization in hunting down and eradicating the formidable Necron threat. Unlike her peers, Draxus is considered a radical due to her pragmatic approach, bordering on immorality. However, her calculated decisions and logical thinking prevent even her most drastic actions from being labeled as rash.
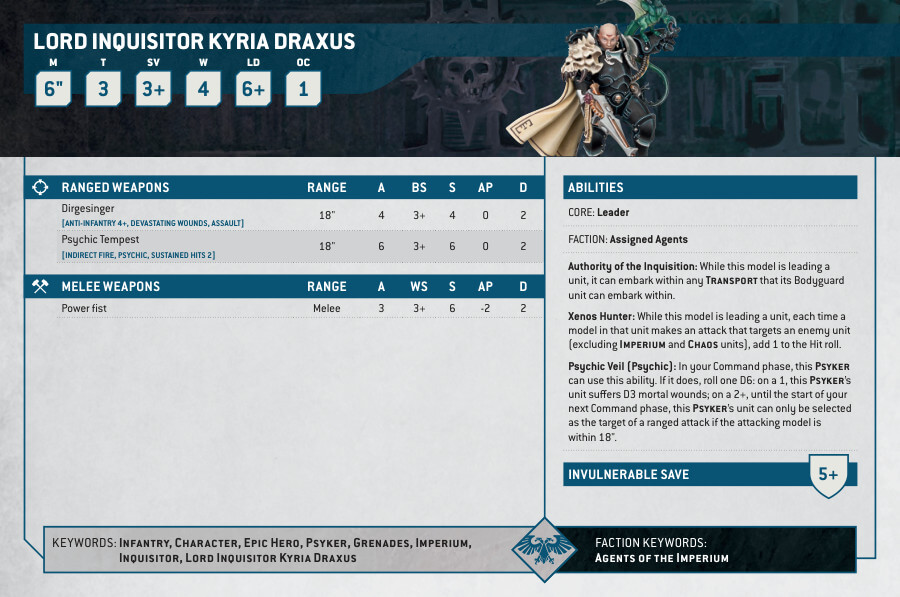
Kyria Draxus exemplifies the epitome of a relentless and unstoppable force, much like the unstoppable movement of continental plates. With her expertise as an Inquisitor of the Ordo Xenos, she becomes an invaluable asset to any Imperial army combatting the alien menace. Equipped with a power fist and an Aeldari shuriken weapon named Dirgesinger, Draxus can unleash death upon her adversaries with lethal precision, regardless of the distance.
Notably, Kyria Draxus is accompanied by her trusted Wyvach familiar named Shang, enabling her to channel her formidable psychic energies through this loyal companion. This combination of psychic abilities and martial prowess further enhances her capabilities on the battlefield.
Kyria Draxus embodies the perfect fusion of unyielding determination, strategic brilliance, and a wide array of weaponry. As a Lord Inquisitor of the Ordo Xenos, she brings both fear and hope to those who fight alongside her in the ongoing battle against alien threats.
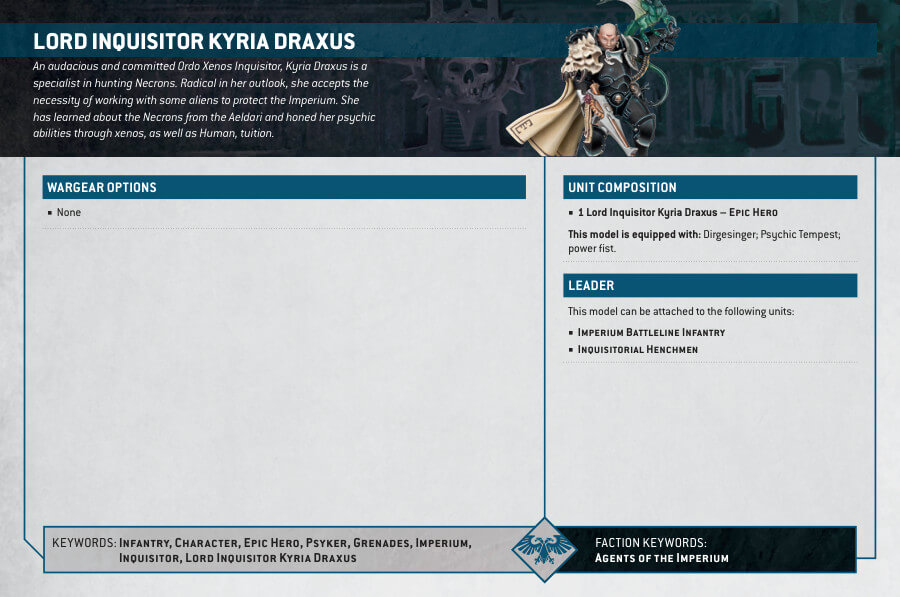
Lord Inquisitor Kyria Draxus Datasheets
What’s in the Ordo Xenos Lord Inquisitor Kyria Draxus box
- x10 plastic components that make Kyria Draxus
- x1 Citadel 32mm Round Base
How to paint the Ordo Xenos Lord Inquisitor Kyria Draxus set
- Step 1: Prepare Your Workspace
Set up a clean and well-lit area to work on your miniature. Make sure you have all the necessary tools and paints within reach. - Step 2: Prime the Miniature
Apply a thin and even coat of Chaos Black spray primer to the miniature. This will provide a good base for the paint to adhere to. - Step 3: Base Colors
Start by applying the base colors to Kyria Draxus. For her armor, use Incubi Darkness, and for the fabric parts, use Mechanicus Standard Grey. Apply thin layers of paint, allowing each layer to dry before adding the next one.Paint Kyria Draxus armor with Incubi Darkness. - Step 4: Details and Highlights
Add details to the miniature using different colors. For the gold parts, use Retributor Armour. Paint the weapons with Leadbelcher. Use Warplock Bronze for the small metallic details.Paint the intricate designs on Kyria Draxus armor with Retributor Armour. - Step 5: Washes
Apply washes to add depth and shading to the miniature. Use Nuln Oil for the armor and Agrax Earthshade for the fabric parts. Apply the washes generously, allowing them to flow into the recesses of the model.Apply Nuln Oil over the armor, ensuring it settles into the crevices for added depth. - Step 6: Highlights and Edges
To make the details stand out, apply highlights to the miniature. Use Stormhost Silver to highlight the gold parts, Fenrisian Grey for the fabric, and Ironbreaker for the metallic details. Apply the highlights sparingly to the raised areas to create a sense of depth.Carefully apply Stormhost Silver to the edges of the gold areas on Kyria Draxus armor to make them pop. - Step 7: Finishing Touches
Complete the miniature by adding final touches. Paint the eyes with Mephiston Red to bring them to life. Use Rhinox Hide for the base, and Stirland Mud for texture.Paint Kyria Draxus eyes with Mephiston Red to give her a menacing gaze. - Step 8: Varnish and Protect
Once the paint is dry, apply a layer of Munitorum Varnish to protect your paint job and give the miniature a professional finish.

