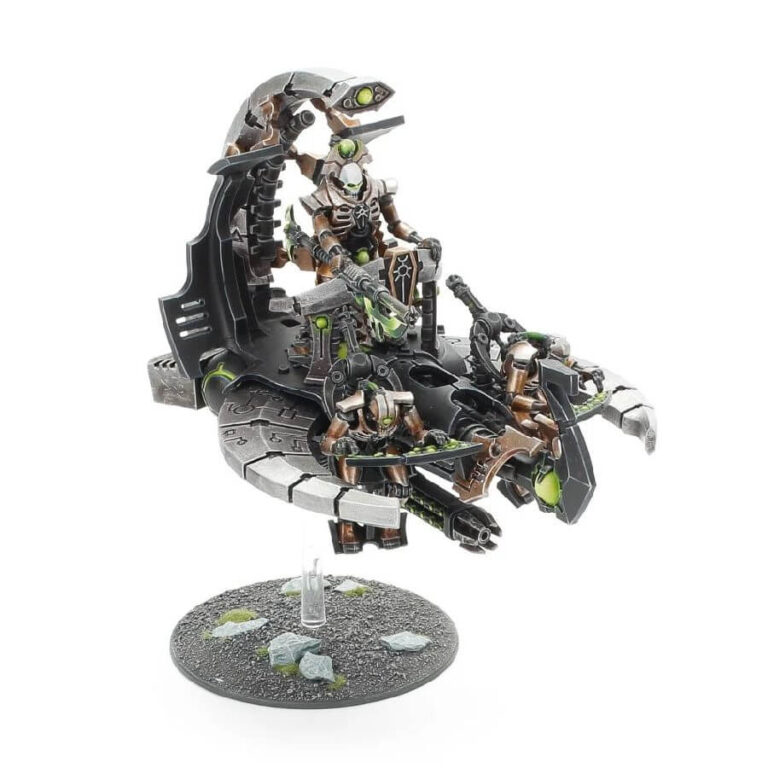
The Command Barge itself is a sight to behold, boasting an awe-inspiring design adorned with striking Necron iconography and dynastic glyphs. It stands as a formidable centerpiece, making an impressive addition to any Necron collection. The scythe-like midsection adds a touch of menacing elegance, encircling two loyal Necron minions attending the control dashboard.
Above them all, a skeletal Necron Lord takes his defiant stand, exuding an air of unyielding authority. With a commanding gesture forward, he wields his formidable warscythe, ready to strike down any who dare challenge the might of the Necron Empire.
What’s in the Necron Catacomb Command Barge box
- x84 plastic components with which to build one Necron Catacomb Command Barge or one Annihilation Barge.
- x2 Citadel Flying Stems.
- x1 Citadel 60mm Flying Base.
- x1 Citadel 32mm Round Base.
- x2 Necron transfer sheets.
How to paint the Necron Catacomb Command Barge set
- Step 1: Basecoat the Model
Start by applying a basecoat to the Necron Catacomb Command Barge. For the main body, use a mix of black, metallics, copper, and green accents. You can use Abaddon Black and Leadbelcher to achieve this effect. Apply the colors evenly with a large brush, covering the surface completely. - Step 2: Metallic Accents
To add metallic accents, focus on areas like the scythe-like midsection and other metal elements. Use Runelord Brass or a similar copper color to paint these details. Apply the paint carefully with a smaller brush to ensure clean lines and precision. - Step 3: Green Highlights
For a touch of eerie energy, highlight specific areas with a vibrant green color. Use Warpstone Glow or a similar shade to create the glowing effects on the Necron glyphs and other power sources. Apply the green highlights sparingly to make them pop against the darker basecoat. - Step 4: Shade the Model
Apply a shade to add depth and definition to the model. Use Nuln Oil or a similar black wash to emphasize the recesses and create shadows. Apply the wash strategically to avoid overpowering the metallic and green accents. - Step 5: Dry Brushing
Dry brushing is a technique to highlight raised edges and surfaces. Use a dry brush and a metallic color like Ironbreaker to lightly brush over the model, focusing on the edges of the scythe-like midsection and other metallic details. This technique adds a weathered and battle-worn appearance to the model. - Step 6: Fine Details
Now, it’s time to paint the finer details. Use a smaller brush and Screaming Bell to carefully paint the Necron iconography and other intricate elements. Take your time with this step to ensure precision and neatness. - Step 7: Final Touches
Inspect the model for any missed spots or areas that need touch-ups. Adjust the highlights and shadows as needed to achieve the desired effect. Take a step back and admire your work!

