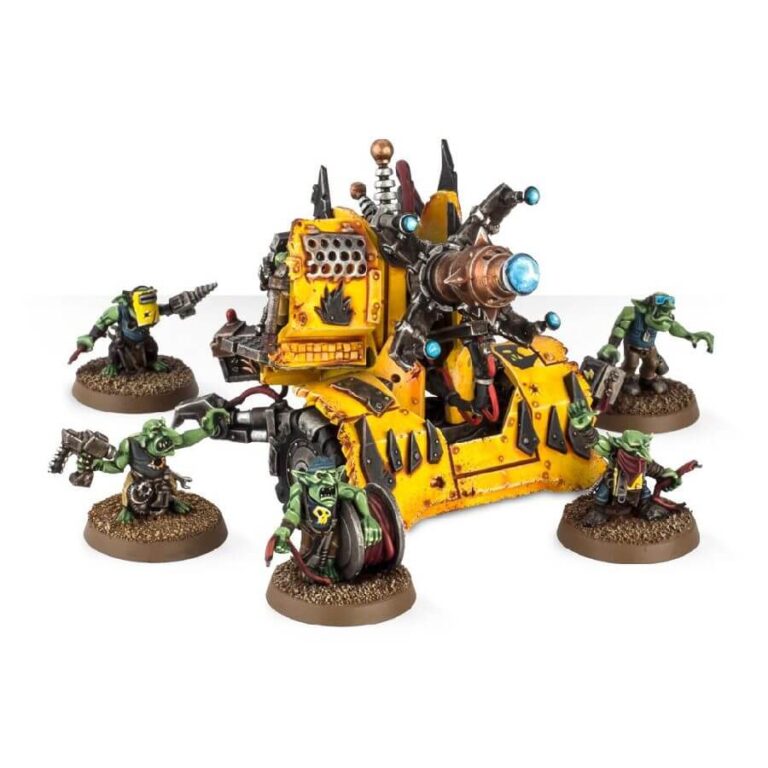
Mek Gunz armed with a traktor are an absolute nightmare for aerial threats. Picture this: as the traktor kannon unleashes a powerful beam of force into the sky, the grot crew springs into action, maneuvering the beam with wild precision until it locks onto an unsuspecting airborne target. With a satisfying hum, the victim is unceremoniously yanked from the sky, helplessly crashing and shattering upon impact with the unforgiving ground below.
These Mek Gunz embody both power and chaos, making them a fearsome addition to any Ork arsenal. Their ability to disrupt the skies and swiftly eliminate airborne adversaries is unparalleled. In this guide, we’ll walk you through the step-by-step process of painting these magnificent Mek Gunz – Kustom Mega-kannon set, ensuring your miniatures look jaw-droppingly impressive on the battlefield.
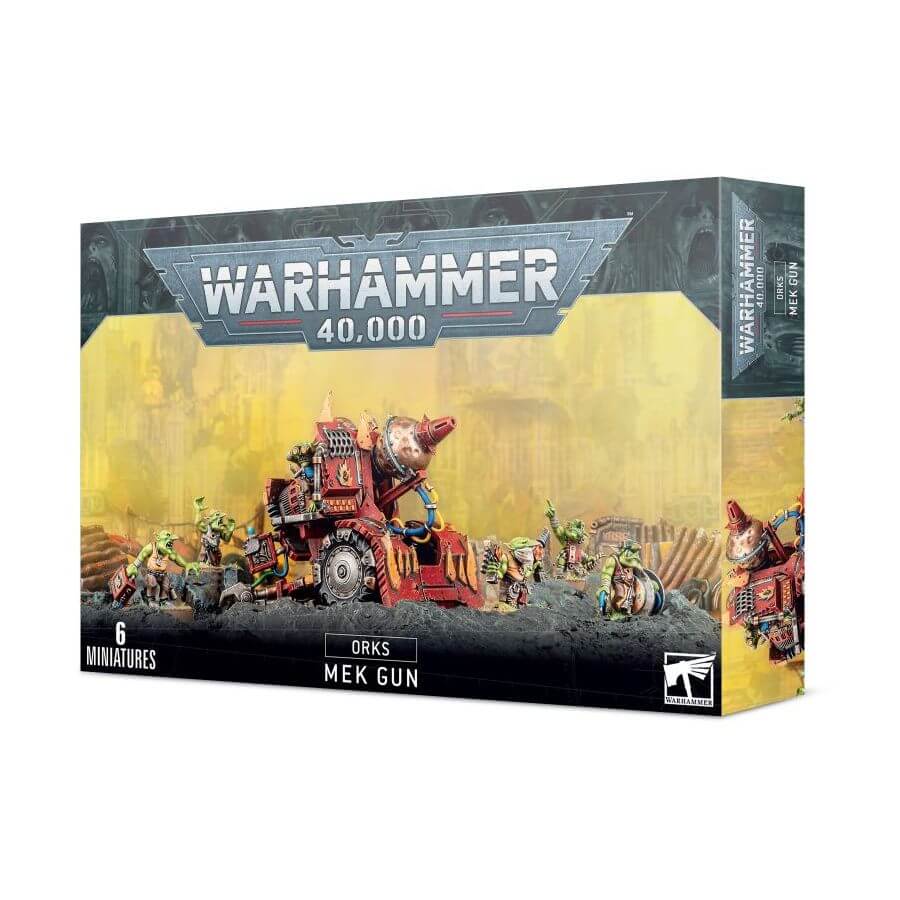
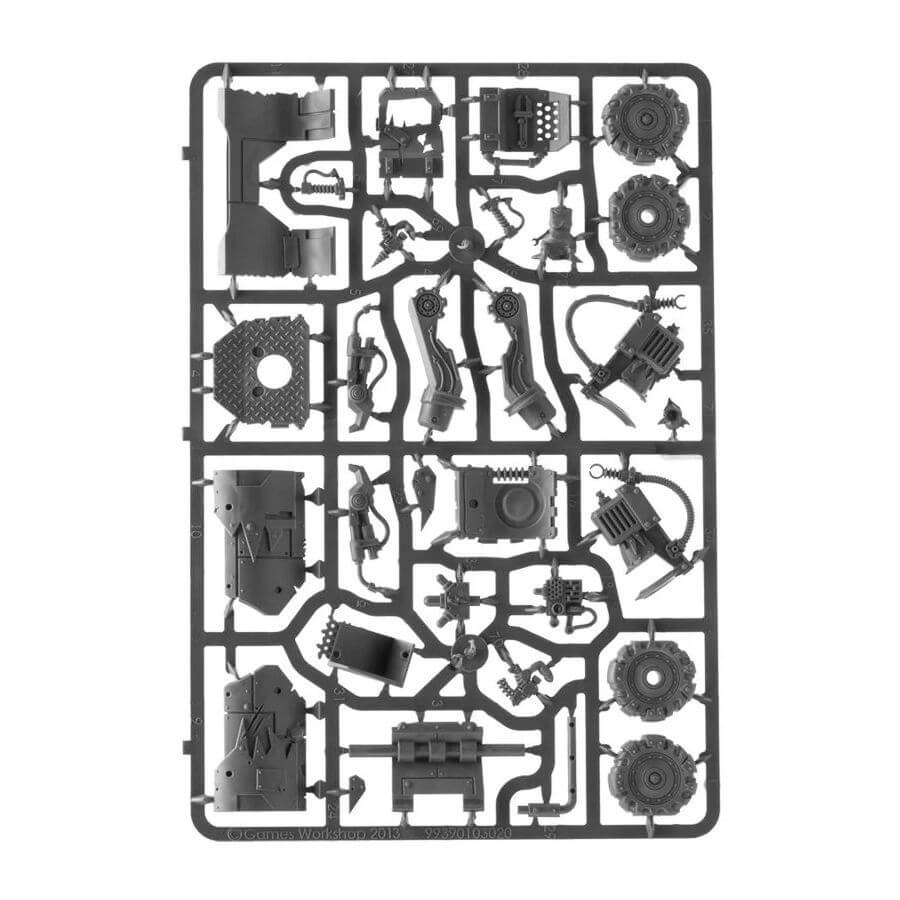
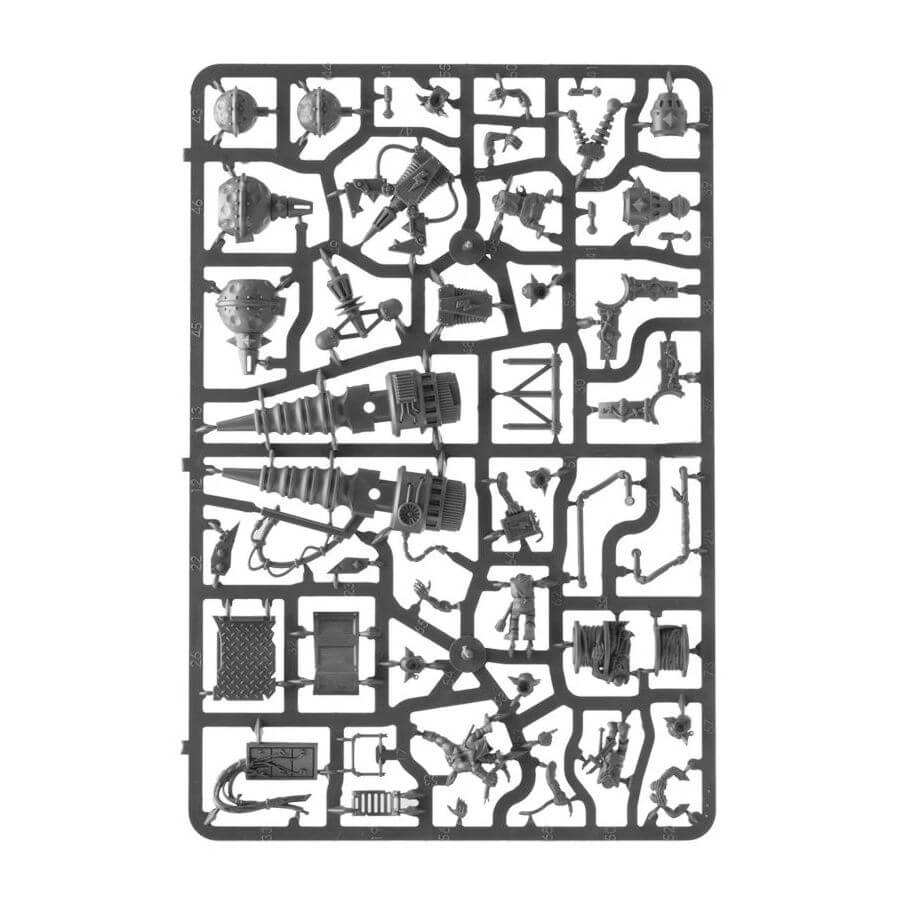
What’s in the Mek Gunz: Traktor Kannon box
- x79 plastic components that make one of four possible Mek Gunz and 6 Gretchins. It can be assembled as a bubblechukka, a smasha gun, a traktor kannon or a kustom mega-kannon.
- x5 Citadel 25mm Round Bases for the Gretchins.
How to paint the Mek Gunz: Traktor Kannon set
- Step 1: Prime Your Model
Priming your model is an important first step. It helps the paint adhere better and gives you a smooth surface to work on. Use Chaos Black spray primer or brush-on primer to prime the Mek Gunz. - Step 2: Base Coat
Start by applying a base coat to the different parts of the Mek Gunz. For the body of the cannon, use Yriel Yellow. Apply the paint evenly, making sure to cover the entire surface. For the metallic parts, such as the turret and metallic details on the body, use Leadbelcher. - Step 3: Layering
To add depth and shading to your model, you can use layering techniques. For example, if you want to add shadows to the body of the cannon, mix a darker shade of yellow by adding a small amount of Abaddon Black to Yriel Yellow. Apply this darker mix to the recesses and edges of the cannon body. For the metallic parts, you can apply a layer of Nuln Oil shade to add depth and shading. - Step 4: Highlighting
Highlighting brings out the details and adds visual interest to your model. To highlight the body of the cannon, mix a lighter shade of yellow by adding a small amount of white to Yriel Yellow. Apply this lighter mix to the raised edges and areas that catch more light. For the metallic parts, you can highlight the edges with a mix of Leadbelcher and a touch of Runefang Steel. - Step 5: Painting the Electric Blue Center
For the electric blue center of the turret, use Baharroth Blue. Apply this color to the center of the turret in a smooth and even manner. - Step 6: Layering Green Skin
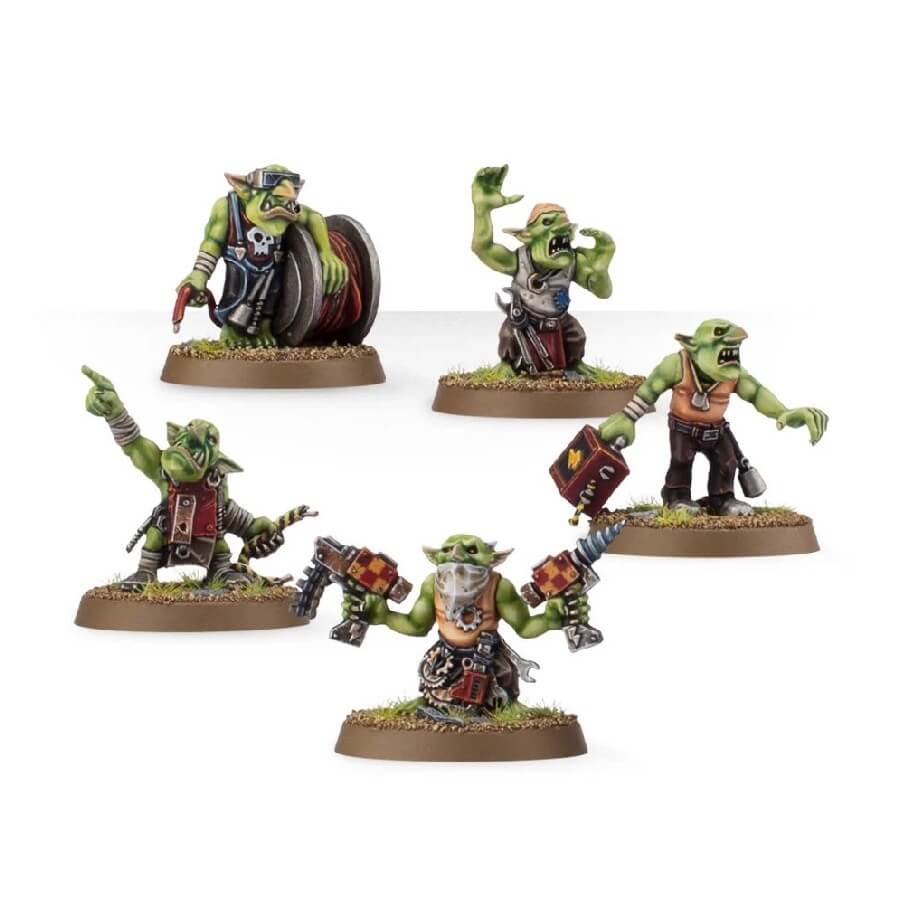
To paint the Gretchin and their green skin, base coat their skin with Moot Green. Apply a layer of Warpstone Glow shade to add depth and shading. Then, highlight the raised areas with Nuln Oil. - Step 7: Painting Gretchin Details
Using a small detail brush, paint the Gretchin’s clothing, weapons, and any other details with the appropriate Citadel paints. For example, you can use Abaddon Black for their clothing and Leadbelcher for their weapons. Be careful and take your time to ensure clean and precise painting. - Step 8: Layering Metallic Details
For the metallic details on the body of the cannon, follow the same layering technique used for the metallic parts mentioned earlier. Base coat them with Leadbelcher. Once dry, apply a layer of Nuln Oil shade to add depth and shading. Then, highlight the edges with a mix of Leadbelcher and a touch of Runefang Steel. - Step 9: Fine Details
Now it’s time to paint the fine details like buttons, wires, or insignias. Use a small detail brush and carefully apply the desired colors. For example, you can paint buttons with Abaddon Black and wires with Mephiston Red. - Step 10: Weathering (Optional)
If you want to give your Mek Gunz a weathered look, you can use techniques like dry brushing or sponge weathering. For example, you can lightly dry brush Ryza Rust on the metallic components to create rust effects. - Step 11: Varnish
Once you are satisfied with your paint job, it’s important to protect it. Apply Ardcoat or any gloss varnish to seal the paint and add a protective layer. This will help prevent chipping and keep your model looking great for a long time. - Step 12: Basing (Optional)
If you want to take your model to the next level, you can create a base for it. Use Citadel texture paints like Astrogranite or Stirland Mud to create the desired terrain. Paint the base to match the theme of your army or the setting you envision for your Mek Gunz.