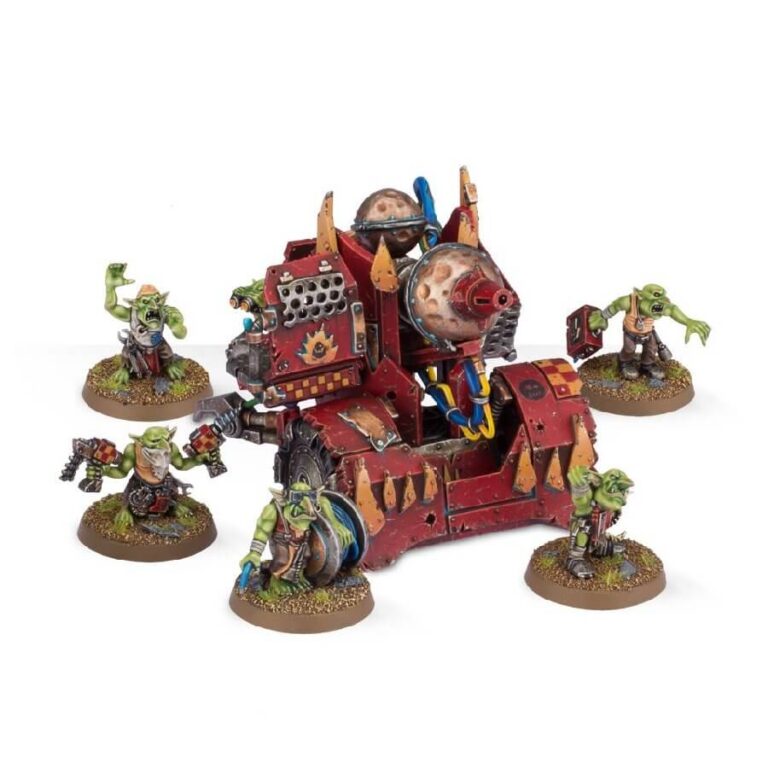
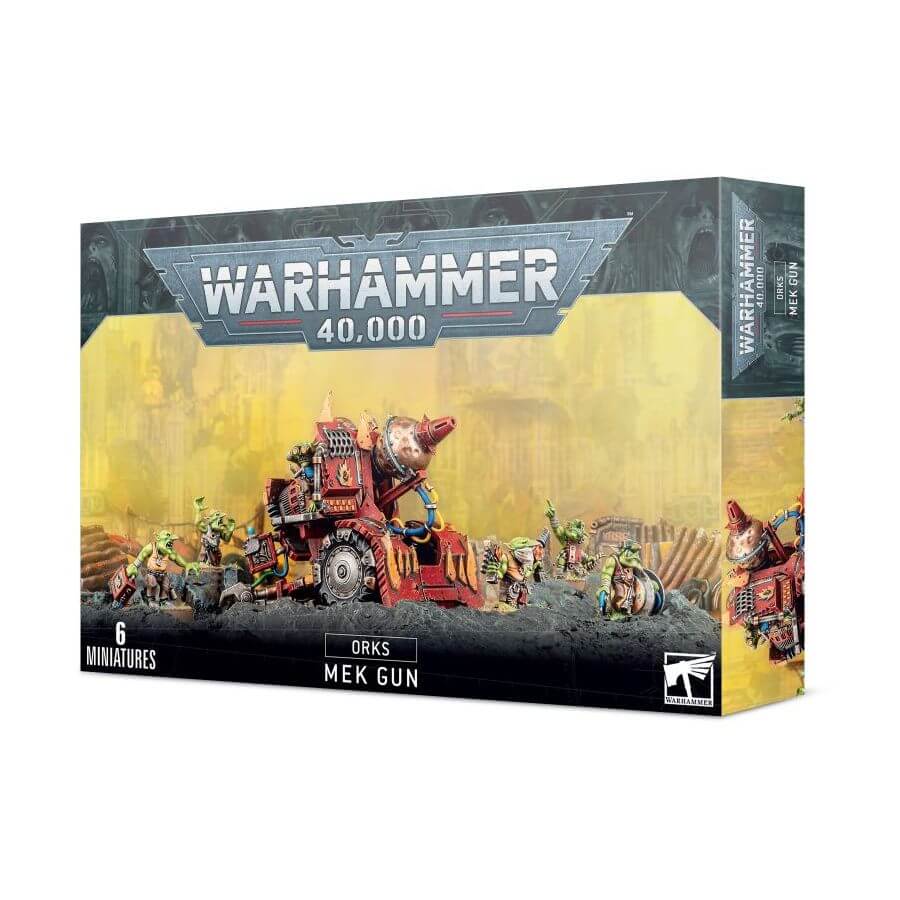
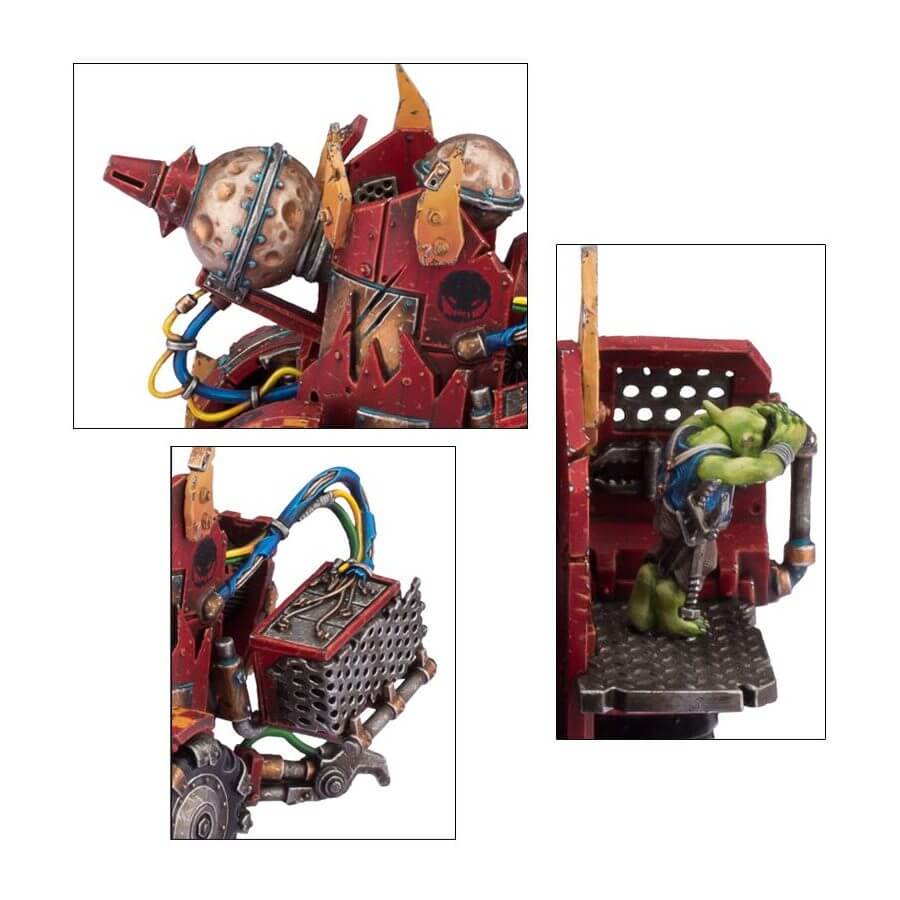
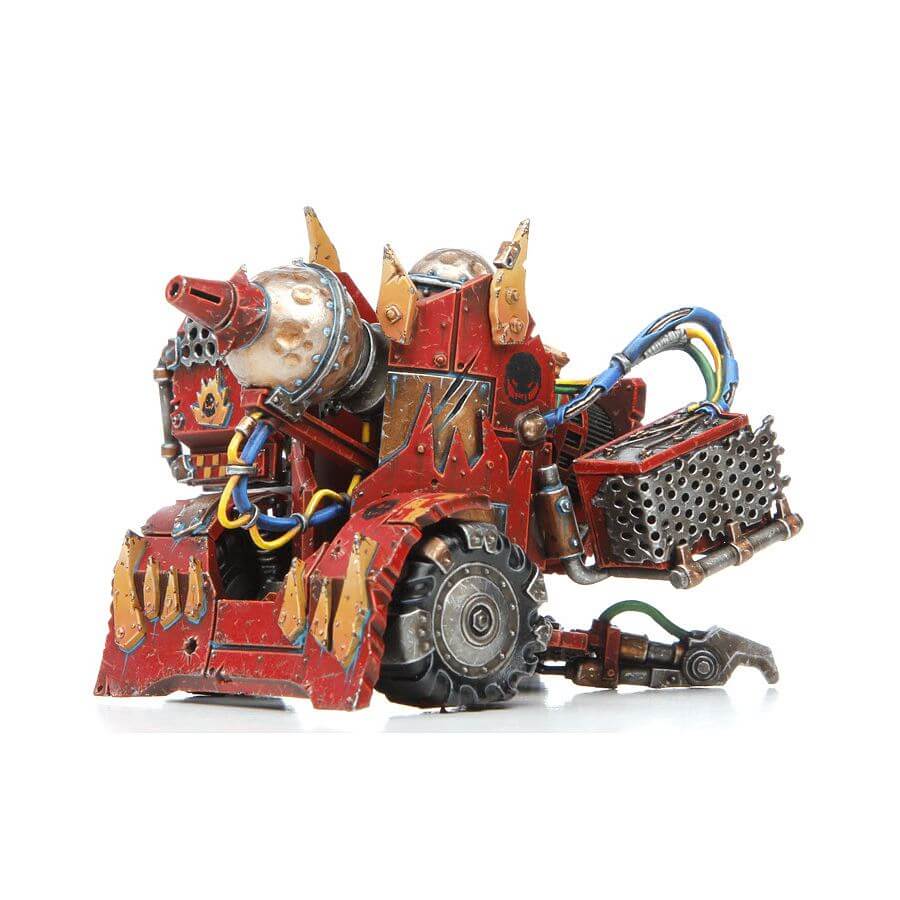
At the heart of this fearsome artillery piece lies the bubblechukka, a marvel of Ork engineering. This extraordinary contraption generates an array of force field bubbles, each with its own unpredictable characteristics. Some of these bubbles take on the form of colossal orbs, striking their targets with the force of an audacious backhand slap. Others drift gently through the air, resembling delicate soap bubbles, only to burst with the explosive power befitting the mighty Gork himself.
What’s in the Mek Gunz: Bubblechukka box
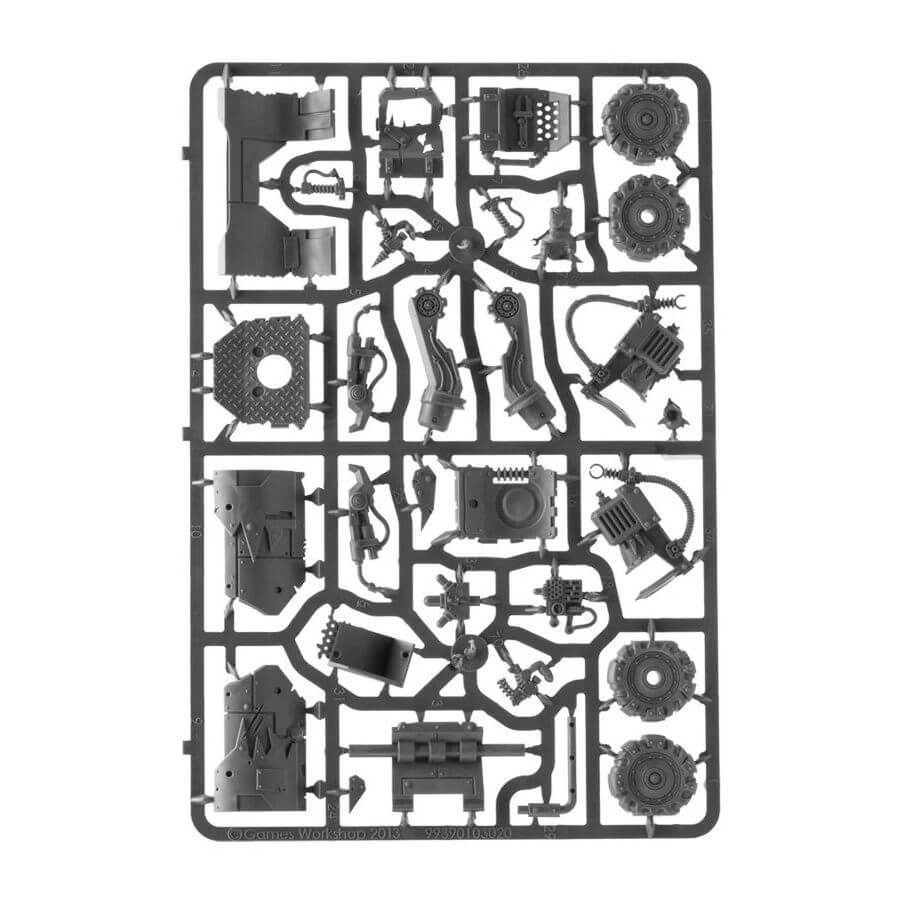
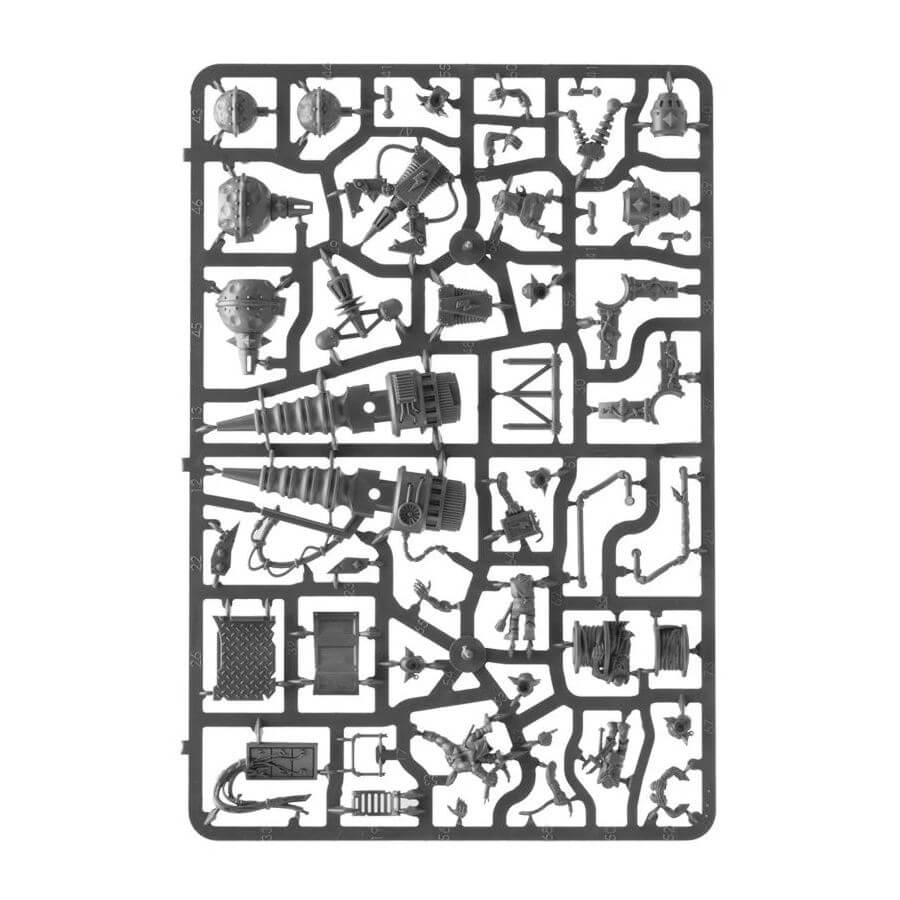
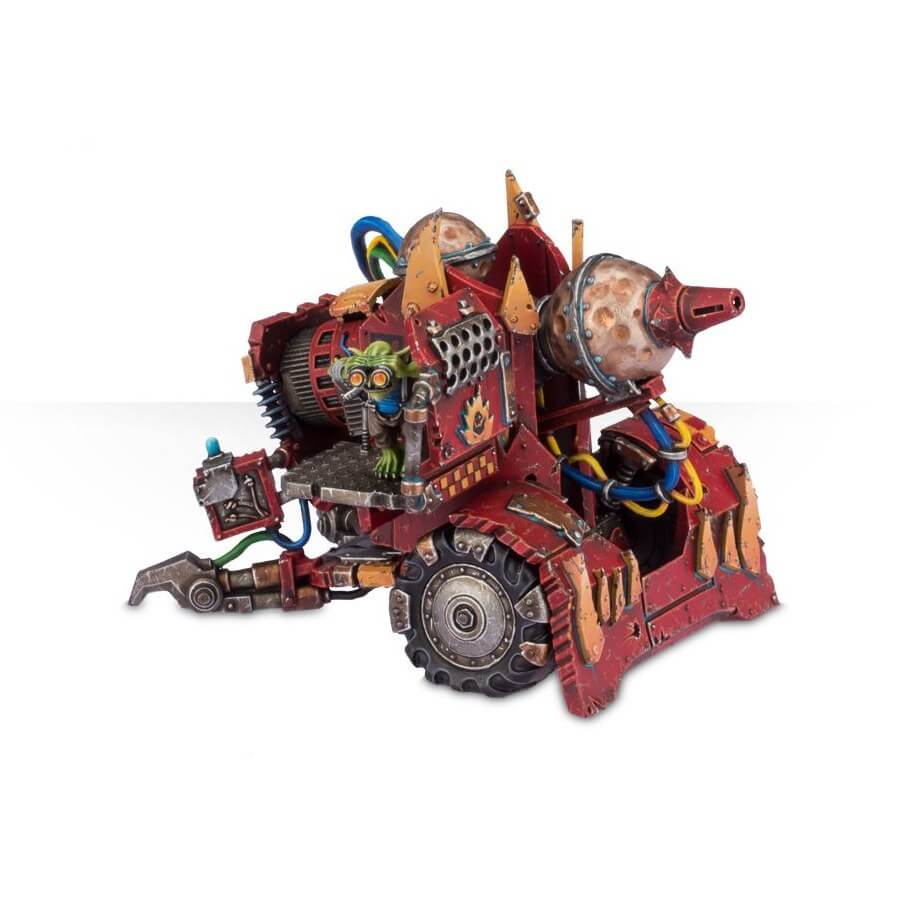
- x79 plastic components that make one of four possible Mek Gunz and 6 Gretchins. It can be assembled as a bubblechukka, a smasha gun, a traktor kannon or a kustom mega-kannon.
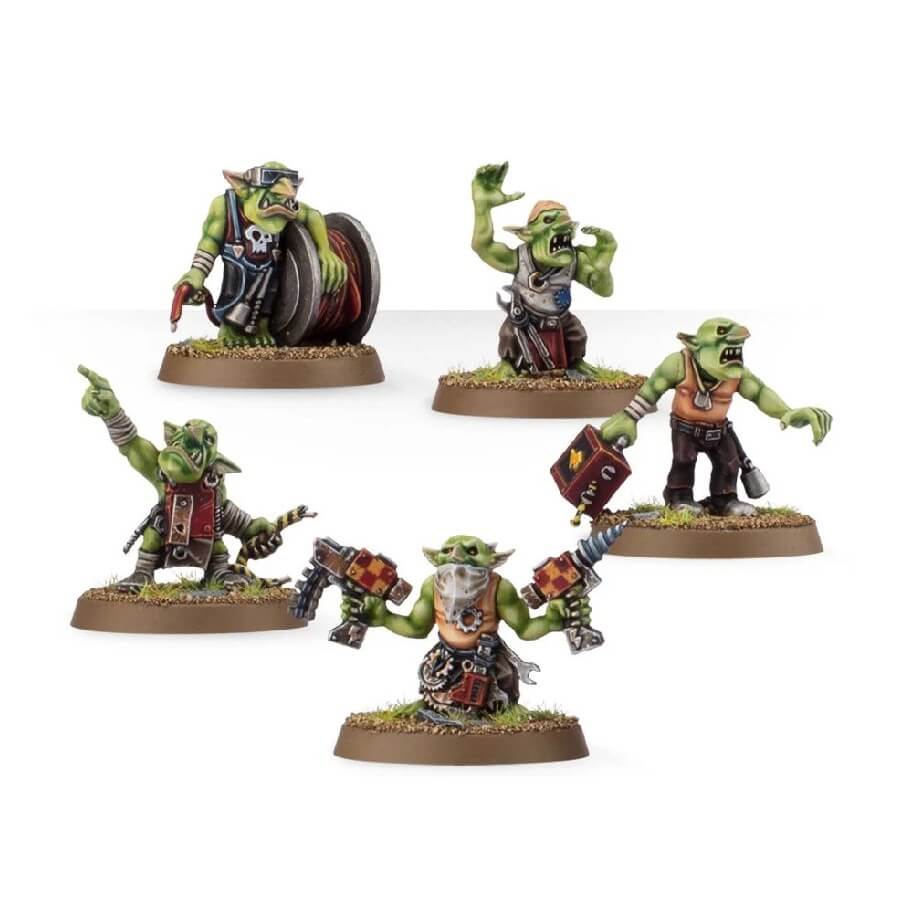
- x5 Citadel 25mm Round Bases for the Gretchins.
How to paint the Mek Gunz: Bubblechukka set
- Step 1: Prime Your Model
Start by priming your Mek Gunz: Bubblechukka and Gretchins with a suitable primer. This helps the paint adhere better and provides a smooth surface for painting. Use a gray or black primer, such as Chaos Black, for this step. - Step 2: Base Coat
Apply a base coat to the different parts of the Mek Gunz. For the body of the cannon, use Mephiston Red. Apply the paint evenly, ensuring full coverage on all surfaces of the cannon body. - Step 3: Layering
To add depth and shading to the red body, mix a slightly darker shade using Abaddon Black or a dark brown color like Rhinox Hide. Apply this darker mix to the recesses and areas where shadows would naturally occur. - Step 4: Highlighting
To create highlights on the red body, mix a lighter shade using Evil Sunz Scarlet or a light pink color like Pink Horror. Apply this lighter mix to the raised edges and areas that catch more light. - Step 5: Apply Wash
To enhance the depth and add richness to the red color, apply a wash like Carroburg Crimson or Druchii Violet. Use a fine brush and carefully apply the wash to the recesses and crevices of the red body. This will give the cannon a more weathered and realistic appearance. - Step 6: Metallic Parts
For the metallic components, follow the base coating, highlighting, and shading techniques mentioned in the previous guide. Use metallic paints like Leadbelcher or Runelord Brass for the metallic details, applying highlights and washes as desired. - Step 7: Bubblechukka Orbs
For the force field bubbles, follow the base coating and highlighting techniques mentioned in the previous guide. Use bright colors such as Zandri Dust for the base coat, and White Scar or Seraphim Sepia for the highlights. - Step 8: Painting the Gretchins
Base coat the Gretchins skin with Warboss Green. Apply a wash like Biel-Tan Green to add depth and shading to the skin. Then, highlight the raised areas with a mix of Warboss Green and a light green color like Skarsnik Green. - Step 9: Detailing
Using a small brush, paint the finer details of the Mek Gunz and Gretchins, such as buttons, wires, or glyphs, with suitable colors. For example, you can use Abaddon Black for buttons and Runelord Brass for wires. - Step 10: Weathering (Optional)
To give your Mek Gunz and Gretchins a weathered look, you can add weathering effects. Dry brushing Ryza Rust or stippling Typhus Corrosion on the metallic areas can create rust and corrosion effects, adding realism to the models. - Step 11: Varnish
Once you’re satisfied with your paint job, protect it by applying a varnish or protective coat. This helps prevent chipping and keeps your models looking great for a long time. You can use a matte or gloss varnish, such as Ardcoat or Munitorum Varnish, depending on the finish you prefer.