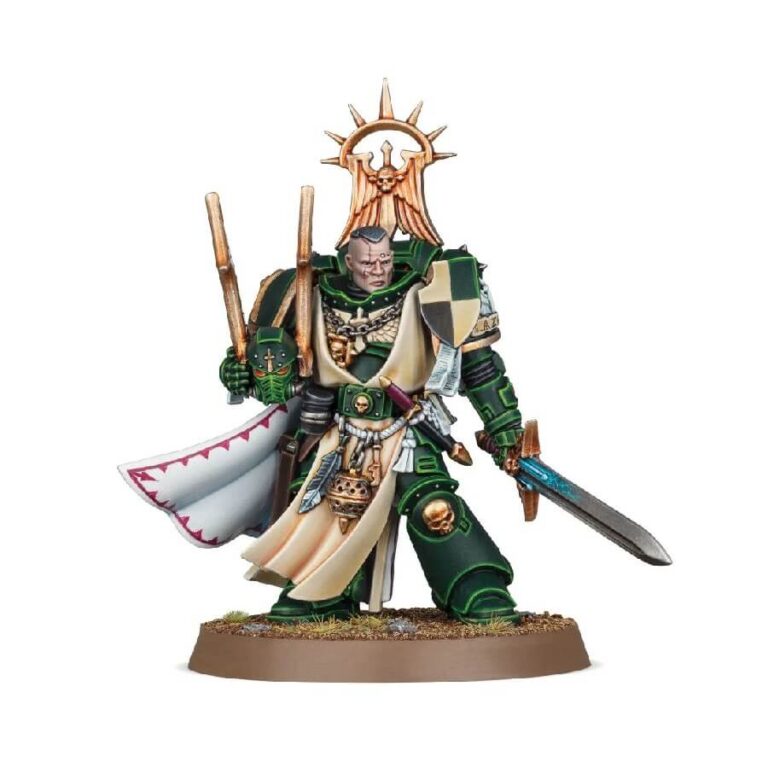
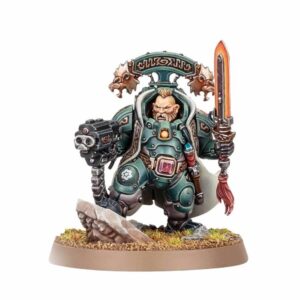
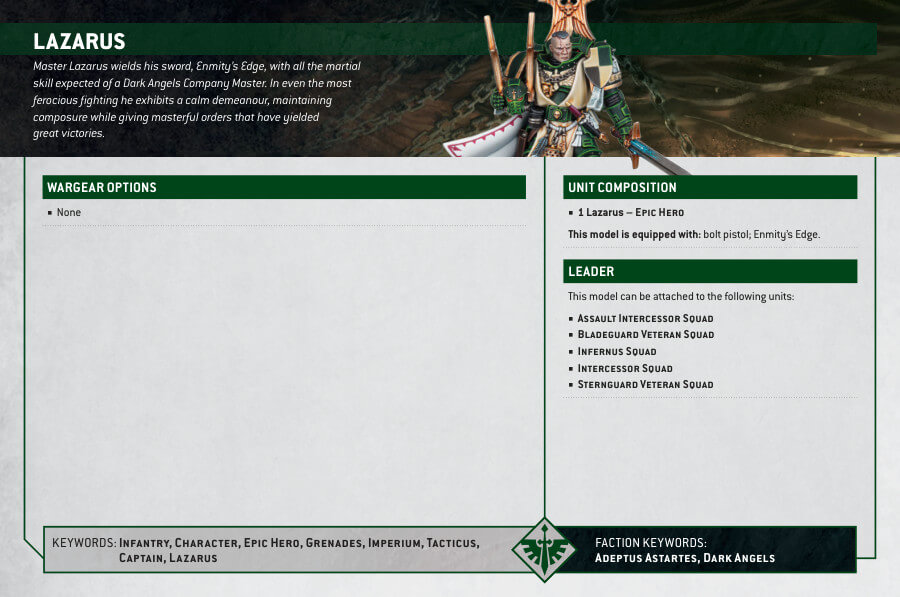
Meet Master Lazarus, a revered warrior of the Dark Angels who wields Enmity’s Edge with deadly precision. His composure is unwavering on the battlefield, except when facing enemy sorcerers whose abilities threaten the safety of his battle-brothers. Having witnessed the loss of many comrades to the taint of the warp, Lazarus channels his grief into every strike against psykers, invoking their memory to inspire himself to heroic deeds.
As an HQ choice for the Dark Angels, Master Lazarus is an exceptional melee fighter, especially when facing his chosen prey, enemy psykers. He is also equipped with the Spiritshield Helm, a powerful piece of technology that protects him from the corrupting influence of the warp.
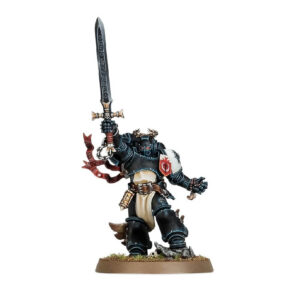
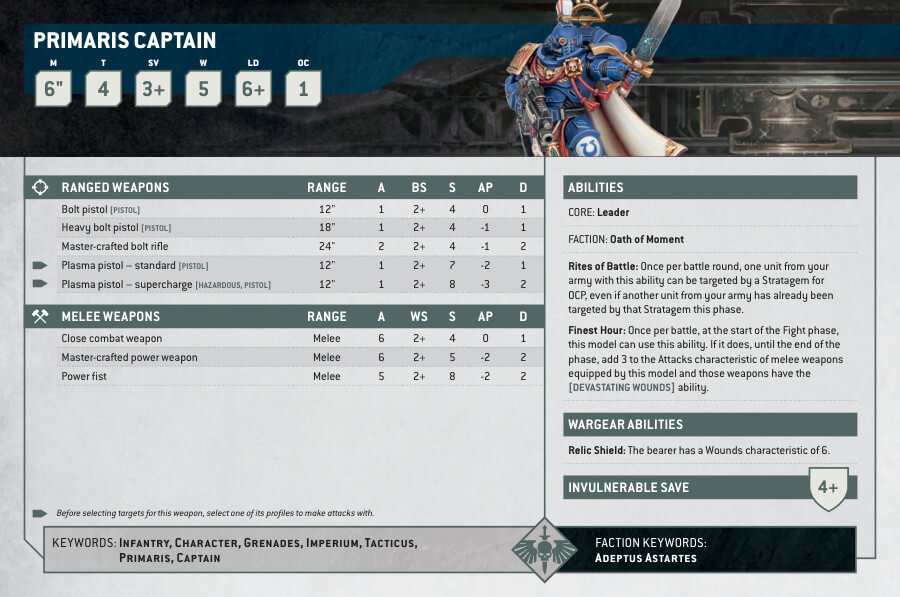
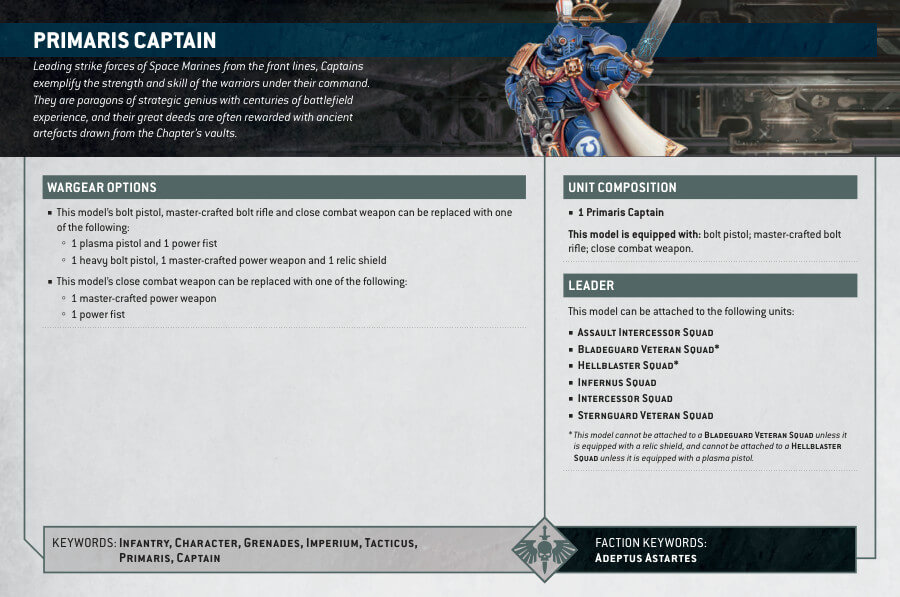
But that’s not all – Master Lazarus also has the option to be assembled as an unnamed Primaris Captain. With a choice of helmeted or unhelmeted head, the Primaris Captain forgoes the Spiritshield Helm in favor of a bolt rifle and a choice of power sword or power fist. This flexibility in assembly allows Dark Angels players to tailor their army to their desired playstyle and tactics.
Master Lazarus Datasheets
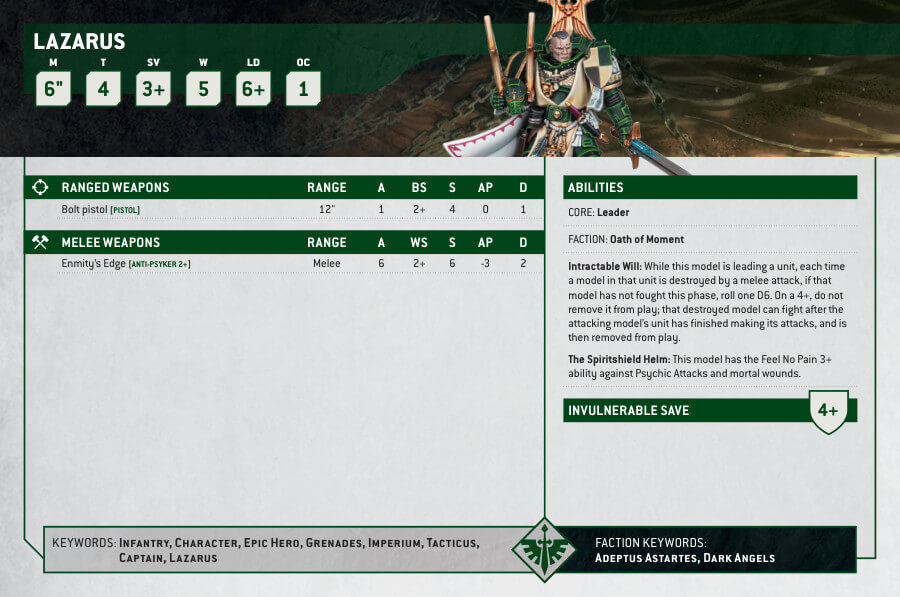
And in case you assemble him as a Primaris Captain..
What’s in the Master Lazarus box
- x22-piece plastic set that makes 1 Master Lazarus miniature.
- x1 Citadel 40mm Round Base
How to paint the Master Lazarus
- Step 1: Priming
Begin by priming this Dark Angels hero with Chaos Black spray paint. A well-primed surface provides a strong foundation for your paint layers and ensures a consistent starting point. - Step 2: Armor, Chainsword, and Metal Parts
Use Caliban Green to paint the armor, sword, and other metal components. Ensure a smooth and even application, covering these areas thoroughly. - Step 3: Shading Armor and Metal
Apply Nuln Oil to the armor and metal parts. This dark shade will settle into the recesses, creating shadows and depth on the surfaces. Allow it to dry completely. - Step 4: Edge Highlighting
Highlight the green areas of the armor with Moot Green, focusing on the edges. This step will make the green pop and give the armor a defined appearance. - Step 5: Further Highlighting
Add a second highlight to the green areas using Warpstone Glow. Concentrate on the edges and raised details to create depth and vibrancy. - Step 6: Gold Details
Paint the gold details on the armor, chainsword handle, helmet, and halo with Retributor Armour. Be precise, especially when working on intricate designs and the halo. - Step 7: Shading Gold Details
Enhance the gold details with Reikland Fleshshade. Apply this shade carefully to create depth and bring out the richness of the gold. - Step 8: Highlighting Gold Details
Highlight the gold details using Liberator Gold. Focus on edges and raised surfaces, adding a shining effect to the gold elements. - Step 9: Metal Parts
Paint the metal parts, such as the sword, with Leadbelcher. Ensure a smooth and even coat to create a metallic appearance. - Step 10: Layering Metal Parts
Layer the metal parts with Ironbreaker, focusing on raised areas and edges. For additional shine, add Stormhost Silver as a final layer to create a more realistic metal effect. - Step 11: Skin(optional)
Use Kislev Flesh to paint the skin of the miniature. Carefully cover all exposed skin areas, if any. - Step 12: Shading Skin with Druchii Violet(optional)
Apply Nuln Oil to the skin areas for shading and depth. Focus on recessed areas and where shadows naturally form. - Step 13: Highlighting Skin(optional)
Highlight the skin with Pallid Wych Flesh. This step should emphasize the raised areas and contours, giving the skin a lifelike appearance. - Step 14: Clothing
Paint any clothing on the model with Zandri Dust. Ensure that this complements the overall color scheme. You can paint the cape with White Scar, to create a nice contrast with the rest of the clothing. - Step 15: Eye Lenses
Paint the eye lenses of the helmet with Mephiston Red. Be precise to create vibrant red lenses. - Step 16: Immersive Basing with Texture Paints
To truly immerse your Lazarus in its environment, the choice of basing is crucial. Textured paints, such as Astrogranite for rocky terrain or Stirland Mud for a muddy landscape, offer a unique opportunity to add depth and realism to the base. - Step 17: Protecting Your Masterpiece with Munitorum Varnish
Preserve the work you’ve invested in your Dark Angels Space Marine by considering the application of Munitorum Varnish. This transparent varnish serves as a protective barrier, shielding your model from the rigors of time and play while maintaining its appearance.

