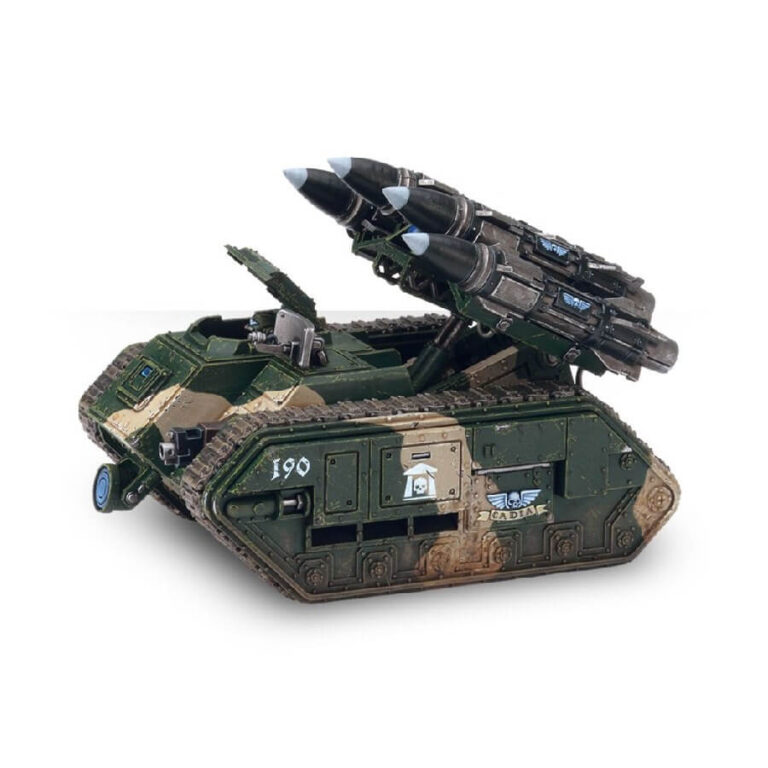
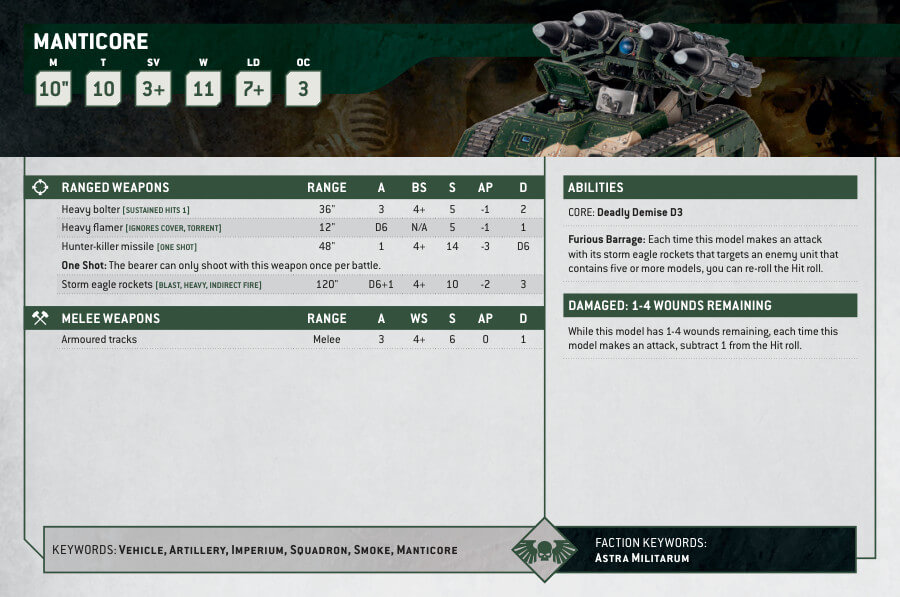
The Manticore, a fearsome long-range Astra Militarum artillery vehicle, rains destruction upon enemy formations with its devastating storm eagle rockets launched from incredible distances. Each rocket carries multiple warheads that ensure the doom of any fleeing adversaries.
This multipart plastic kit allows you to construct your own Manticore, equipped with four storm eagle rockets, which unleash furious salvos of firepower. The vehicle also features a hull-mounted heavy bolter or heavy flamer for additional offensive capabilities. With various options for the hatch, you can choose to build it closed, open with a raised blast shield, or fully open to reveal a crew member, who can be customized with different heads.
To enhance the Manticore’s appearance, the kit includes accessories like a spotlight and radar dish, which complement its detailed treads and riveted armor panels. With its versatile design and powerful armament, the Manticore stands ready to decimate the enemy from afar.
Manticore Datasheets
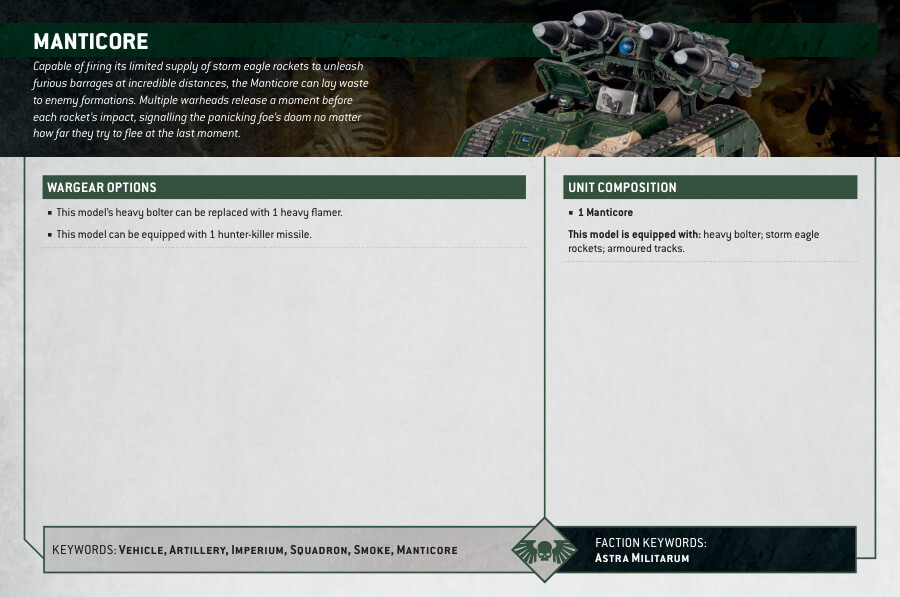
What’s in the Manticore box
- x85 plastic components kit: This kit can alternatively be used to build a Deathstrike – an Astra Militarum tank armed with a single massive missile.
- x1 Astra Militarum Vehicle Transfer Sheet featuring tactical markings, numerals, and other regimental heraldry.
How to paint the Manticore Set
- Step 1: Base Coat
Using a larger brush, apply a smooth coat of Abaddon Black to cover the entire tank. Make sure to get into all the nooks and crannies, and be careful not to leave any visible brushstrokes. Let it dry completely. - Step 2: Metallics
Using the smaller brush, paint the metal parts of the tank with Leadbelcher. This includes the tracks, cannons, and any other metallic details. Take your time and be precise. If you make any mistakes, you can easily touch them up later. - Step 3: Highlights
Using Mechanicus Standard Grey and the smaller brush, carefully highlight the edges of the tank to add depth and dimension. Focus on areas where light would naturally hit, such as edges, corners, and raised surfaces. This step requires a steady hand and attention to detail. - Step 4: Camouflage Effect
To achieve a camouflage effect, choose one or two additional colors that work well together, such as Skarsnik Green and Elysian Green. Using the smaller brush, paint irregular shapes or patterns on the tank’s surface with these colors. These shapes can resemble natural patterns like foliage or brush strokes. - Step 5: Shade
Apply a thin coat of Agrax Earthshade using the larger brush to the recessed areas of the tank, such as panel lines and crevices. This will create shadows and add depth to the model. Be careful not to overdo it, as too much shade can make the model look dirty. - Step 6: Drybrush
Using Tyrant Skull and a drybrushing technique, lightly brush the raised areas of the tank. This will pick out the texture and add highlights to the model. Make sure to remove excess paint from the brush before drybrushing to achieve a subtle effect.

