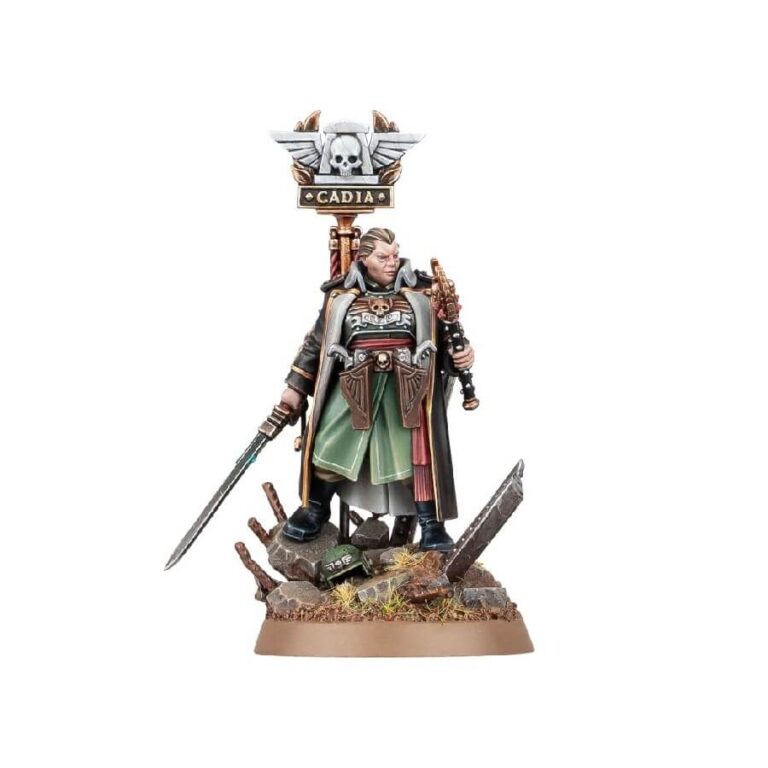
The unwavering commandant of the Astra Militarum, who stands as a living testament to Cadia’s enduring spirit and indomitable will. Despite the planet’s tragic fate, Ursula Creed remains a formidable strategist, carrying the legacy of her legendary father, and leading Imperial armies to numerous victories against the Imperium’s adversaries. This kit allows you to construct Lord Castellan Ursula Creed, a commanding presence amidst the ruins of an Imperial world, donning her father’s iconic greatcoat and proudly displaying the raised icon of Cadia. Adorned with twin relic pistols, Duty and Vengeance, secured at her waist, she brandishes an unsheathed power sword in one hand, while the other holds the choice of either magnoculars for battlefield reconnaissance or a bejeweled sceptre symbolizing her high office.
The kit also offers the option of two heads, one helmeted and the other bare, enabling you to further customize Ursula Creed’s appearance. As the highest-ranking officer of Cadia and a potent symbol of bravery and resilience, she serves as an impressive centerpiece for any Cadian collection, embodying the unwavering courage that defines the Astra Militarum.
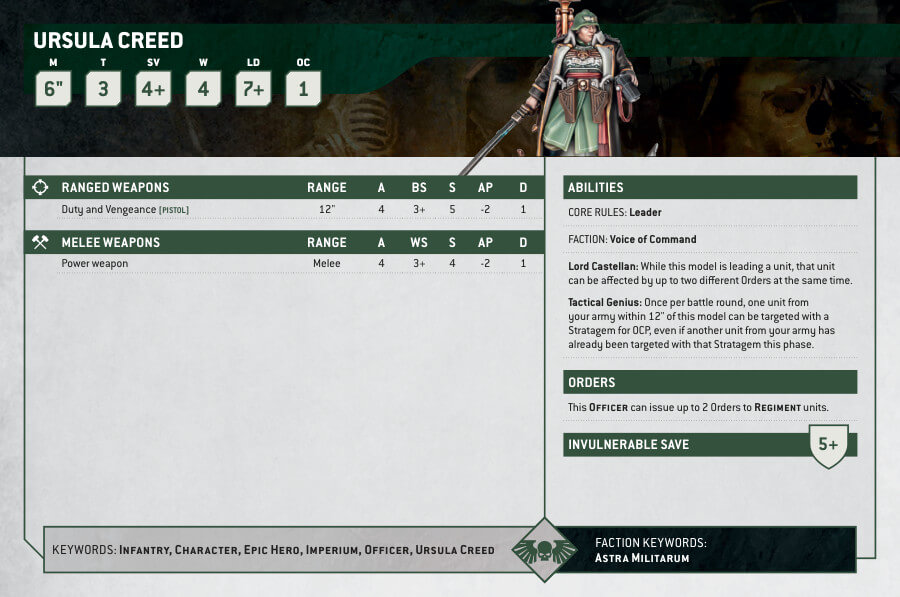
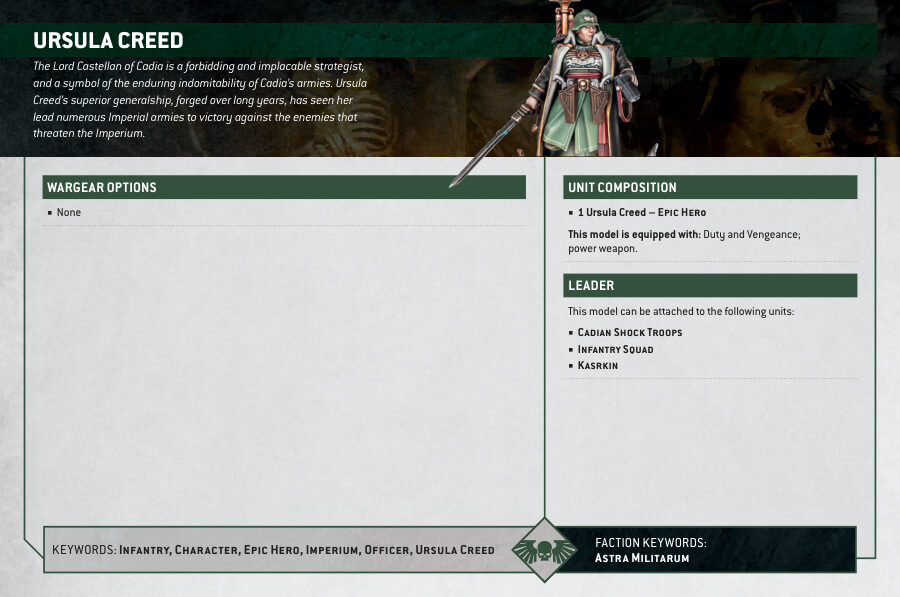
Lord Castellan Ursula Creed Datasheets
What’s in the Lord Castellan Ursula Creed box
- x22 plastic components
- x1 Citadel 32mm Round Base
How to paint the Lord Castellan Ursula Creed set
- Step 1: Prime the Model
Start by priming Lord Castellan Ursula Creed with a black or grey primer. This will provide a solid base for the paint to adhere to. - Step 2: Basecoat the Armor
Use Abaddon Black to carefully paint the armor of Lord Castellan Ursula Creed. Apply thin and even coats to achieve smooth coverage. - Step 3: Paint the Details
Use colors like White Scar for the icon of Cadia and Mephiston Red for any red accents, such as the capes or insignia. For the gold trim on the armor, use Retributor Armor. Be careful and precise with your brushwork to maintain clean lines. - Step 4: Highlight the Armor
To add depth and dimension to the armor, use colors like Calgar Blue for the blue areas and Evil Sunz Scarlet for the red areas. Apply thin lines or dots on the raised edges to create highlights. - Step 5: Paint the Weapons
Paint the weapons using colors like Leadbelcher for the metallic parts and Retributor Armor for any gold details. Apply shades like Nuln Oil to the metallic areas for added depth. - Step 6: Paint the Face and Hair
Use colors like Kislev Flesh for the face and hair. Apply thin layers and build up the color gradually. Use Reikland Fleshshade to add depth to the facial features. - Step 7: Paint the Sceptre or Magnoculars
If you choose to paint the magnoculars, use colors like Mechanicus Standard Grey or Administratum Grey. For the sceptre, use colors like Retributor Armor for the main part and highlight with Liberator Gold. - Step 8: Add Wash for Depth
Apply Agrax Earthshade wash to the recesses of the armor to create shadows and enhance the details. Use Nuln Oil wash on the metallic areas for a more realistic look. - Step 9: Highlight the Details
Use a small brush and carefully apply highlights to the raised areas of the armor and weapons using colors like Ulthuan Grey for the blue areas and Fire Dragon Bright for the red areas. - Step 10: Varnish the Model
Once the paint is dry, protect your work by applying a layer of varnish. This will help preserve the paint and provide a protective finish.

