Meet the Space Marine Lieutenants, battle-hardened field tacticians, and revered warriors entrusted with the command of the Chapter’s forces. These exceptional officers not only issue commands with authority but also personally engage the enemy in combat, often wielding formidable relic wargear such as the blazing volkite weaponry or intricately crafted storm shields.
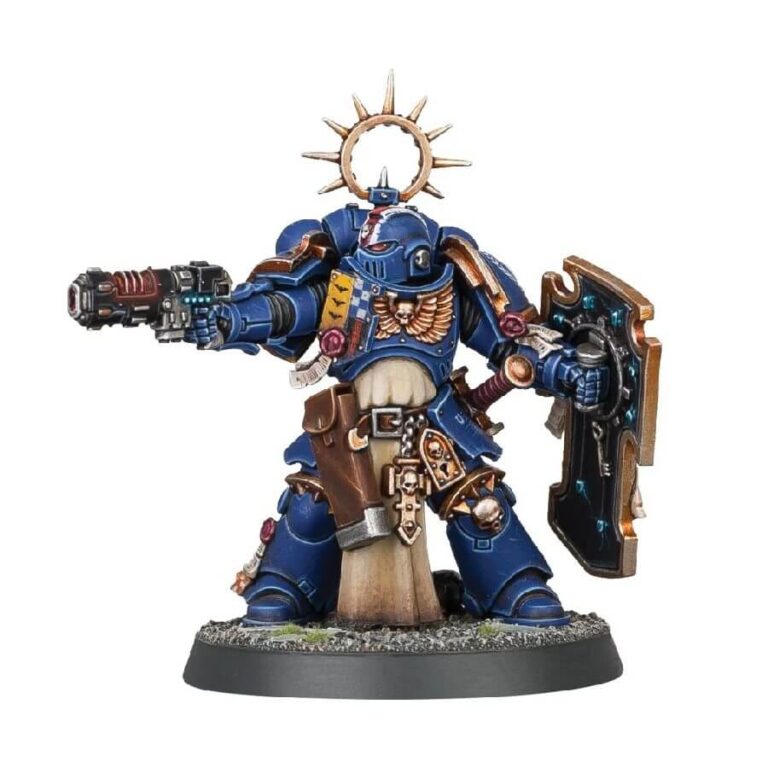
In this versatile multipart plastic kit, you can craft a singular Space Marine Lieutenant, a sub-commander of the Adeptus Astartes. This experienced leader is equipped with a robust storm shield, a symbol of his mastery on the battlefield. He wields a rare and exotic neo-volkite pistol and carries a power sword sheathed at his side, a testament to his combat prowess.
The Lieutenant’s armor showcases his veteran status, adorned with a surcoat and with relics and symbols of distinction. His storm shield proudly displays the emblem of the Indomitus Crusade, underlining his dedication to the Imperium‘s cause.
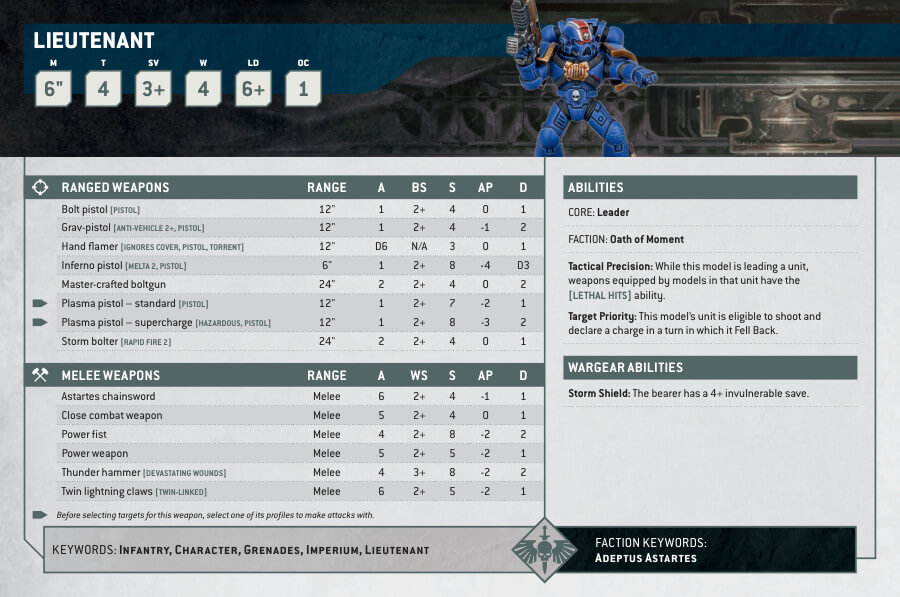
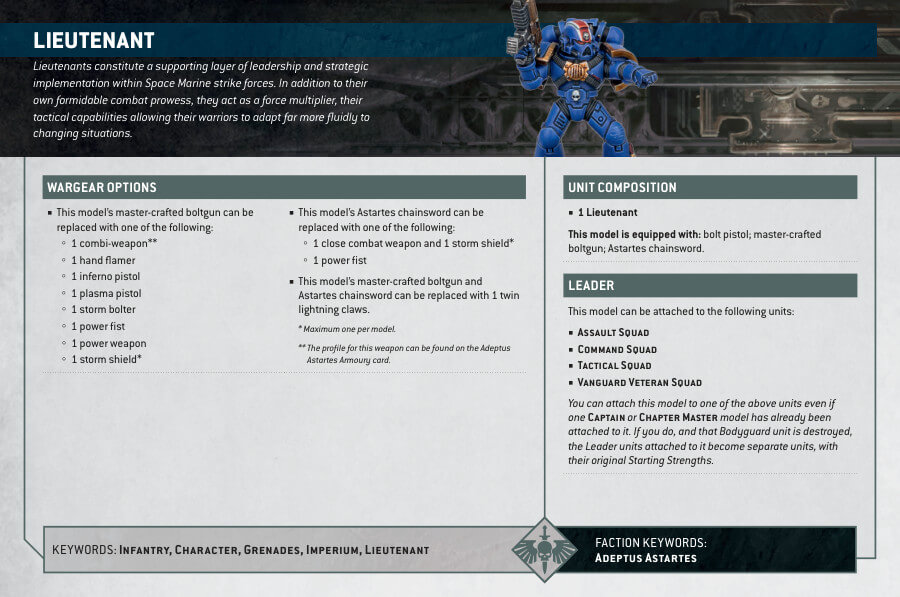
Lieutenant with Storm Shield Datasheets
What’s in the Lieutenant with Storm Shield box
- x10 plastic components that make 1 Lieutenant with Storm Shield.
- x1 Citadel 40mm Round Hex Hole Base.
How to paint the Lieutenant with Storm Shield set
- Step 1: Basecoat the Armor
Begin your painting journey by applying a base coat of Macragge Blue to the Lieutenant’s armor. Ensure your strokes are smooth and even, covering every blue part of the miniature. This forms the foundation for the rest of the paintwork. - Step 2: Shade for Depth
To infuse depth and realism into the armor, use Nuln Oil as a shade. Concentrate on the recesses and crevices of the armor, allowing the shade to settle naturally. This step enhances the three-dimensional appearance of your miniature. - Step 3: Layer the Armor
Progress by layering the armor with Calgar Blue. Focus on the sections that aren’t shaded, letting the shade you used previously create shadows in the recesses. This layering technique adds complexity and depth to the armor’s appearance. - Step 4: Highlight with Fenrisian Grey
Highlight the raised areas of the armor with Fenrisian Grey. This subtle touch accentuates the miniature’s details, creating a captivating gradient effect that makes the armor stand out. - Step 5: Storm Shield
Turn your attention to the storm shield. Apply Retributor Armour to give it a majestic golden sheen, adding a touch of grandeur to this vital piece of equipment. - Step 6: Weaponry
For the neo-volkite pistol, use Leadbelcher to create a metallic appearance that befits its advanced technology. The power sword can be transformed with Runelord Brass, granting a different look. - Step 7: Surcoat and Relics
Paint the Lieutenant’s surcoat with Zandri Dust for a contrasting look that complements the overall color scheme. Add exquisite details and symbols of status using colors like Mephiston Red (e.g. paint the helmet lenses) or White Scar (create the small checker board pattern on his chest, paint stripes on his helmet) allowing you to personalize your miniature. - Step 8: Finishing Touches
Consider enhancing the miniature with subtle touches. Utilize Abaddon Black , Yriel Yellow or Skrag Brown for belt buckles or other tiny features that add depth and character to your Lieutenant. - Step 9: Base
Complete your masterpiece by crafting a thematic base using Texture paints such as Astrogranite or Stirland Mud. Tailor the base to match your chosen battlefield or thematic setting. Static grass or tufts can be incorporated for added realism, making the miniature feel rooted in its environment. - Step 10: Varnish and Seal
To protect your masterpiece, apply a layer of Ardcoat for a glossy finish that enhances the details and colors. This protective layer not only preserves the integrity of your Lieutenant but also adds a subtle shine to the finished piece, making it truly stand out on the battlefield.

