
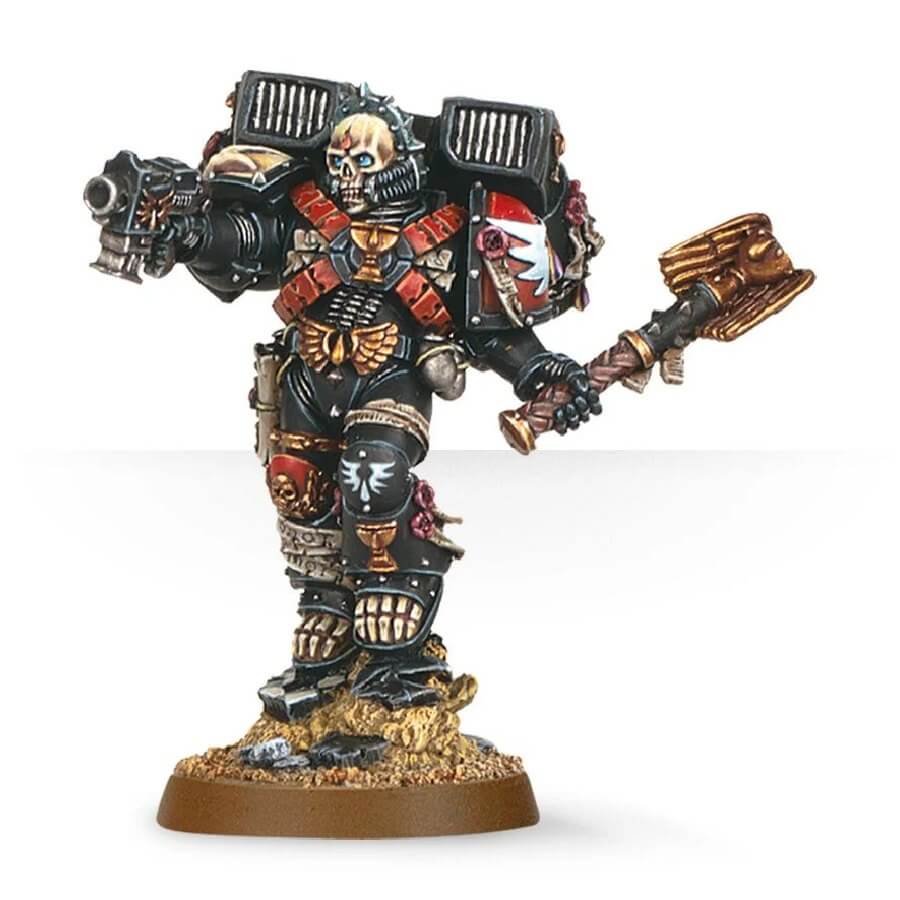
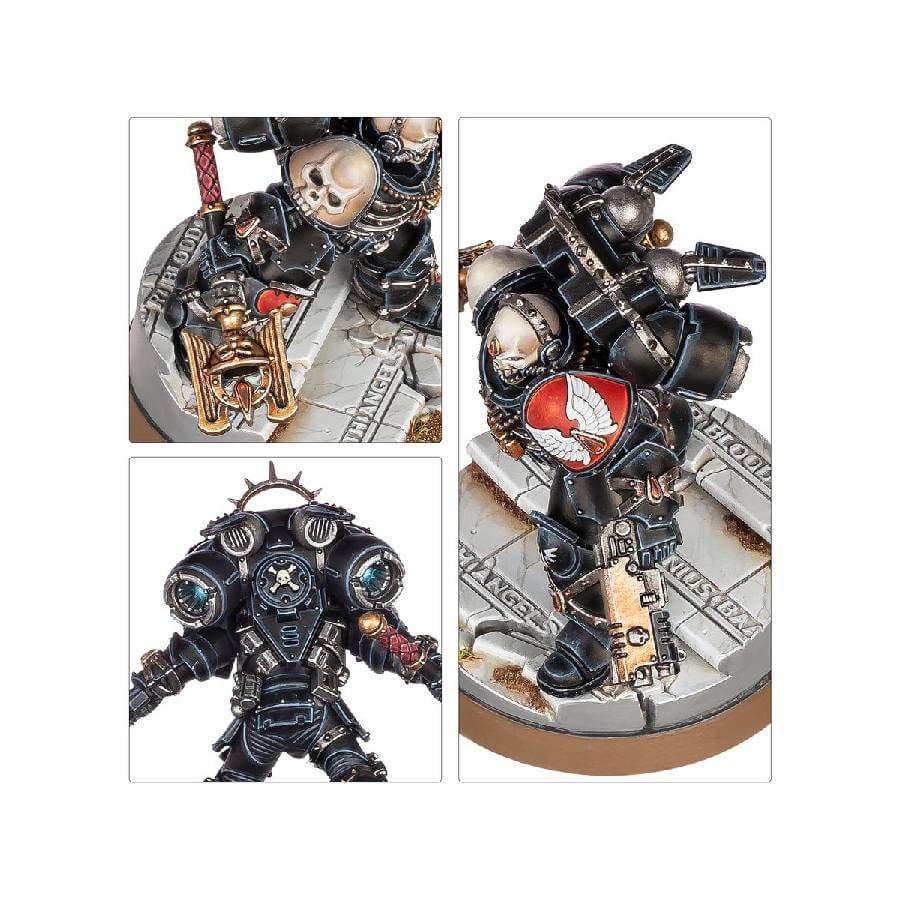
Lemartes is a warrior of unshakable resolve, maintaining clarity despite having long fallen to the Black Rage. As the Guardian of the Lost, he commands the Blood Angels‘ Death Company, wielding the legendary Blood Crozius. His presence elevates the Death Company to even greater heights of ferocity and power.
The miniature of Lemartes showcases his dynamic pose, with his bolt pistol in one hand and the Crozius Arcanum in the other. His armor is adorned with intricate details, including purity seals, scrolls, Blood angels iconography, chalice imagery, and an immense skull on one shoulder pad. His jump pack also features similar decorations, and a halo surrounds his skull head.
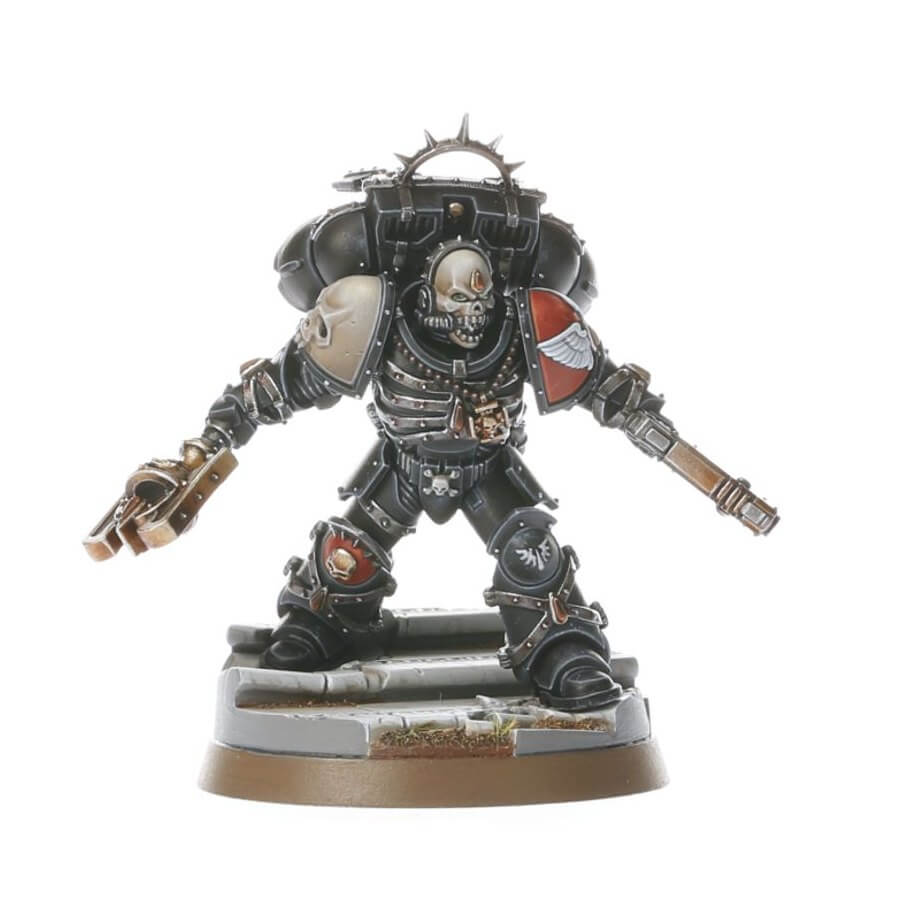
Lemartes Old Vs New model
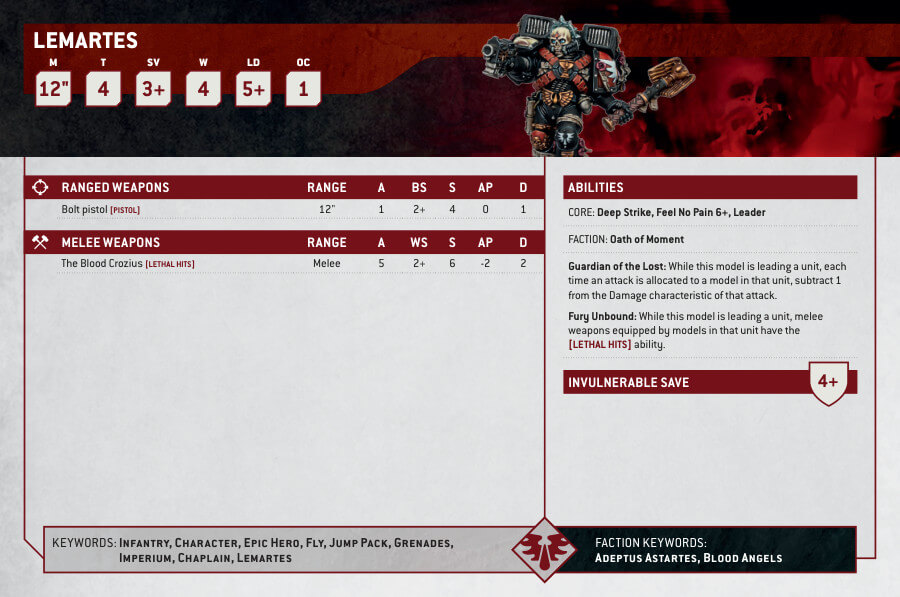
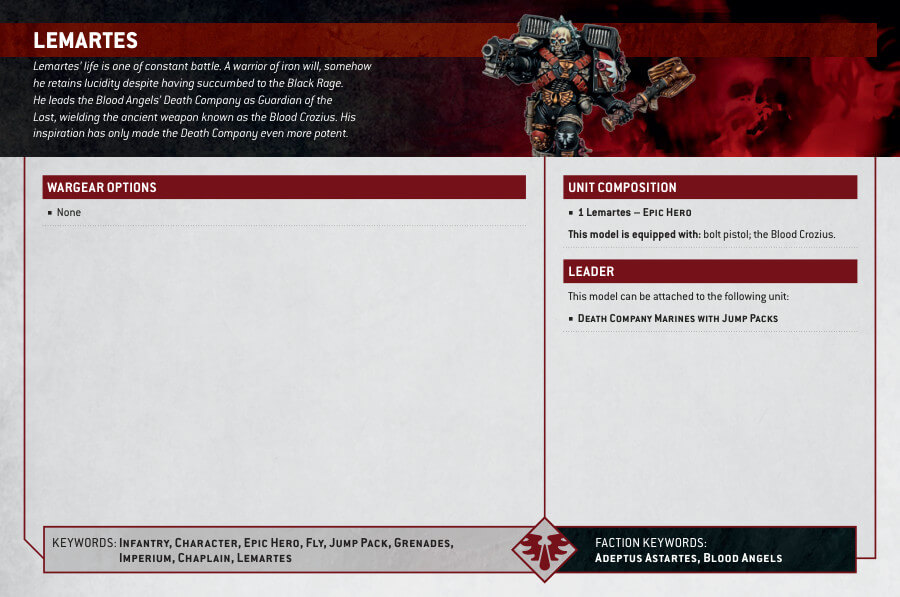
Lemartes, Guardian of the Lost Datasheets
What’s in the Lemartes, Guardian of the Lost box
- x25 plastic components that make one Lemartes model.
- x1 Citadel 40mm Round Base.
How to paint Lemartes, Guardian of the Lost
- Step 1: Priming
Begin by applying a Chaos Black Primer to cover the entire miniature. The primer serves as a crucial foundation, enhancing paint adhesion and providing a consistent base for your colors. Ensure that the primer coat is even and let it dry completely. - Step 2: Painting the Armor
With Abaddon Black, start painting the majority of the armor. This includes most areas except for the shoulder pads and the skull on the left shoulder pad. Use thin layers of paint to avoid obscuring details and achieve a smooth, rich black finish. - Step 3: Painting the Red Details
For the vibrant red details, which include the shoulder pads, the skull on the shoulder pad and other red details, use Mephiston Red. Apply multiple thin coats to achieve a bold and consistent red color. - Step 4: Painting the Metal Parts
Switch to Leadbelcher for the metal parts of the crozius arcanum, the bolt pistol, halo, and the jump pack. Pay close attention to detail while painting these areas, as metallic surfaces benefit from a smooth, even application. - Step 5: Painting the Gold Details
Apply Retributor Armour to the gold details of the armor, the crozius arcanum, and the jump pack. This rich gold color adds a regal touch to your miniature. Take your time to ensure a neat and opulent finish. - Step 6: Painting Bone Details
For the bone parts, which include the feet, head, and other bone details you may want him to have, use Screaming Skull. This off-white shade mimics bone and should be applied with precision to capture the desired skeletal appearance. - Step 7: Applying a Wash
To create depth and shadows across the entire miniature, apply a controlled wash of Nuln Oil. Focus on recessed areas to emphasize details. Be careful not to let the wash pool excessively, as it may obscure finer details. - Step 8: Highlighting the Red details
Highlight the red details using Evil Sunz Scarlet. Apply this color sparingly along the edges and corners of the red areas. These highlights give dimension to the armor and make it visually striking. - Step 9: Highlighting the Black Parts
With Eshin Grey, highlight the armour parts of the miniature. Use precise brushwork to apply thin lines along edges and corners. This technique defines the black areas and adds depth. - Step 10: Highlighting the Metal Parts
Highlight the metal parts using Stormhost Silver. Apply this metallic paint with care along the edges and corners of the metal surfaces. This creates a weathered, worn appearance on the metal components. - Step 11: Highlighting the Gold Details
For the gold details, use Liberator Gold to create subtle highlights along edges and corners. This enhances the luster of the gold elements, making them stand out. - Step 12: Highlighting the Bone Parts
Complete your miniature by highlighting the bone parts with Ushabti Bone. Apply this color precisely along the edges and corners of the bone areas to bring out their natural texture. - Step 13: Final Touches
Thoroughly inspect your miniature for any areas that require touch-ups or refinements. Make sure all details are well-defined, and the overall appearance matches your vision. - Step 14: Seal with Varnish
If you intend to use your miniature for gaming or want to protect your paintwork, consider applying a clear varnish. Munitorum Varnish is a suitable choice. This protective layer safeguards your model and preserves your hard work.