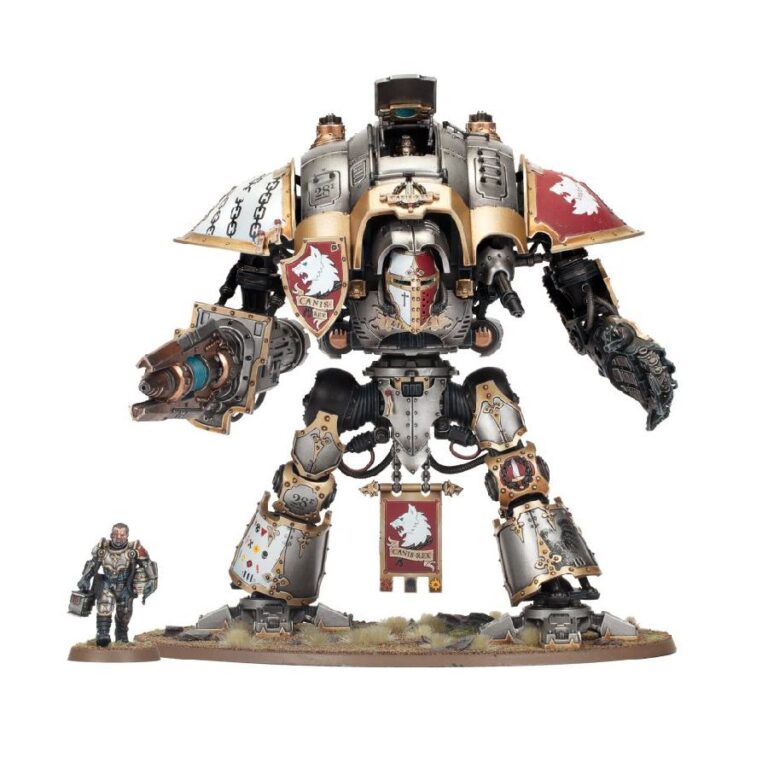
This multi-part plastic kit is your gateway to commanding a Knight Preceptor, a prestigious choice in the Lords of War choice for your Imperial Knights armies or a wandering Freeblade ready to serve other Imperium forces. This super-heavy walker comes equipped with a variable las-impulsor and Preceptor multi-laser, offering versatility in the heat of battle. Additionally, you have the freedom to select carapace-mounted weaponry to further enhance its capabilities. Notably, the Knight Preceptor can support allied Armiger-class squires, adding strategic depth to your army.
Beyond its battlefield prowess, the Knight Preceptor offers an exciting painting project. With an abundance of customization options and intricately detailed components available during assembly, you have the opportunity to craft a truly distinctive war machine. Let your creativity run wild as you bring this noble knight to life with your unique touch.
While this kit is designed to create a Knight Preceptor, it offers even more possibilities. Assemble it as one of several other Questoris-class Imperial Knights, including the Errant, Paladin, Crusader, Gallant, Warden, or the renowned Canis Rex. Alternatively, venture into the realm of Chaos Knights by constructing a Knight Despoiler. Any remaining weapons, faceplates, or accessories can be kept as valuable spares, ready to enhance your other Knight kits.
Knight Preceptor and Canis Rex Datasheets
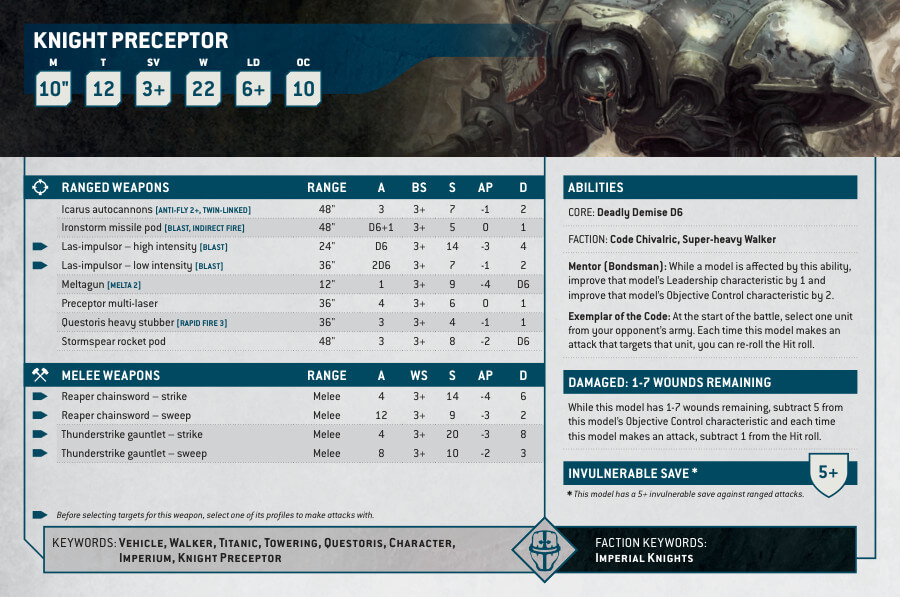
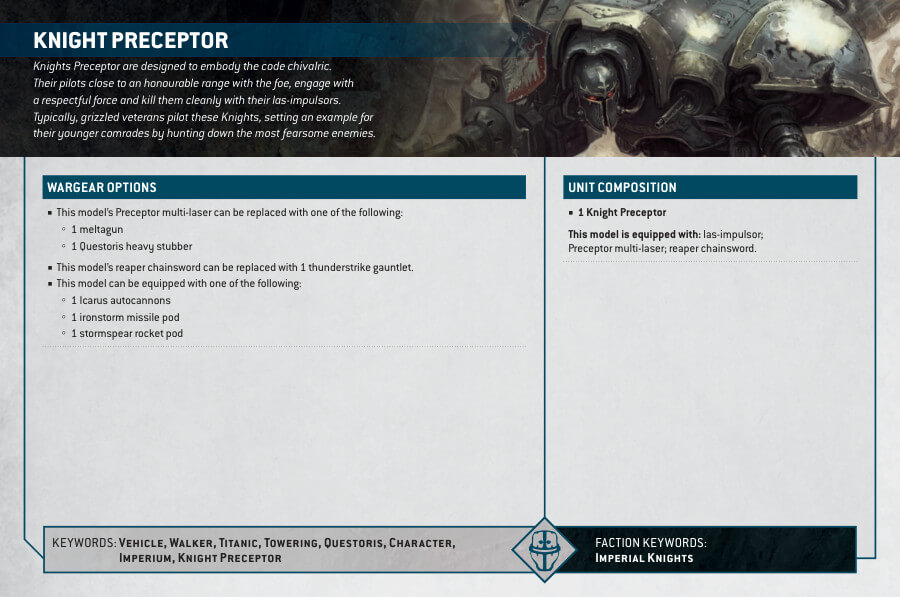
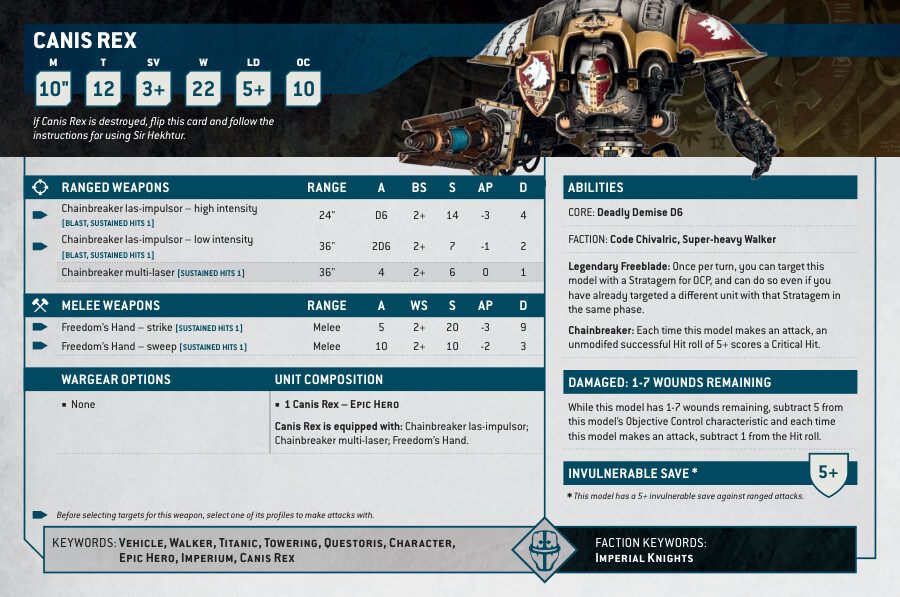
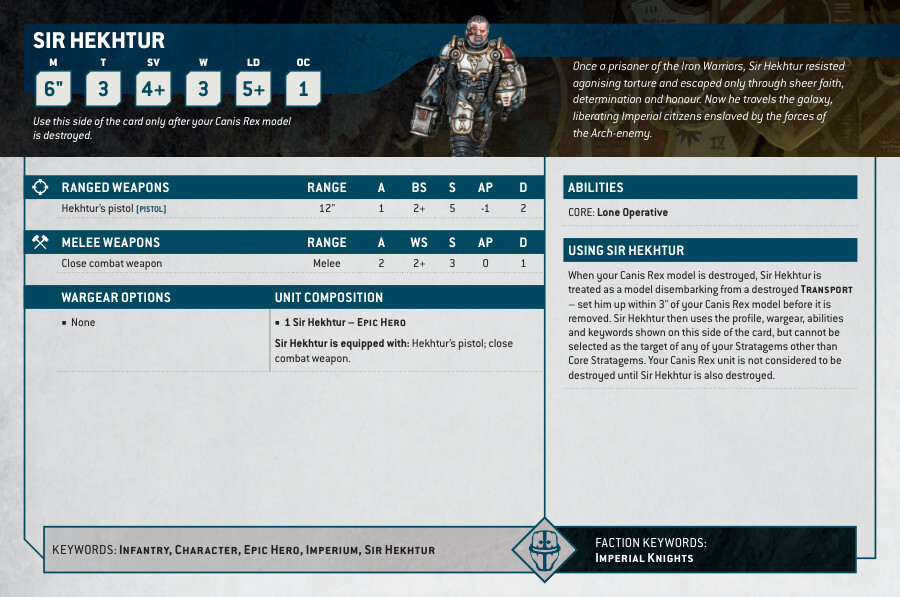
What’s in the Knight Preceptor box
- x250 plastic components that make the Knights Preceptor, an honorable and exemplary Lords of War choice for your Imperial Knights armies.
- x1 Citadel 170mm Oval Base
- x1 Citadel 25mm Round Base
- x1 transfer sheet, featuring heraldry for Imperial Knights.
How to paint the Knight Preceptor Set
- Step 1: Prime for Perfection
Prepare your Knight Preceptor for a vibrant paint job by using Chaos Black spray primer. This crucial step ensures that your subsequent layers of paint adhere smoothly to the model’s surface. - Step 2: The Gleaming Armor
Start with the Knight’s impressive armor. Apply Leadbelcher to the plates, creating a metallic base that will catch the light on the battlefield. To elevate the shine, carefully layer the armor with Stormhost Silver. For added depth and definition, use Agrax Earthshade as a shade, allowing it to settle into the recesses for a weathered effect. - Step 3: Fiery Red Highlights
Turn your attention to the Knight’s shoulder pads and any specific plates you wish to accentuate. Use Khorne Red as the base color, infusing these areas with a bold crimson hue. To make them truly pop, apply a layer of Wild Rider Red, intensifying the vibrancy of these striking accents. - Step 4: Gilded Details
The trims and gold details deserve special attention. Begin by coating them with Retributor Armour, creating a regal, golden appearance. To enhance their brilliance, layer these areas with Auric Armour Gold, ensuring they gleam with opulence. - Step 5: Crisp White Highlights
Highlight intricate details, such as icons and emblems, with White Scar. This addition provides a stark and eye-catching contrast against the other colors, elevating the overall visual appeal. - Step 6: Subtle Under-Armor Depth
To add depth and subtlety to the black under-armor crevices, use Eshin Grey. This technique enhances the contours and shadows, making your Knight Preceptor’s armor even more captivating. - Step 7: Weathering Effects for Realism
For a battle-hardened appearance, consider introducing weathering effects. Typhus Corrosion creates a rusted, worn look, adding authenticity to your model. Alternatively, Blood for the Blood God can simulate a dramatic splatter of battle, telling a visual story of your Knight’s heroic battles (plot twist: it’s not his blood… he is a machine of war fighting daemon princes and lords). - Step 8: Crafting a Solid Base
Elevate your Knight Preceptor’s presentation by meticulously painting the base. Utilize textured paints such as Astrogranite Debris or Stirland Mud to establish a realistic foundation. Incorporate rocks or terrain elements as desired to create a dynamic and immersive setting. - Step 9: Preserving and Enhancing
To safeguard your masterpiece and provide it with a professional finish, apply a protective layer of Munitorum Varnish. This crucial step not only preserves your hard work but also enhances the textures on the base, ensuring your Knight Preceptor stands the test of time and battles. With these steps, your Knight Preceptor will become a true centerpiece of your army, ready to dominate the battlefield with its striking appearance.

