Imperial Guard regiments are often called upon to fight grueling wars of attrition lasting years or even decades. As time passes, each company shrinks in size as casualties take their toll. Those who survive become the hardiest troopers in the Astra Militarum, their battlefield prowess honed in the fires of war. These Veterans are battle-hardened elites, the first squad into an assault and the last to retreat.
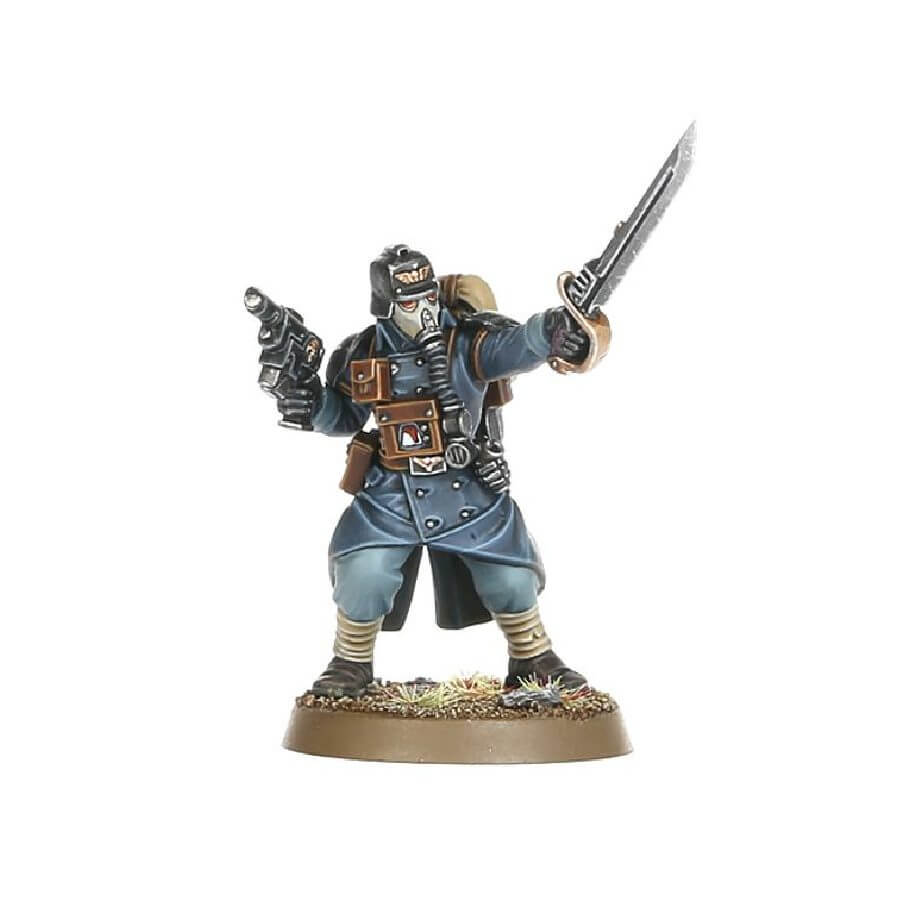
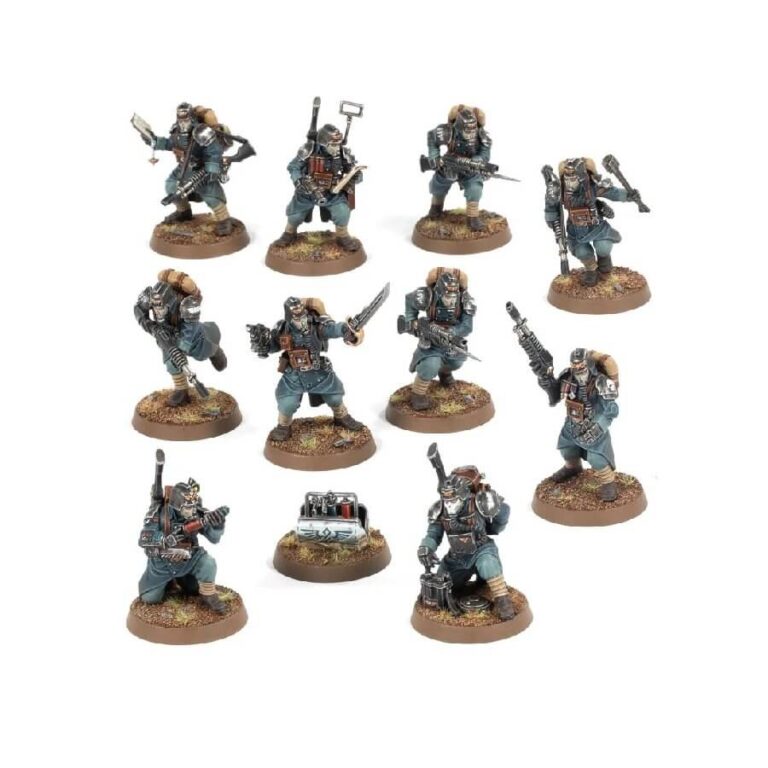
This kit builds a unit of Veteran Guardsmen in the uniforms of the legendary Death Korps of Krieg. The Veteran Guardsmen Box Set is suitable for games of Kill Team and Warhammer 40,000. Nearly every model has a selection of weapon options, allowing them to be built for a variety of tactical roles. They can also be assembled as a standard Infantry Squad, armed with lasguns, providing flexibility for different battlefield scenarios.
One model can be built as a Sergeant Veteran, leading the squad with enhanced skills and strategic acumen. Additionally, the set includes a Medikit model
Kill Team: Veteran Guardsmen Box Contents
- x171 plastic components that make 10 Veteran Guardsman and a Medikit model.
- x12 Citadel 25mm Round Bases.
- x1 Death Korps of Krieg Transfer Sheet.
How to paint the Kill Team Veteran Guardsmen set
- Step 1: Prime your miniatures
Apply a thin, even coat of primer to your Veteran Guardsmen. This helps the paint adhere better and provides a solid base for your colors. For example, you can use a gray or black primer like Chaos Black or White Scar. - Step 2: Basecoat the armor
Using a medium-sized brush, apply a basecoat of your chosen color to the armor sections of your miniatures. For instance, you could use Abaddon Black for a dark and gritty look or Cadian Fleshtone for a lighter, worn appearance. Ensure full coverage, but don’t worry about being too neat at this stage. - Step 3: Detail the weapons and accessories
Switch to a smaller brush and carefully paint the weapons, pouches, and other accessories on your miniatures. Pick contrasting colors to make these details stand out. For example, you can use Leadbelcher for metallic parts, Mournfang Brown for leather pouches, or Averland Sunset for grenades. - Step 4: Highlight the armor
Using a lighter shade of your base color, gently apply highlights to the raised areas of the armor. This helps add depth and dimension. For instance, if you used Abaddon Black as the base, you can highlight with Dawnstone or Mechanicus Standard Grey. - Step 5: Paint the faces and hands
With a steady hand, carefully paint the faces and hands of your Veteran Guardsmen. Start with a flesh tone, such as Kislev Flesh, and add a touch of Reikland Fleshshade to create shadows and depth. Be patient and take your time to achieve the desired effect. - Step 6: Add details and symbols
Now it’s time to add some character to your miniatures. Use fine-tipped brushes to paint the regimental symbols, unit markings, and other intricate details. For example, you can use Wazdakka Red for the regimental emblem or Karak Stone for numerals on shoulder pads. - Step 7: Apply washes
To enhance the shadows and add depth to your miniatures, apply washes to the appropriate areas. For example, use Agrax Earthshade for brown and metallic parts, or Nuln Oil for black and gray areas. Apply the wash selectively, ensuring it settles into recesses and crevices. - Step 8: Finish with highlights and basing
Finally, apply highlights to smaller details like buttons, buckles, and straps using lighter colors. Once your miniatures are painted, consider basing them with sand, tufts, or other scenic elements to complete their look and tie them into the overall theme of your army.

