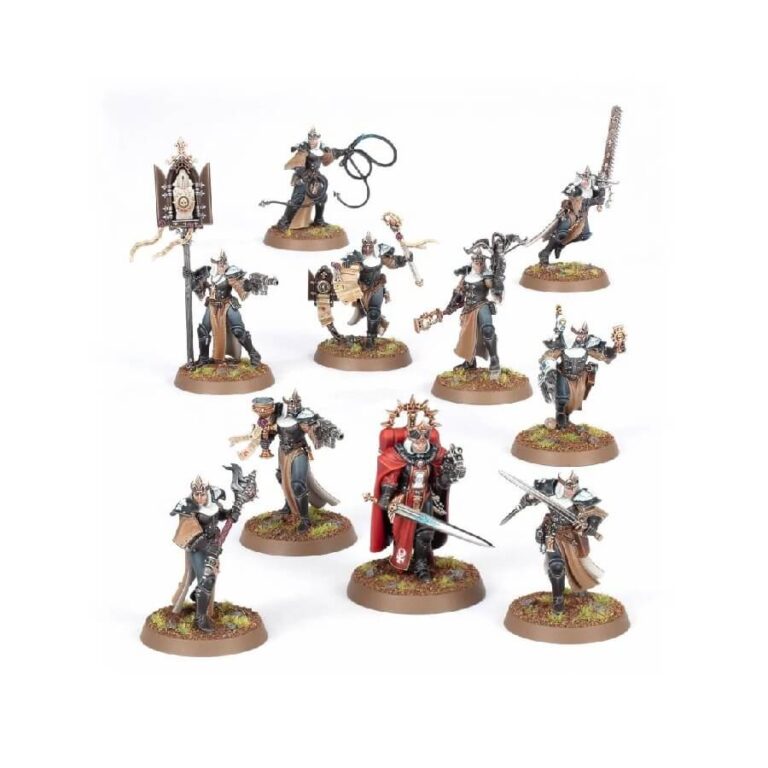
The Sisters Novitiate are brave recruits of the Adepta Sororitas, honing their skills under the guidance of Drill Abbots from the Schola Progenium. These enthusiastic warriors are entrusted to an Order Militant, where they undergo rigorous training and gain valuable combat experience on the battlefield.
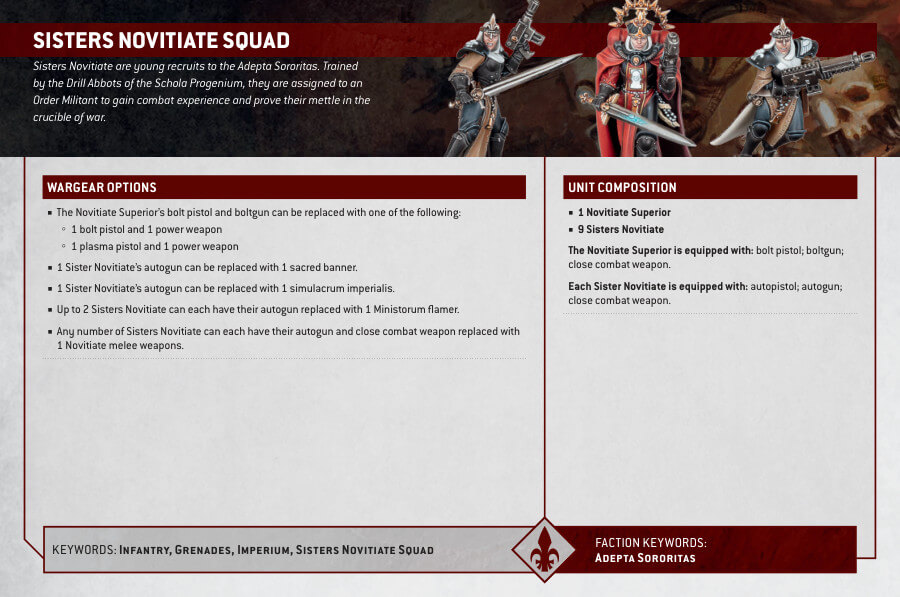
With this kit, you have the opportunity to assemble a unit of 10 Sisters Novitiate who possess lighter armor and weaponry compared to their seasoned sisters. The Sisters Novitiate kit is not only suitable for Warhammer 40,000 as a Troops option for your Adepta Sororitas armies but also caters to Kill Team games with the inclusion of free rules downloadable from the Warhammer Community website. Among the models, nine can be assembled as standard Novitiate Militants or specialized tactical roles for your Kill Team, while the remaining model represents a Novitiate Superior. The Novitiate Superior offers customization options, including various head choices, decorations, and weapon loadouts, adding depth to your collection.
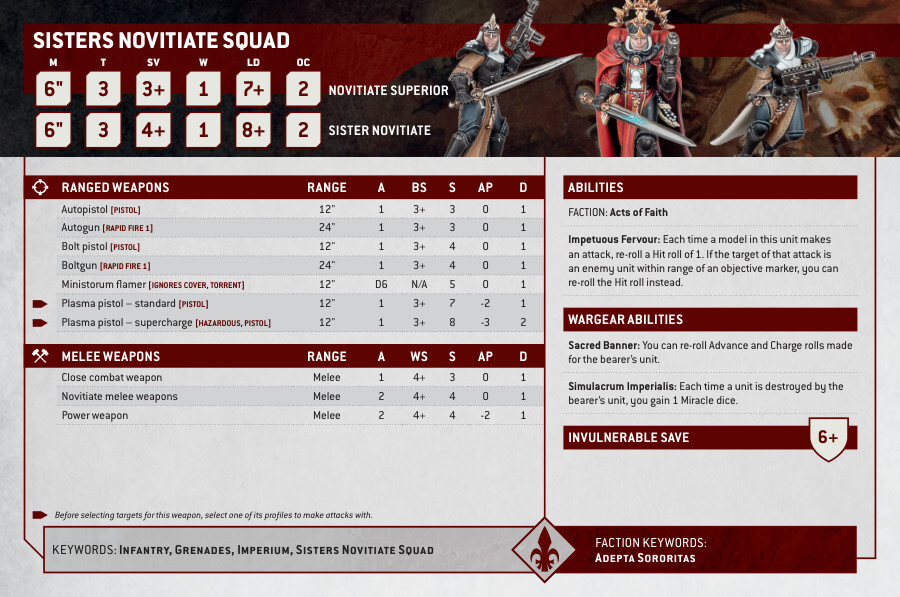
Kill Team: Novitiates Datasheets
What’s in the Kill Team: Novitiates box
- x128 plastic components that make 10 Sisters Novitiate.
- x10 Citadel 28.5mm Round Bases.
- x1 Citadel 32mm Round base.
- x1 Adepta Sororitas Transfer Sheet.
How to paint the Kill Team: Novitiates Set
- Step 1: Prepare your workspace
Before you begin painting your Kill Team: Novitiates, make sure you have a clean and well-lit area to work in. Gather all the necessary painting supplies, including brushes, paints, a palette, water for rinsing brushes, and a painting handle or base clips to hold the models. - Step 2: Prime the models
Apply a thin and even coat of primer to all the models. This helps the paint adhere better and provides a good base for the colors to come. A popular color choice for priming is Chaos Black spray, but you can also use other colors like gray or white. - Step 3: Base coat the armor
Start by applying a base coat to the armor of the Novitiates. Use a large brush and Celestra Grey or any light gray paint to cover the majority of the armor. Apply multiple thin coats if needed, allowing each coat to dry before applying the next. - Step 4: Paint the details
With the armor base coated, it’s time to paint the details. Use smaller brushes to carefully paint the different elements of the model, such as the robes, weapons, and accessories. Here are some suggested paint colors for the details:
Robes: Mephiston Red
Weapons: Leadbelcher
Accessories: Balthasar Gold - Step 5: Add shading and highlights
To add depth and definition to your models, apply shading and highlights. Use Nuln Oil or any black wash to apply shading to the recessed areas, such as the folds of the robes and the crevices of the armor. Apply the wash selectively, focusing on the areas where shadows naturally occur.
Once the shading is dry, use a lighter color, such as Ulthuan Grey or any off-white color, to carefully apply highlights to the raised edges and prominent areas. This helps to create contrast and make the details pop. - Step 6: Finish with details and basing
Complete the painting process by adding final details and basing. Paint smaller details like faces, eyes, and symbols with care, using colors like Bugman’s Glow for flesh tones and White Scar for intricate markings.
For the bases, you can use Citadel texture paints like Astrogranite or Stirland Mud to create a realistic ground texture. Paint the base rims with Abaddon Black or any black color for a clean finish. - Step 7: Varnish and protect
To protect your painted models, apply a layer of varnish. Munitorum Varnish or any matte varnish works well to seal the paint and prevent it from chipping or rubbing off during gameplay.

