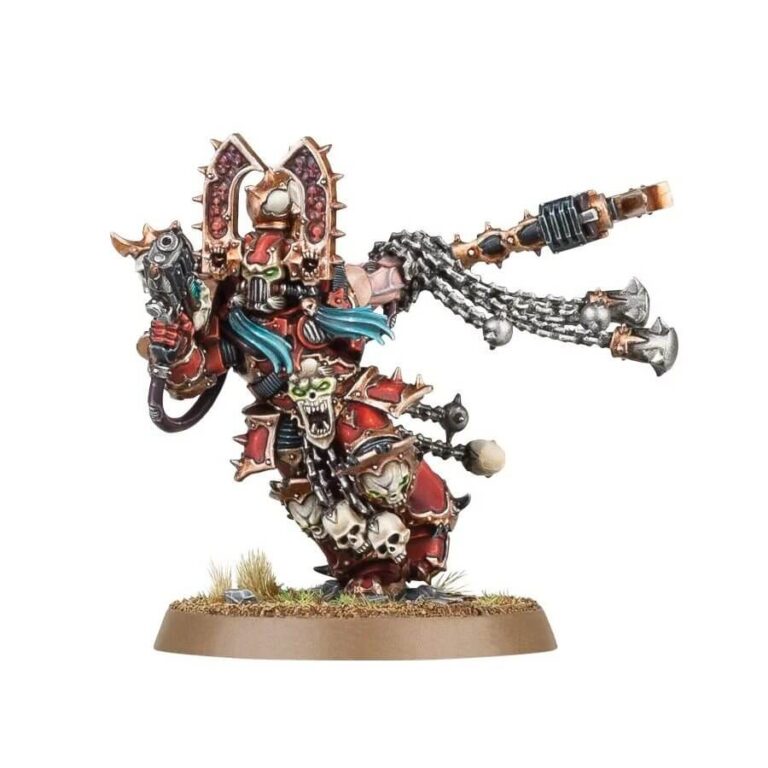
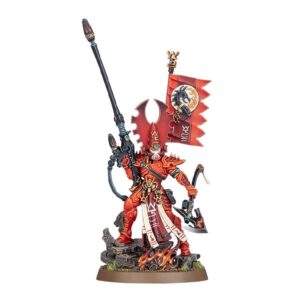
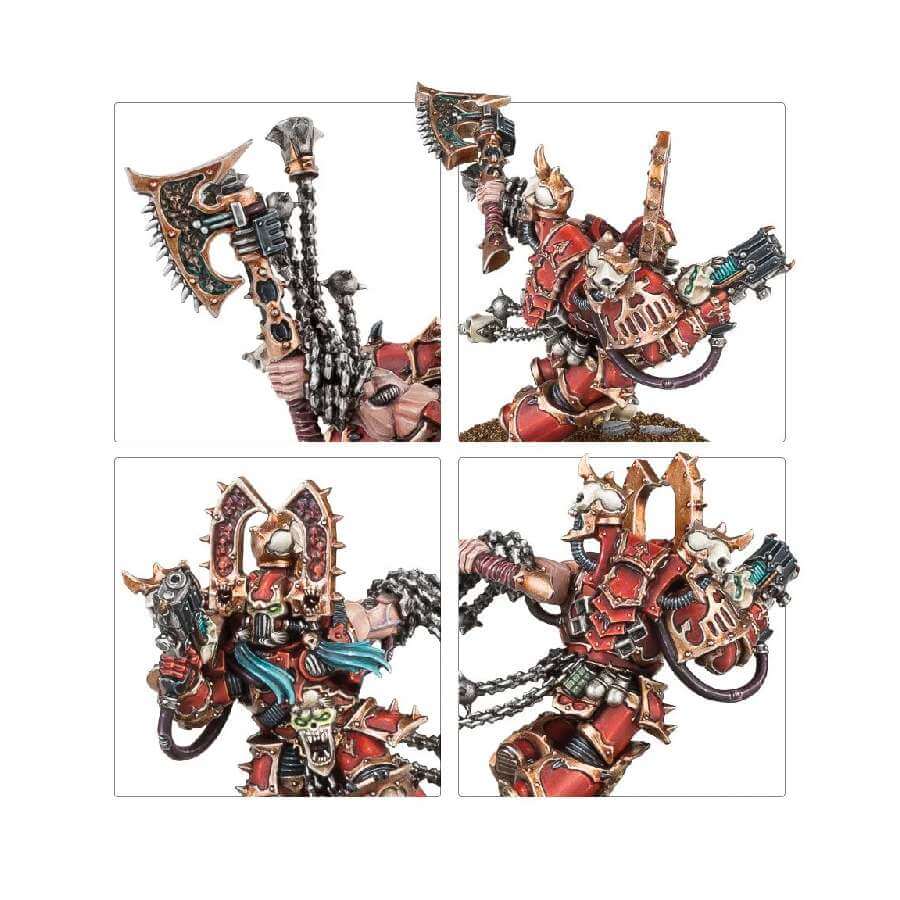
With his infamous mantra “Kill! Maim! Burn!” echoing across the Imperium, Khârn the Betrayer is a fearsome champion of Khorne, leaving devastation in his wake. This multipart plastic kit assembles Khârn, wielding the destructive Gorechild chainaxe and ancient plasma pistol, exuding ferocity with swinging chains, skull-trophies, and a menacing war-helm. Khârn’s mere presence inspires his World Eaters Legion to unparalleled acts of bloodshed, unless he slays them himself…
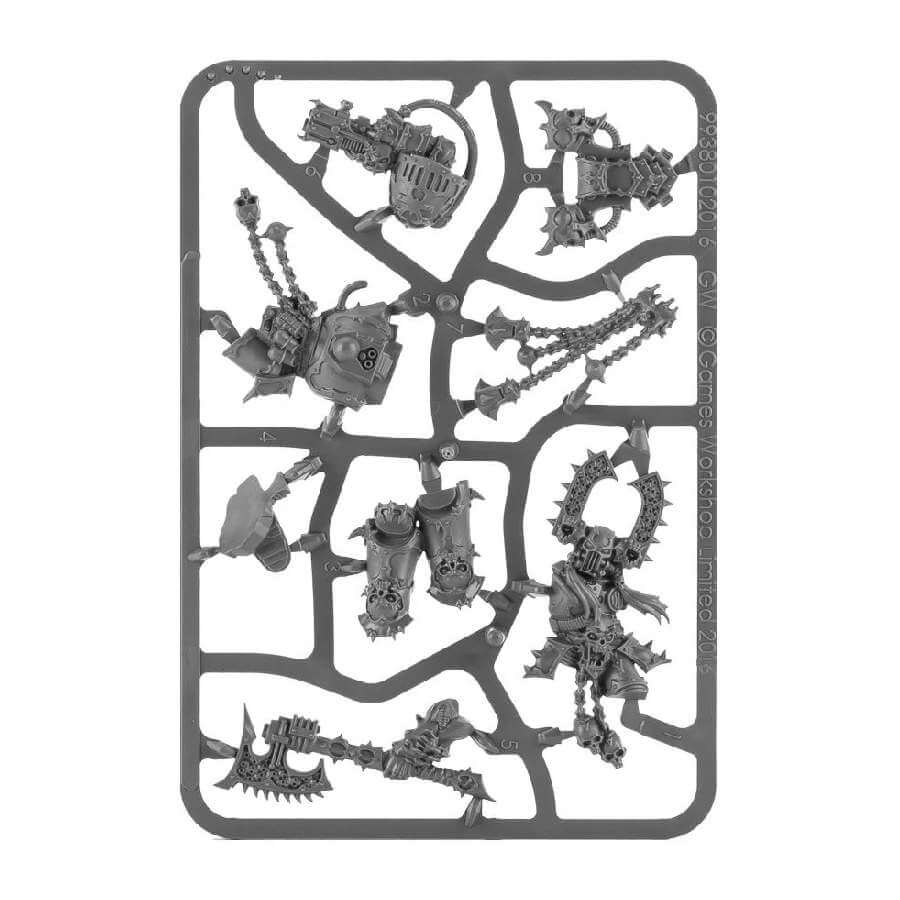
What’s in the Khârn the Betrayer box
- x8 plastic components that make this Doom Slayer like character, which means…Get ready for the eternal bloodshed.
- x1 Citadel 40mm Round
How to paint the Khârn the Betrayer set
- Step 1: Prime the Miniature
Using a black or grey spray primer, apply an even coat to the entire model. Priming helps the paint adhere better and provides a solid base for the subsequent layers of paint. Allow the primer to dry completely before moving on to the next step. - Step 2: Base Colors
Using a medium-sized brush, paint the armor of Khârn the Betrayer with a deep red color such as Khorne Red. Apply thin layers of paint, allowing each layer to dry before adding another. This ensures smooth and even coverage. Be careful to avoid painting over other areas that will be a different color. Using another medium-sized brush, apply a base coat of a flesh tone like Bugman’s Glow to the exposed flesh areas of Khârn the Betrayer. Take care to cover all the skin surfaces evenly. - Step 3: Washes
Once the red paint is dry, apply a wash of a dark shade like Nuln Oil over the red armor. This will add depth and shading to the model, emphasizing the details and creating a more realistic look. Use a small brush to carefully apply the wash, focusing on the recessed areas and crevices.For the skin, apply a wash of a flesh shade like Reikland Fleshshade. This wash will add depth and definition to the skin, enhancing the details and giving it a more realistic appearance. - Step 4: Highlights
Using a finer brush, select a brighter red color like Evil Sunz Scarlet. Apply this color to the edges and raised surfaces of the armor to create highlights. Concentrate on areas where light would naturally hit, such as the edges of the shoulder plates and the top surfaces of the helmet. This technique adds definition and brings out the three-dimensional aspects of the model. Now using a lighter flesh tone like Cadian Fleshtone, apply this color to the raised areas of the skin to create highlights. Concentrate on areas where light would naturally hit, such as the cheekbones, forehead, and nose. This technique adds dimension and brings out the natural contours of the face and body. - Step 5: Details and Accents
For the eyes, use a fine brush to carefully paint them with a vibrant green color like Moot Green. Take your time and aim for precision. The green eyes will create a striking contrast with the red armor, adding visual interest and making the model stand out.
Additionally, you can paint smaller details, such as skulls, chains, and trophies, using appropriate colors. For example, you can use Ushabti Bone for skulls, Balthasar Gold for chains, and trinkets. These accents will add further depth and character to the model. - Step 6: Varnish
Once the paint is completely dry, apply a thin and even layer of varnish to protect the paint job and give the model a finished look. Choose a varnish appropriate for miniatures, such as a matte or satin finish, and follow the instructions on the product for best results.
