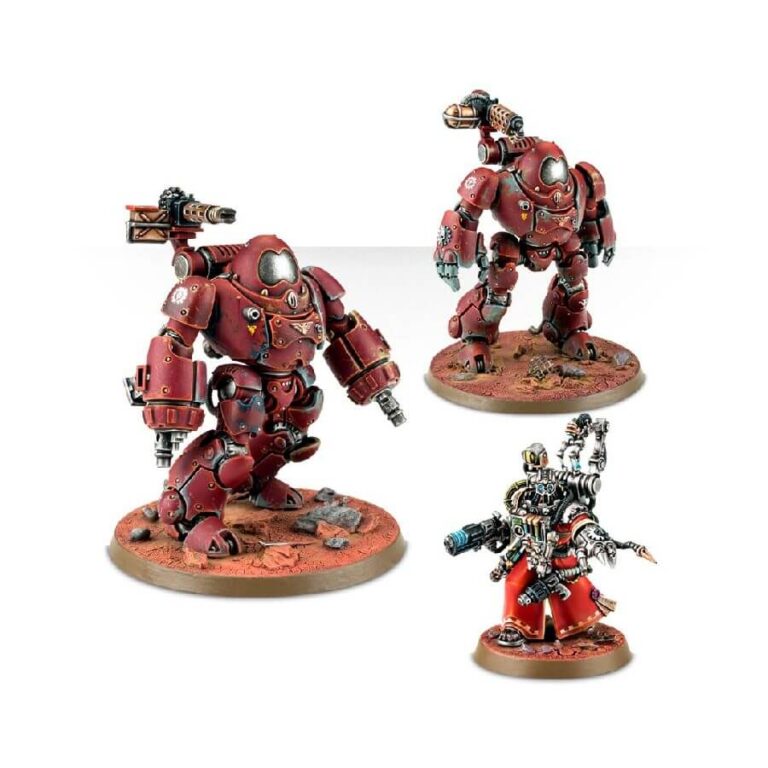
The Kastelan Robot, an enormous and ancient robot built by the Adeptus Mechanicus thousands of years ago, is a perfect example of their adeptness at repurposing technology. Armed with powerful weapons, the robot is nearly unstoppable, but its only flaw is its inability to disobey orders, even if it leads to its destruction. The Cybernetica Datasmith, a specialist Tech-Priest, must continually update and reprogram the Kastelan Robot through order dataslates to avoid such outcomes. This plastic kit contains everything you need to make two Kastelan Robots and one Cybernetica Datasmith, armed with various weapons, including power fists, phosphor blasters, and incendine combustors, and a gamma pistol, dataspike, and servo arm assembly respectively. The Cybernetica Datasmith also features a prehensile socket drill to reprogram the Kastelan Robots on-the-fly, and a choice of two heads to customize your model.
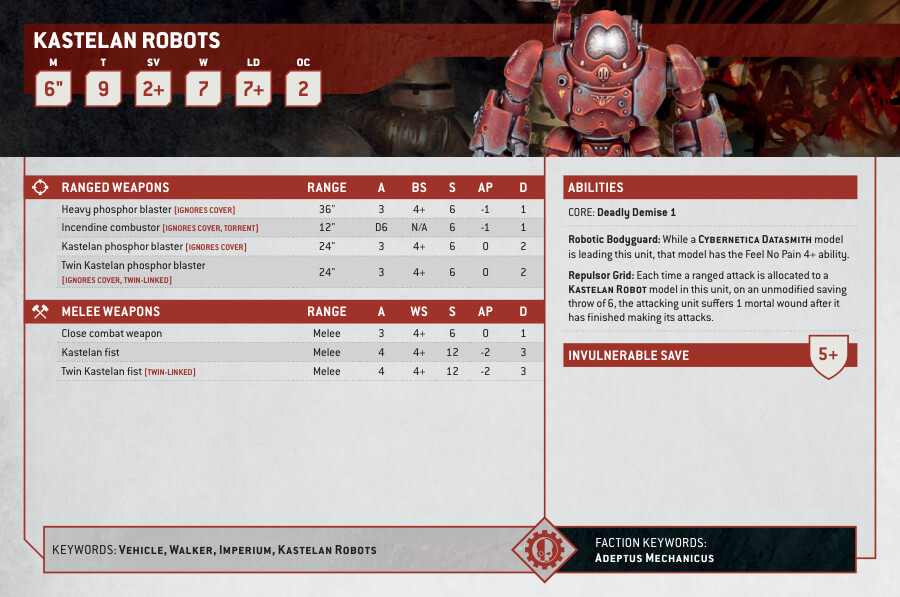
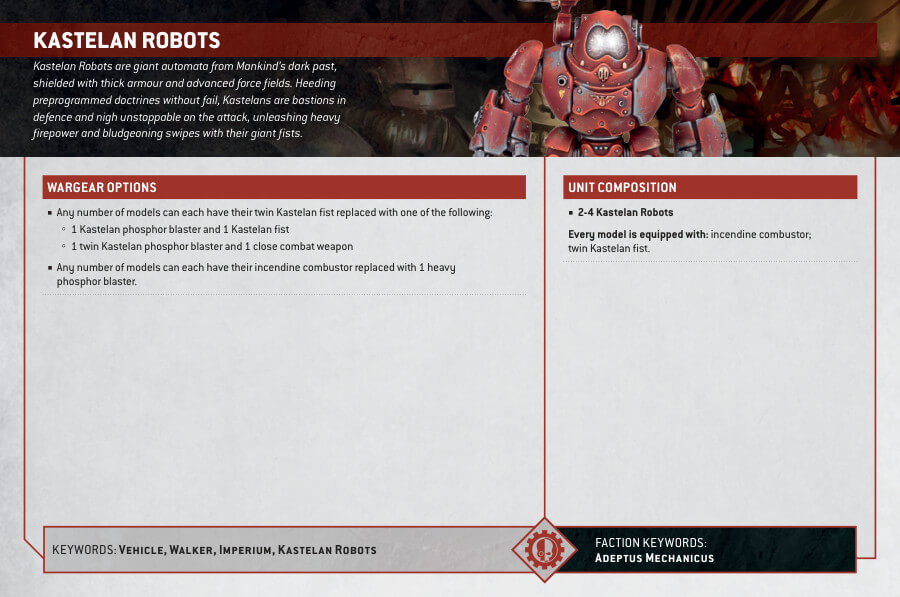
Kastelan Robots Datasheets
What’s in the Kastelan Robots box
- x95 plastic components are everything you need to make two Kastelan Robots and one Cybernetica Datasmith.
- x2 Citadel 60mm Round Bases.
- x1 Citadel 32mm Round Base.
How to paint the Kastelan Robots Set
- Step 1: Prepare Your Workspace
Find a clean and well-lit area to work on your Kastelan Robots. Gather all the necessary supplies, such as brushes, paints, water, palette, paper towels, and your Kastelan Robots models. - Step 2: Prime Your Models
To ensure good paint adhesion, start by priming your models. Shake your can of Citadel Colour Chaos Black or Mephiston Red spray paint. Hold the can about 10-12 inches away from the models and apply a thin, even coat. Allow it to dry completely before proceeding. - Step 3: Base Coat
Begin by applying the base coat to your Kastelan Robots. Use a large brush and Citadel Colour Mephiston Red or Khorne Red to cover the entire model. Thin the paint with water if necessary and apply a smooth and even layer. - Step 4: Details and Contrast
Now it’s time to paint the various details and add contrast to your Kastelan Robots. You can paint the joints and smaller parts in Abaddon Black, the metallic areas with Leadbelcher or Runelord Brass and any power coils or cables in Averland Sunset. - Step 5: Dry Brushing
Dry brushing will add highlights and bring out the textures of your models. Take a dry brush (a brush with most of the paint removed) and gently dip it into Ironbreaker or Liberator Gold. Lightly brush the raised areas of your Kastelan Robots to create a subtle shine. Use Eshin Grey or Ulthuan Grey for non-metallic areas to add depth and contrast. - Step 6: Washes for Depth
To enhance depth and shadows, apply washes to your models. Nuln Oil or Carroburg Crimson are good options. Apply the wash to recessed areas, such as panel lines, crevices, and joints. The wash will flow into these areas, creating depth and definition. - Step 7: Weathering – Adding Realism
To achieve a weathered look on your Kastelan Robots, you can use either Typhus Corrosion or Ryza Rust. Apply a small amount of Typhus Corrosion to areas where rust or wear would naturally occur, like joints, edges, and recesses. For a more complex rusted effect, apply Ryza Rust sparingly over the areas with Typhus Corrosion. This combination will give your robots a battle-worn appearance. - Step 8: Paint the Bases – Creating a Martian Landscape
For the bases of your Kastelan Robots, you can create a Martian landscape effect. Start by applying Martian Ironearth texture paint to the bases. Use a palette knife (or a big brush if you don’t have that) to spread the paint evenly. Allow it to dry completely. This texture paint will give the impression of a barren Martian surface. - Step 9: Varnishing – Protecting Your Masterpiece
To protect your finely painted Kastelan Robots and give them a finished look, apply a varnish. Citadel ‘s Stormshield is ideal for this purpose.

