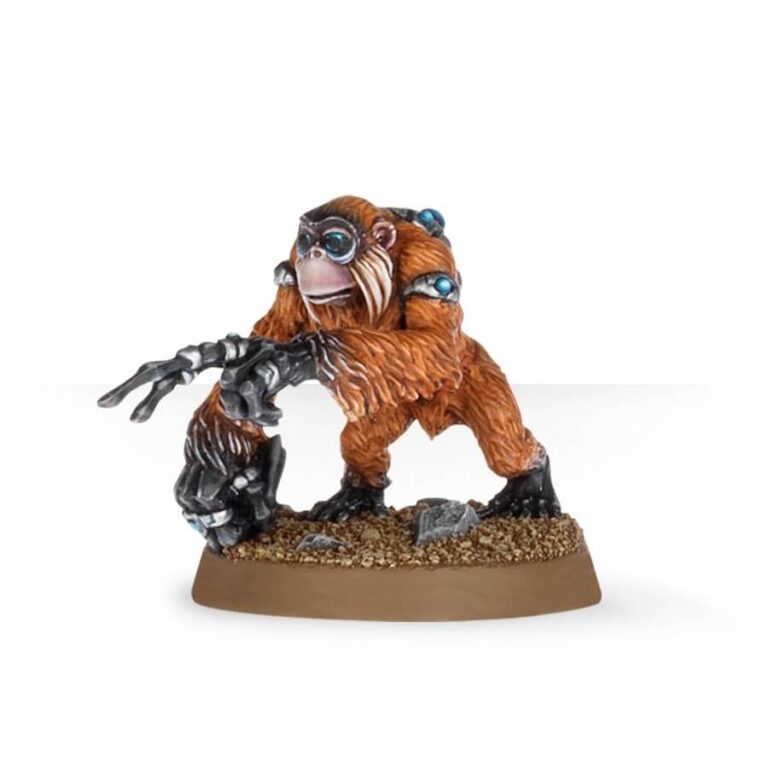
The Jokaero, despite their outwardly primitive appearance, are remarkable technosavants with unparalleled expertise in machinery and technology. Resembling the ancient orang-utans of Terra, these heavyset, orange-furred apes possess an innate understanding of mechanical systems.
Their unrivaled skill allows them to customize and enhance a wide range of weapons and equipment, empowering groups of Henchmen with superior firepower and increased protection. While they may appear unarmed, the Jokaero wield deadly digital weapons capable of delivering devastating damage, be it through a powerful laser, a fiery flamethrower, or a destructive melta weapon. With their unique blend of technological mastery and unexpected combat prowess, the Jokaero bring a captivating and unpredictable element to the battlefield.
What’s in the Jokaero Weaponsmith box
- x2 resin components with which to make one Jokaero Weaponsmith
- x1 25mm round base
How to paint the Jokaero Weaponsmith set
- Step 1: Basecoat the model
Apply a basecoat of orange paint, such as Jokaero Orange(heh), to cover the entire Jokaero Weaponsmith model. This will provide a solid foundation for the subsequent layers of paint. - Step 2: Apply fur color
Using a light brown or tan shade, like Zandri Dust, carefully paint the fur areas of the Jokaero. This includes its body, arms, and face. Take your time to ensure even coverage and smooth application. - Step 3: Detail the face
Use a fine brush to paint the facial features, such as the eyes, nose, and mouth. You can use colors like Averland Sunset for the eyes and Rakarth Flesh for the nose and mouth. Precision is key to bring out the character of the Jokaero. - Step 4: Metallic parts
Identify the metallic components, such as the weapons and mechanical parts. Paint them with a metallic color of your choice, like Leadbelcher, to give them a realistic metallic sheen. Take care to paint each part separately for better detail. - Step 5: Details and accessories
Apply colors to any additional details, such as belts, pouches, and accessories. You can use various colors to personalize these elements. For example, paint the belt with Mournfang Brown and add highlights using Baneblade Brown for depth. - Step 6: Fine touches
Use a small brush to add finer details, such as buttons, symbols, or markings. This step requires precision and a steady hand. You can use colors like Mephiston Red or Eshin Grey for these smaller details. - Step 7: Bases
Paint the base of the model using suitable colors for the terrain or environment you want to represent. For example, you can use Stirland Mud for a muddy base or Martian Ironearth for a Martian landscape. Adding some static grass or rocks can further enhance the appearance. - Step 8: Varnish
Once the paint is completely dry, protect your work by applying a layer of varnish. This will help preserve the colors and add a protective coating to the model. You can choose between a matte or gloss varnish, depending on your preference.

