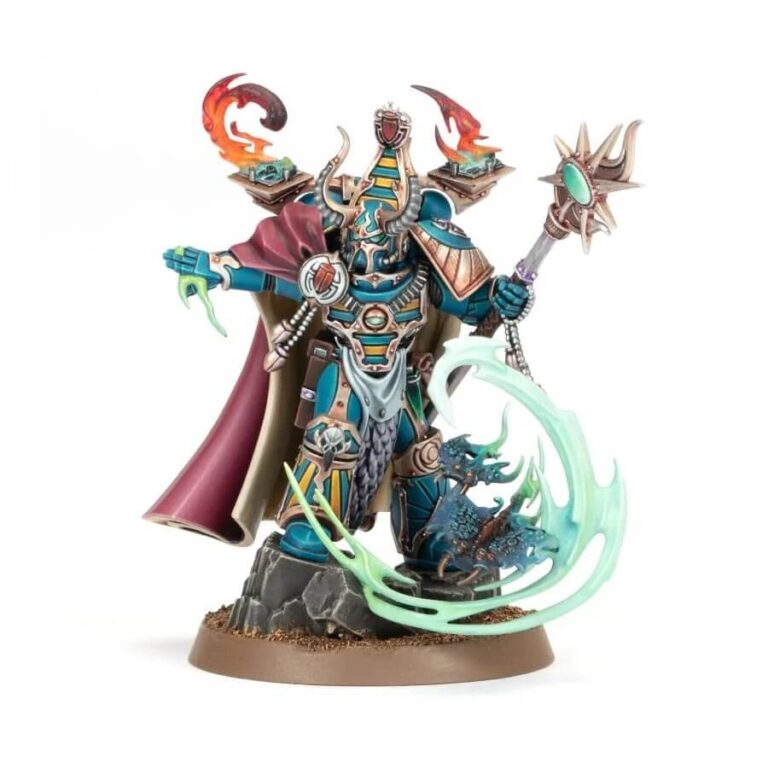
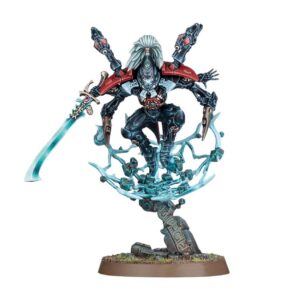
Unveiling their dark and mystical lore, the Infernal Masters of Prospero forge profound pacts with daemonic entities known as tutelaries. Through chants of jagged syllables and promises of blood and souls, these masters unleash the formidable powers of their sinister familiars. Whether engulfing enemies in swarms of fleeting horrors, unraveling whispers of the future, or bending the currents of the warp to their will, these diabolical beings bring chaos and uncertainty to the battlefield.
Embrace the allure of the Infernal Master as they guide your Thousand Sons to victory. With their unparalleled mastery over infernal pacts and their profound connection to the warp, these enigmatic figures epitomize the perfect blend of arcane knowledge and martial prowess. Immerse yourself in the depths of their dark arts and witness the transformative influence they bring to the battlefield. The Infernal Master is a captivating force, embodying the essence of occult power and strategic brilliance within the world of the Thousand Sons.
Also available in this box:
What’s in the Infernal Master box
- x15 pieces that build one Infernal Master
- x1 40mm Citadel Round Base
How to paint the Infernal Master set
- Step 1: Prime the model
Apply a thin, even coat of black or grey primer to the Infernal Master. This provides a good base for the paint to adhere to. - Step 2: Basecoat the armor
Using a medium-sized brush, apply a basecoat of Thousand Sons Blue to the armor of the Infernal Master. Ensure even coverage and let the paint dry completely. - Step 3: Highlight the armor
Using a smaller brush, carefully apply a layer of lighter blue, such as Baharroth Blue, to the raised areas of the armor. This technique, called highlighting, adds depth and definition to the model. - Step 4: Paint the details
Switch to a fine detail brush to paint the smaller features. Use a dark color, like Abaddon Black, for the intricate details such as the face, weapon, and accessories. Remember to paint carefully to avoid any mistakes. - Step 5: Apply washes
To enhance the depth and shading, apply a wash, like Nuln Oil, to the entire model. This will settle into the recesses, emphasizing the details and providing a more realistic appearance. - Step 6: Add final highlights
Using a small brush, carefully apply a final highlight of lighter blue, like Alaitoc Blue, to the edges and raised areas that were previously highlighted. This adds a finishing touch and brings out the sharpness of the model. - Step 7: Base and finishing touches
Paint the base with a layer of texture paint or apply sand and rocks using PVA glue for a realistic look. Once dry, you can paint the base to match your preferred style. Consider drybrushing with a bone color, such as Ushabti Bone, to create a striking contrast.

