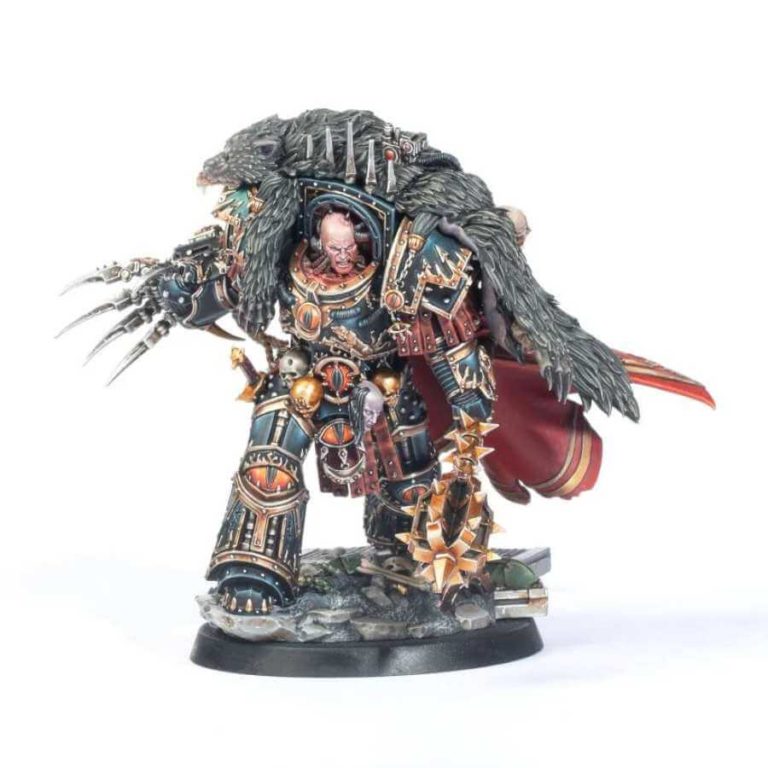
The Horus Ascended miniature represents the final form of Horus during the Horus Heresy.
This model is finely detailed and depicts Horus in his transformed state, towering over even his Primarch brothers. He’s a Primarch for your Traitor Sons of Horus army and in-game, he’s a force to be reckoned with.
His combat prowess is unmatched, and he can take on anything from hordes of heavy infantry to the largest war machines.
His signature armor and war gear are subtly altered by his immense power, and he stands atop a fully sculpted scenic base that depicts the unfathomable destruction he has unleashed upon the galaxy.
However, it’s important to note that this resin modelling kit is not a toy, but a collectible item that requires assembly and painting.
It’s perfect for expert Warhammer 40,000 hobbyists aged 15 years and over who love to collect and build amazing miniatures.
The Horus Ascended kit
The kit comprises 41 resin components and comes with a 50 mm round base for gaming, which slots into an 80 mm round display base.
Inside the box:
- 3 trays with 41 components to be assembled
- 50 mm round base
- 80 mm round display base
- Assembly Manual
How to paint Horus Ascended in 25 steps
Horus is a big boy hence it requires a bit more work than your regular Space Marine miniature.
- Clean and assemble the miniature as per the instructions provided by Games Workshop.
- Prime the miniature with Chaos Black spray primer. This provides a good base for the other paints to adhere to.
- Use the Large Layer Brush to paint the armor plates with Leadbelcher.
- Use the Small Layer Brush to paint the helmet, shoulder pads, and other details with Abaddon Black.
- Use the Medium Layer Brush to paint the face and hands with Cadian Fleshtone.
- Use the Small Layer Brush to paint the eyes and other small details with Ceramite White.
- Use the Small Layer Brush to paint the cloak with Khorne Red.
- Use the Medium Layer Brush to highlight the cloak with Evil Sunz Scarlet.
- Use the Small Layer Brush to highlight the cloak again with Fulgurite Copper.
- Use the Large Layer Brush to paint the gold details with Retributor Armour.
- Use the Small Layer Brush to paint the gems with Incubi Darkness.
- Use the Medium Layer Brush to highlight the gems with Celestra Grey.
- Use the Small Layer Brush to paint the eagle on the chest with Rhinox Hide.
- Use the Medium Drybrush to highlight the eagle with Steel Legion Drab.
- Use the Small Layer Brush to paint the fur with Deathclaw Brown.
- Use the Small Drybrush to highlight the fur with Dawnstone.
- Use the Small Layer Brush to paint the power weapon with Mephiston Red.
- Use the Medium Layer Brush to highlight the power weapon with Corax White.
- Use the Small Layer Brush to paint the claws of the power weapon with Averland Sunset.
- Use the Small Layer Brush to paint the cracks in the power weapon with Administratum Grey.
- Apply Agrax Earthshade to the entire miniature, except for the power weapon. This will add shading to the recesses and help to bring out the details.
- Use the Small Drybrush to dry brush the entire miniature with Dawnstone. This will help to highlight the edges and create even more depth.
- Use the Small Layer Brush to apply Nuln Oil to the cracks in the power weapon.
- Use the Small Drybrush to highlight the cracks in the power weapon with Corax White.
- Use the Medium Layer Brush to apply Seraphim Sepia to the entire miniature, except for the power weapon.
You will also need the following Citadel brushes:
- Small Layer Brush
- Medium Layer Brush
- Large Layer Brush
- Small Drybrush
- Medium Drybrush
Have fun and remember to thin your paints! 😀

